Table of Contents
Before leaving a computer or laptop with a repair shop, back up important files, record the device's condition and serial number, confirm the repair terms in writing, and decide how the technician can access the system without exposing more data than necessary. A little preparation reduces the risk of data loss, billing disputes, and confusion about replaced parts.

1. Decide whether the problem needs a repair shop
Write down the exact symptoms: what happened, when it started, any error message, whether the problem is intermittent, and what changed immediately beforehand. Reproduce the fault only if doing so is safe.
Simple software problems may be resolved with a restart, an update, or a documented setting change. TipsMake's computer troubleshooting guide can help with basic diagnosis. Stop self-repair if the device has a swollen battery, burning smell, liquid damage, exposed electrical parts, severe overheating, or a storage drive making abnormal mechanical noises. Repeatedly powering on a failing drive can make data recovery harder.
2. Check the warranty and repair options
Look up the warranty status using the manufacturer's official support site. If coverage remains, start with the manufacturer or an authorized service provider; opening the device or using an unauthorized part may affect the available service options. For an out-of-warranty system, compare a reputable independent shop with the manufacturer's paid service.
Ask the provider:
- Is diagnosis free, fixed-price, or billed if I decline the repair?
- Will you obtain approval before exceeding the estimate?
- Are parts new, used, refurbished, or third-party?
- What warranty applies to the part and labor?
- Will work be done on-site or sent to another facility?
- How do you protect customer data, and how are replaced drives handled?
3. Make and verify a backup
Assume the internal drive could be erased or replaced. Copy irreplaceable documents, photos, project files, browser exports, and application data to storage that will not travel with the computer. A backup on another partition of the same physical drive is not enough.
- Create a backup on an external drive, trusted cloud service, or both.
- Open several files from the backup to verify that it is readable.
- Record which folders and applications were included.
- Disconnect the external backup drive before handing over the computer.
If the system is being retired or the drive will leave your control permanently, use a process appropriate to that storage type and your threat model. TipsMake's guide to preparing a Windows PC for transfer explains why a remote backup matters before erasing data.
4. Save encryption and recovery information
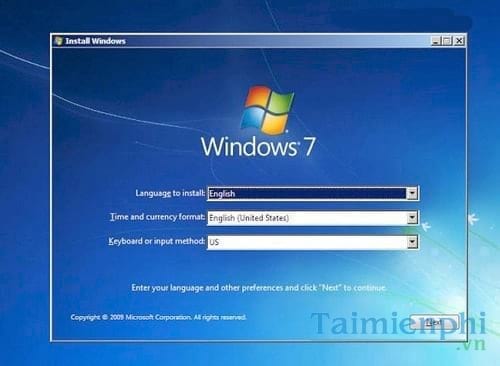
A firmware change, motherboard replacement, or security check can cause an encrypted Windows drive to request its BitLocker recovery key. Confirm that you can retrieve the key from a separate device before service. Do not store the only copy in a file on the computer being repaired.
For a Mac, follow Apple's current preparation instructions for the service method you selected, including any backup, Find My, or firmware-security steps. These requirements can differ between a walk-in appointment and mail-in service, so use the instructions attached to the repair case.
5. Reduce exposure of personal data
A technician may need to boot the operating system, but that does not mean every repair requires unrestricted access to your personal account. Ask what access is necessary and why.
- Sign out of email, messaging, password managers, financial services, and work accounts where practical.
- Remove browser-saved passwords and authentication tokens only after confirming your backup and sync status.
- Remove confidential files from the device if the repair can still be tested without them.
- If login access is required, consider a temporary local test account with no access to personal files. Remove it after the repair.
- Do not send account passwords, one-time codes, recovery phrases, payment card details, or other security secrets by email or chat.
- For an employer-owned computer, contact the IT department instead of arranging an independent repair.
If the device cannot boot, tell the shop that the drive contains private data and explicitly agree on any data-recovery, cloning, or erasure work before it starts. Encryption protects data at rest only when recovery keys and login credentials remain secure.
6. Document the device before handoff
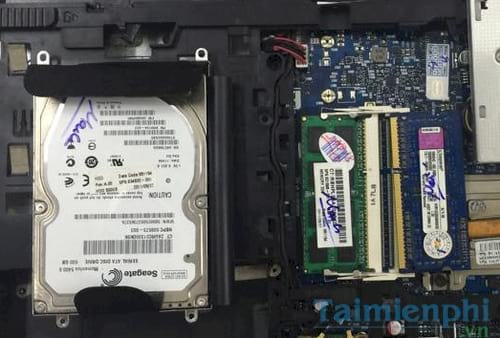
Take clear photos of the top, bottom, sides, screen, ports, screws, charger, and any existing scratches or dents. Record the brand, exact model, serial number, installed storage capacity, memory, and accessories you are leaving.
It is rarely necessary to write directly on internal parts. If the shop opens the device during intake, tamper-evident labels or detailed photos and serial numbers are more useful and less likely to damage a component. Do not open a device solely to mark parts if doing so is unsafe or could affect warranty service.
7. Get a detailed intake receipt and estimate
The intake document should identify the device and accessories, describe its existing condition, list the reported symptoms, and state the diagnostic charge. Before approving work, request an estimate that separates parts, labor, tax, data services, and any non-refundable fee.
Also confirm:
- the maximum amount that can be charged without further approval;
- whether the quote may change after disassembly;
- the expected completion date and notification method;
- the repair and replacement-part warranty;
- whether you want replaced parts returned, where legally and contractually possible;
- the shop's policy for uncollected devices.
Keep the receipt and approval messages. Do not rely solely on a verbal promise.
8. Decide whether repair is worthwhile
Compare the total repair cost with the price and useful life of a suitable replacement, not just with the computer's original price. Consider battery condition, remaining storage, performance, operating-system support, physical wear, and whether another expensive component is likely to fail soon.
A memory or storage replacement may extend the life of an otherwise sound system. Multiple board-level faults, severe liquid damage, or a display repair on a low-value machine may not be economical. If the diagnosis is uncertain or the estimate is large, request the written fault description and seek a second opinion.
9. Test the computer before accepting the repair
At collection, compare the serial number and physical condition with your photos. Ask what was replaced and what tests were performed. Then check the original symptom along with basic functions affected by the work:
- startup, charging, battery detection, keyboard, touchpad, and display;
- Wi-Fi, Bluetooth, audio, camera, USB ports, and external display output;
- storage capacity, memory amount, sleep/wake, and fan behavior;
- your files, if the repair was supposed to preserve them.
For persistent crashes, record the exact error and review focused troubleshooting such as TipsMake's guide to laptop blue-screen causes. After you are satisfied, remove any temporary technician account, change credentials that were disclosed, reinstall security updates if needed, and make a fresh backup.
Quick handoff checklist
- Symptoms and error messages recorded
- Warranty and provider credentials checked
- Backup completed, verified, and disconnected
- Encryption recovery key retrievable elsewhere
- Personal accounts and sensitive files protected
- Device, serial number, condition, and accessories photographed
- Written estimate, authorization limit, timeline, and warranty received
- Post-repair tests agreed in advance
Related Articles
 Is the Laptop Broken, Should It Be Repaired or Purchased?5 minutes read
 6 Things to Note Before Buying a Laptop6 minutes read
 A Few Things to Keep in Mind When Choosing to Buy a Laptop Under5 minutes read
 This Is All Worth Looking Forward to on the Galaxy Note 106 minutes read
 7 Most Important Things to Consider Before Buying a Windows Laptop8 minutes read
 Should I Buy a Used Laptop? 6 Things to Note When Buying a Used Laptop Explained14 minutes read
Reader Comments 0
Sign in with email or Google to join the discussion.