Table of Contents
Sandrone is a five-star Cryo Claymore character introduced in Genshin Impact Version “Luna VIII” (Version 6.7). Her damage centers on a special Charged Attack that deploys her mechanical companion, builds Decoding Power, and deals Stellar-Conduct damage when the team meets the reaction conditions.
She is an on-field damage dealer rather than a general Cryo support. Learning when to build and reduce the companion's power gauge is more important than repeatedly using her standard Claymore attacks.

Sandrone at a glance
| Rarity | Five-star |
|---|---|
| Element | Cryo |
| Weapon | Claymore |
| Combat role | On-field Charged Attack and Stellar-Conduct damage dealer |
| Core mechanic | Manage Fagio's Decoding Power between Decoding and Power Overdrive states |
| Original debut | Version “Luna VIII” Phase I, beginning July 1, 2026 |
Her debut Event Wish has ended, so players who missed it must wait for a future rerun. Event Wish schedules rotate; do not treat the original release date as a permanently available banner.
How Sandrone's kit works
Normal and Charged Attacks
Sandrone's normal string uses controlled weapons for three attacks. The important part of the talent is her Charged Attack, which summons Fagio and enters Decoding mode. Fagio performs Cryo attacks and fires periodic condensed beams while its Decoding Power increases.
At maximum power, Fagio changes to Power Overdrive. The attack behavior changes, and the companion does not return to Decoding mode until its power falls below the required threshold. This creates the central decision in Sandrone's rotation: build enough power to produce her main beam damage, then use the rest of the kit to prevent the gauge from remaining in an unfavorable state.
Translations of names such as Fagio, Decoding Power, and Power Overdrive may differ by client language. Use the terminology shown in the current in-game talent screen when comparing guides.
Elemental Skill: hover and gauge control
Sandrone's Elemental Skill places her on a Tea Party Tactical Assault Hovermech for a short period. You can direct the vehicle and use a faster movement mode that consumes Stamina. The skill is useful in combat and for short repositioning.
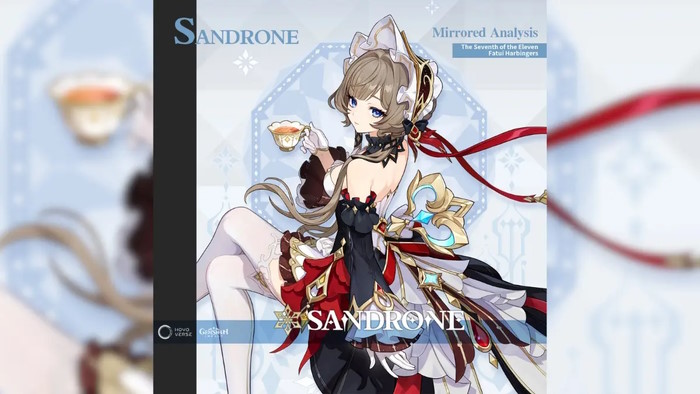
When enemies are nearby, the skill also calls a Prismatic Resonance Cannon to fire two shots. Under the appropriate state, the second shot contributes Stellar-Conduct damage. The hover sequence reduces Fagio's accumulated power, so the skill functions as a meter-management tool as well as an attack.
Do not spend all available Stamina simply to extend fast hovering during a dangerous fight. Preserve enough to dodge unless the target is controlled or the rotation is ending.
Elemental Burst
Sandrone's Burst calls in multiple cannons for an area bombardment and follows with a large beam. It supplies area damage and contributes to her Stellar-Conduct-focused rotation. Group enemies before using it when possible so the area hit is not wasted on a single low-priority target.
What Stellar-Conduct means for her team
Sandrone's passive changes how Superconduct functions for her party, enabling Stellar-Conduct and improving its base damage according to her Attack up to the passive's limit. Because ordinary Superconduct requires Cryo and Electro, an Electro teammate is essential for consistent reaction triggers.
This does not mean any four Cryo/Electro characters automatically form a good team. A practical composition still needs:
- reliable off-field Electro application;
- buffs or resistance effects that benefit Sandrone's actual damage;
- healing, shielding, or interruption resistance where the encounter requires it;
- rotations that do not consume excessive field time before Sandrone begins her Charged Attack sequence.
Test application timing against the enemies you actually fight. A team that works on a stationary boss may feel inconsistent against scattered waves.
A simple gameplay loop
- Set up the team's off-field Electro application and support effects.
- Bring Sandrone on field and begin her Charged Attack sequence to deploy Fagio.
- Watch Decoding Power rather than holding the attack blindly.
- Use the Elemental Skill to deal its shots, reposition, and reduce the companion's gauge at the right time.
- Use the Burst when enemies are grouped and the team's buffs are active.
- Refresh off-field effects before repeating the sequence.
The exact order changes with teammates, Energy Recharge, enemy movement, and constellation level. Practice the gauge loop on a durable enemy before relying on it in timed content.
Build priorities
Stats
Sandrone generally values Attack and critical stats because they support her personal and Stellar-Conduct damage. Enough Energy Recharge is needed for the chosen rotation, but the target depends on teammates, weapon, enemy particles, and whether the Burst is used every cycle.
Do not copy a fixed ratio without checking your actual build. Use the character-details screen and combat tests to balance CRIT Rate, CRIT DMG, Attack, and Energy Recharge.
Talents
Her Normal Attack talent deserves high priority because it governs the Charged Attack system at the center of her kit. The Elemental Skill and Burst are also meaningful; raise them according to the rotation and resources available rather than leaving either permanently at level one.
Weapon and artifacts
A weapon should be judged by its usable passive, Attack, critical stats, and how it affects the complete rotation—not rarity alone. For artifacts, favor a set whose bonuses consistently apply to Stellar-Conduct or her on-field damage. Compare the final substats before discarding a strong mixed set for a nominal four-piece bonus.
Constellations: what changes
Sandrone's constellations improve the Decoding Power loop, Stellar-Conduct output, beam critical damage, coordinated attacks, talent levels, and the high-end behavior of Fagio's beams. Early constellations make the core rotation stronger, while the final constellation substantially amplifies the signature beam sequence.
Exact values should be checked in the current in-game constellation screen. For most players, a new teammate or weapon may improve the wider account more than an additional constellation, so evaluate the cost against other upcoming wishes.
Common mistakes
- Ignoring the gauge: letting Fagio sit in the wrong state reduces control over the damage cycle.
- Using no consistent Electro source: Sandrone cannot maintain her signature reaction alone.
- Spending all Stamina while hovering: this can remove the ability to dodge immediately afterward.
- Starting before supports are ready: her on-field window should overlap with off-field application and buffs.
- Using pre-release numbers: beta leaks and early translations may not match the live client.
HoYoverse's official Sandrone skill showcase is the best reference for the released kit, while the Version “Luna VIII” Event Wish notice confirms her original five-star Cryo debut. Use those and the live talent descriptions before relying on older leak-based guides.
Sandrone video
Related Articles
 How to Update Genshin Impact on PC, PS4, Android and iOS8 minutes readHow to Unlock 7 Characters Genshin Impact for Free5 minutes read
 Genshin Impact: Details of Update 4.4: What to Know29 minutes read
 Wallpaper Genshin Impact, Beautiful Genshin Impact Background3 minutes read
 Genshin Impact Nod - Krai: Everything You Need to Know4 minutes readTips to Play Genshin Impact Fastest Level up7 minutes read
Reader Comments 0
Sign in with email or Google to join the discussion.