Steps to Import data from different tables in MySQL Workbench
Instructions on how to export and import data from different tables in a MySQL database through the MySQL Workbench tool.
When working with database management systems, there must be many times when you want to copy the data of a table from one database to a similar table of another database.
Many of you will extract (Export) data into a Script file => and bring it to another database, then rename and Import back. Is it true!
This method is not wrong, but sometimes it is a bit time consuming and labor intensive if the amount of data is relatively large.
So, in this article, I will learn with you about another way to perform this operation in the MYSQL WORKBENCH tool.
Instructions for Importing Data from Different Tables
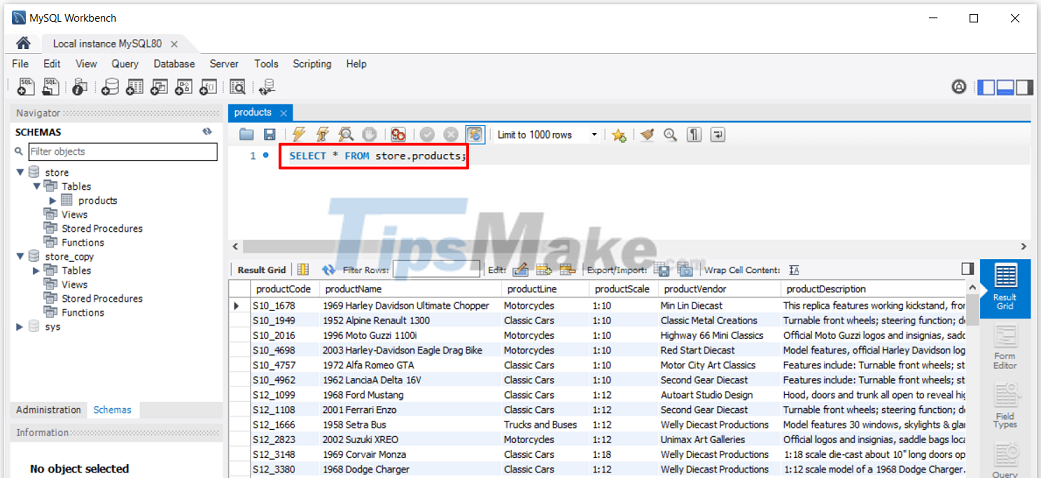
For example, here I have two databases, store and store_copy. In it, each database has a table called products with the same structure.
The problem is that the store.products table in my store database has data, now I want to copy all that data to the store_copy.products table of the store_copy database
Step 1: First we will have to export that data to a file of *.csv format or a *.json file by right-clicking on the table => and selecting Table Data Export Wizard as shown below.

Step 2: You choose which data fields are exported (can select all or some fields) => then click Next to continue.

Step 3:
- (1) In this next step, you will choose the type of file you want to export.
- (2) Then click Browse… to select the location to save the file.
- (3) You name the file (you should put the file name in unsigned).
- (4) Click Save to save the file.

Step 4: Next, you confirm the choices in Step 3 => then click Next to go to the next step.

Step 5: Continue to click Next to start exporting data to *.csv . file

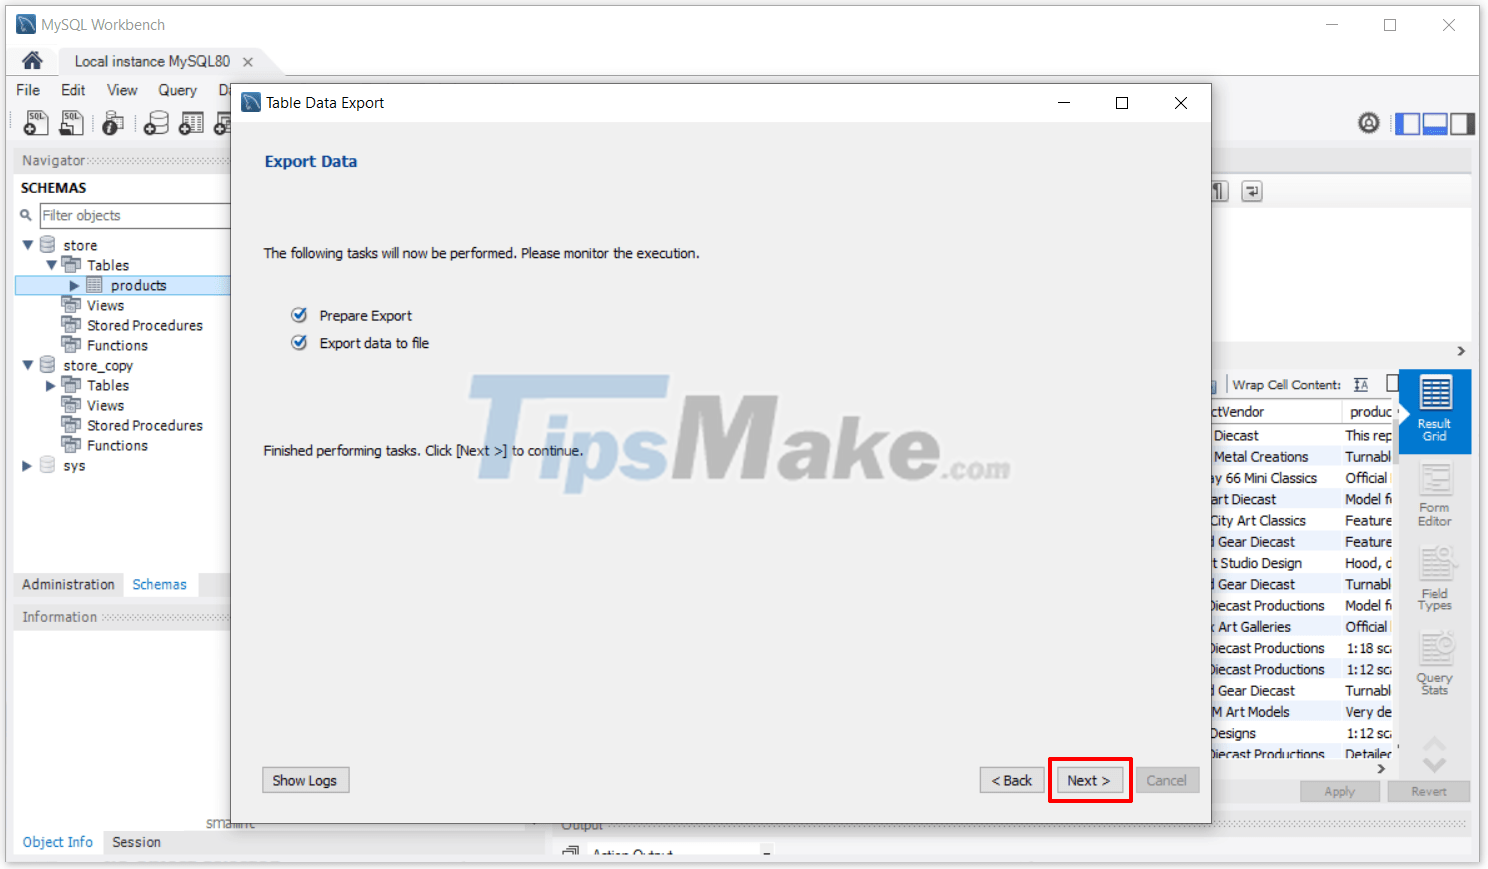
Step 6: Click Finish to complete the data export (you can see that the Export time is 0.468s and the number of records is 110 records).

Step 7: Next in the store_copy.products table I check, there are no records yet.

Step 8: To import data from the .cvs file into the store.products table, we right-click on that table => and select Table Data Export Wizard.

Step 9: Next step we will select the .cvs file that we exported from the previous step. Then click Next to move to the next step.

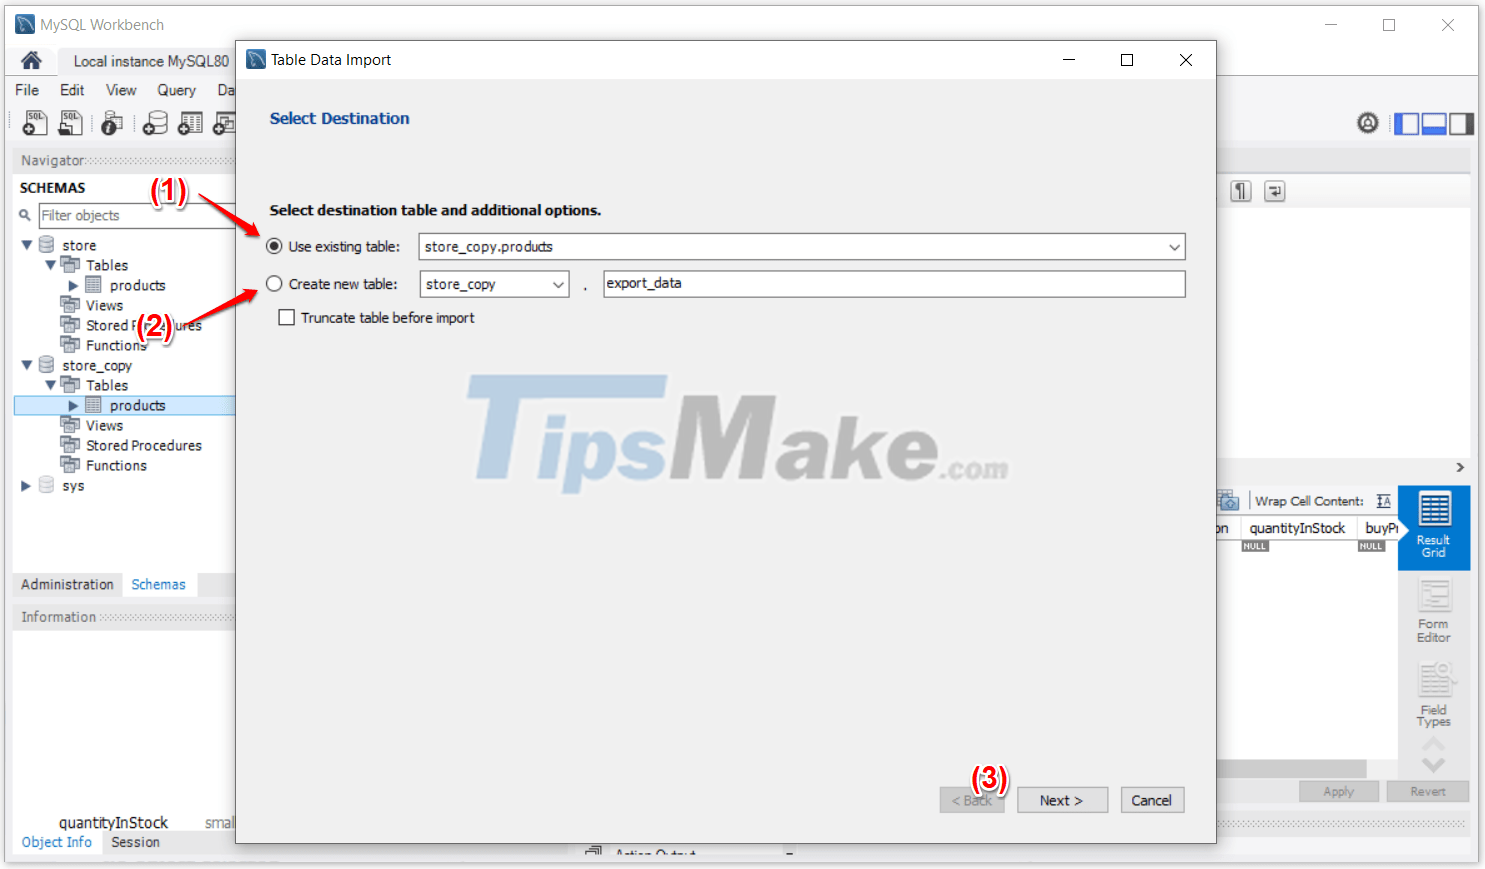
Step 10:
- (1) You choose the table to import data into (the default is the table we choose products)
- (2) You can choose to create a new table when choosing this option.
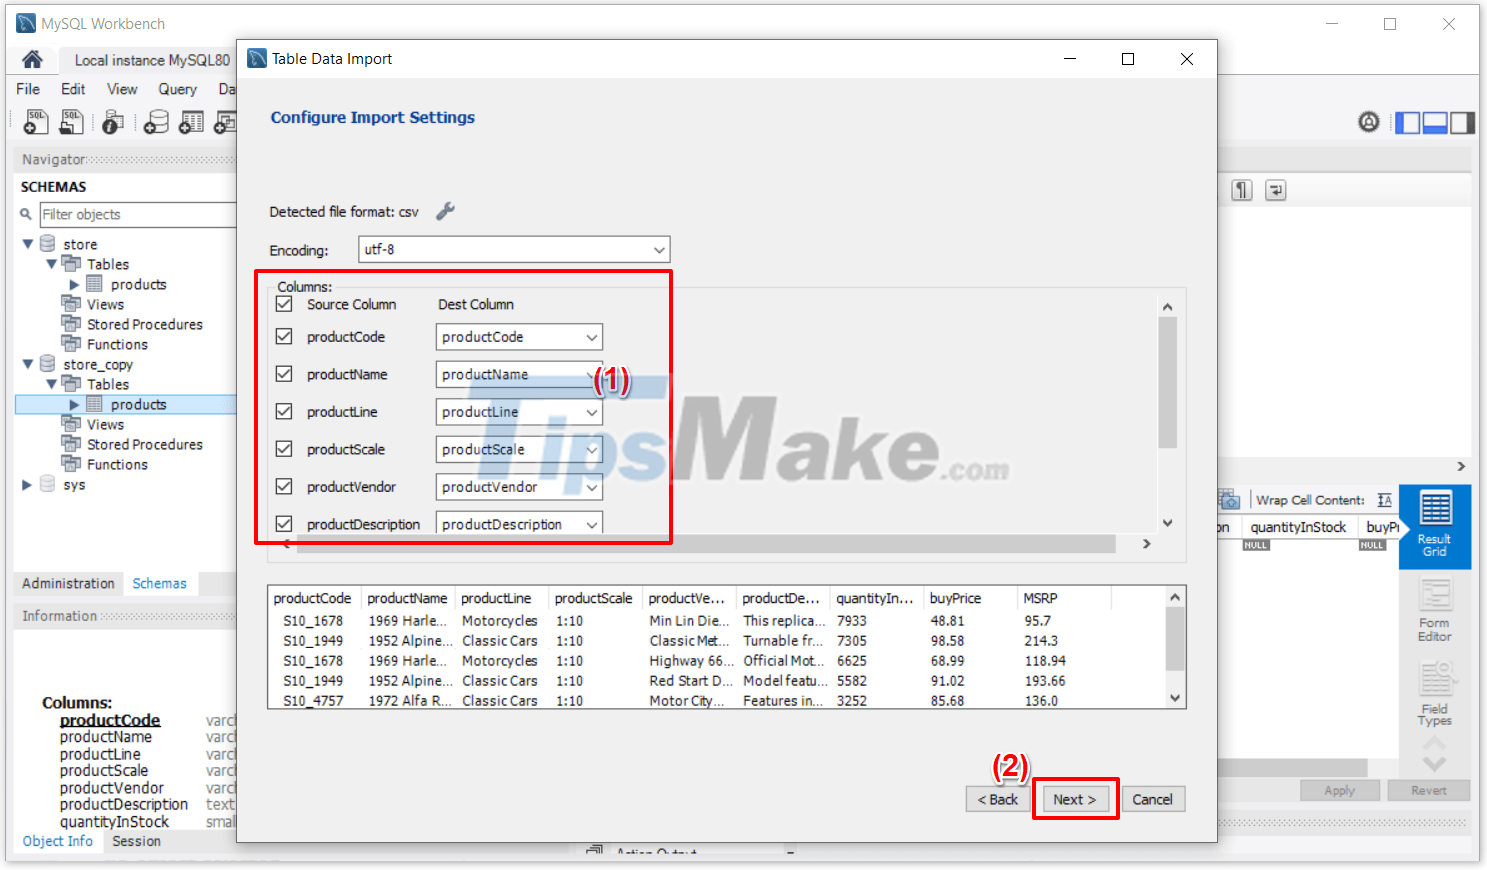
Step 11:
- (1) After selecting the table, we will select the fields in the table to see which fields will be imported data.
- (2) After selecting the data fields, click Next to continue.
Step 12: In this step, click Next to continue.

Step 13: Continue to click Next after the data is imported.
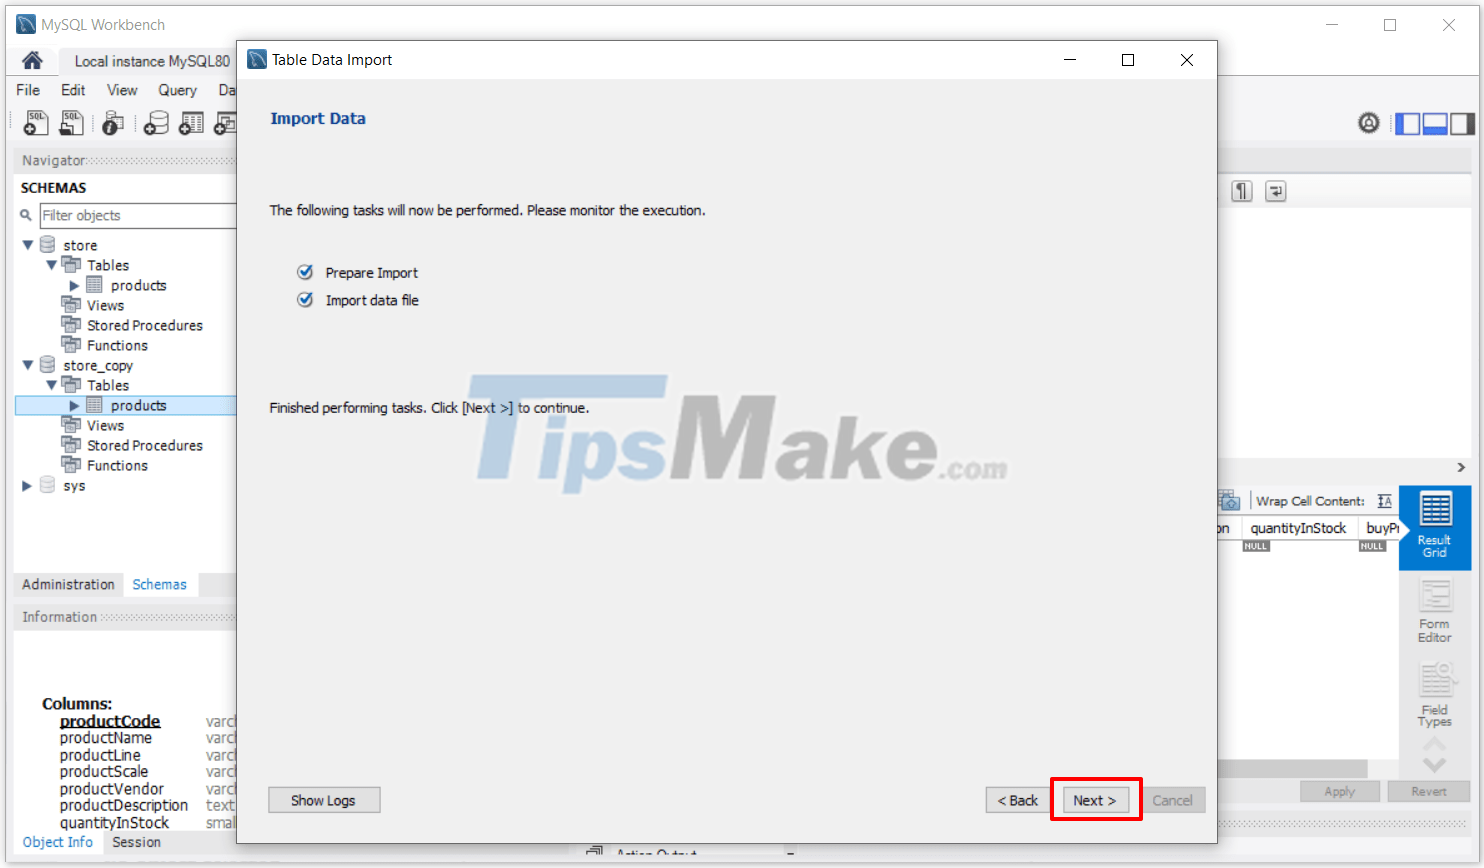
Step 14: So all records from the file have been imported into the store_copy.products table. Click Finish to complete.

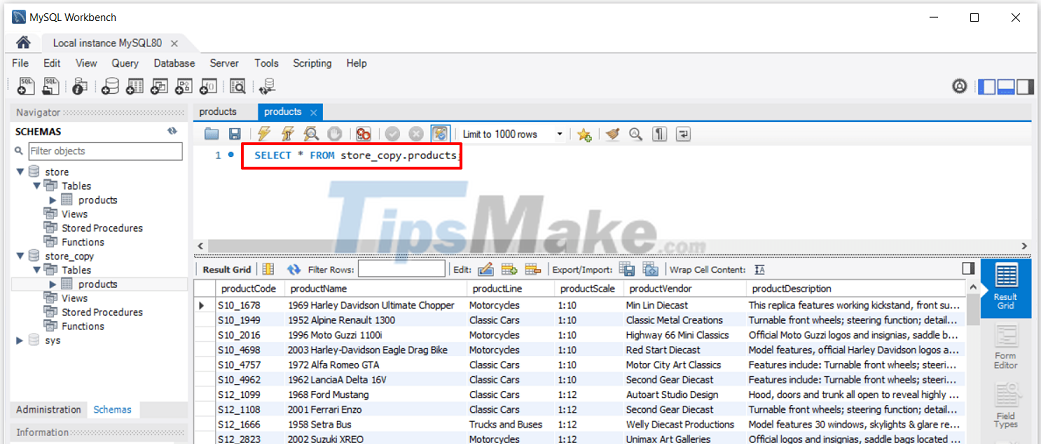
Step 15: Now I go back to check the data in the table and see that the table has full data from the input Import file.
Okay, so in this article, I have learned with you how to Export and Import data from different tables in MySQL database through MySQL Workbench tool.
This will be a nice trick in many cases where we have sample data saved as *.csv or *.json files
Hope the little tips in this article will be useful to you. Goodbye, see you in the next post!