Instructions on how to connect to MySQL Server in IntelliJ
How to connect MySQL Server in IntelliJ? Detailed instructions on how to connect to MySQL Server in IntelliJ, it is time to quit MySQL Workbench
Table of Contents
As you all know, using MySQL Workbench in parallel with the MySQL server will make manipulating the database easier and more intuitive.
But nowadays there are many modern IDEs that not only support us in compiling and compiling source code, but also support us to work with database management systems.
Typical of which are JetBrains products with outstanding functions. In this article, I will guide you to link to MySQL Server using InteliJ - an IDE that is being used by many programmers today.
Ok, let's get started now!
Instructions to link to MySQL Server in IntelliJ
NOTE: In this article I use IntelliJ Ultimate version (link) (If you use Community version, this feature will not be available).
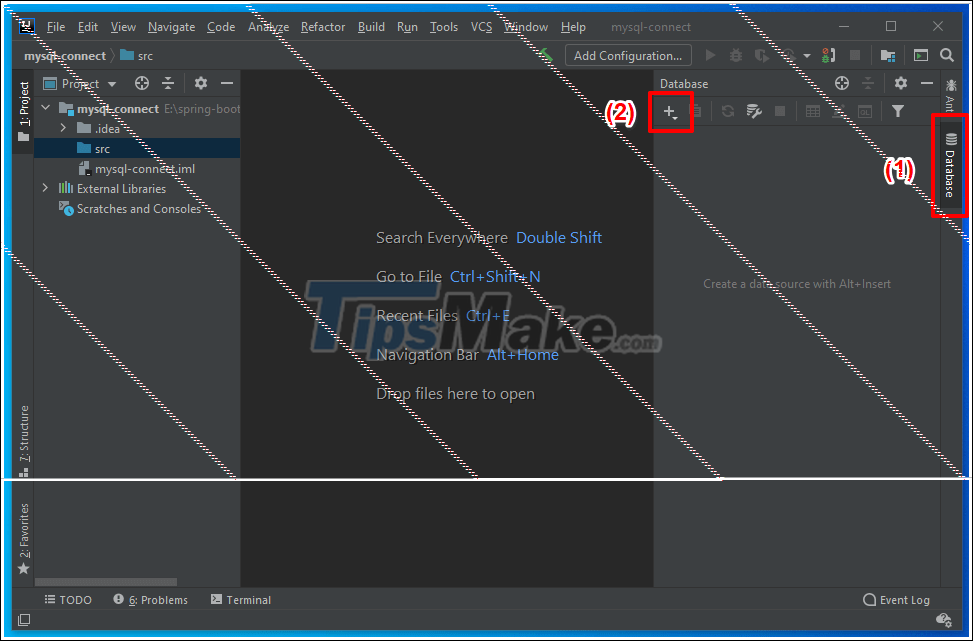
+ Step 1: First, open a Project and click on the Database tab on the right as shown and click the '+' sign to create a connection to the database management system.
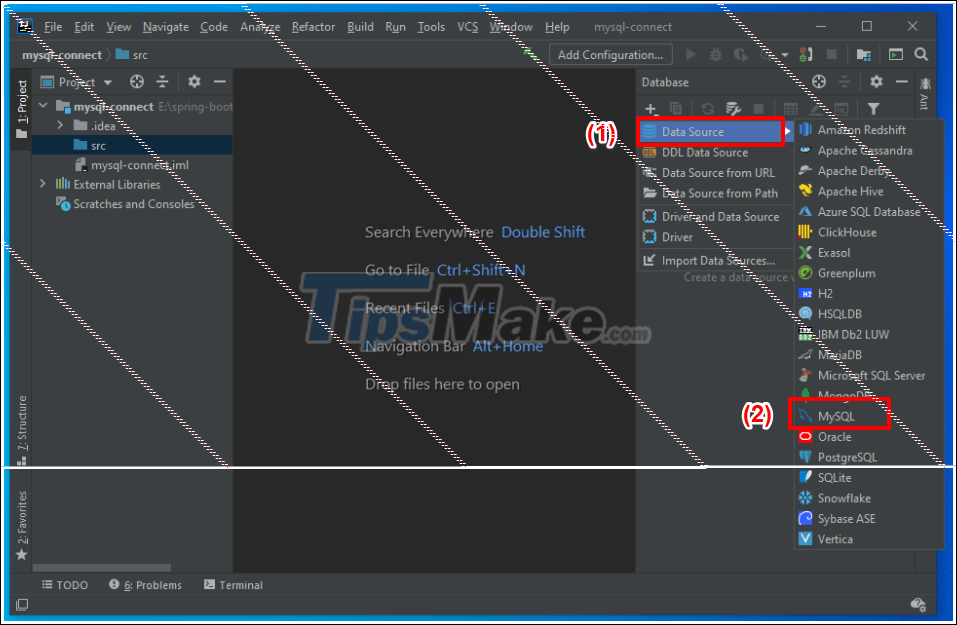
+ Step 2: Here, InteliJ supports many different database management systems as well as many different connection types.
In this article I only guide how to connect to a database server installed on the same machine with InteliJ tool. You choose Data Source => MySQL as shown.
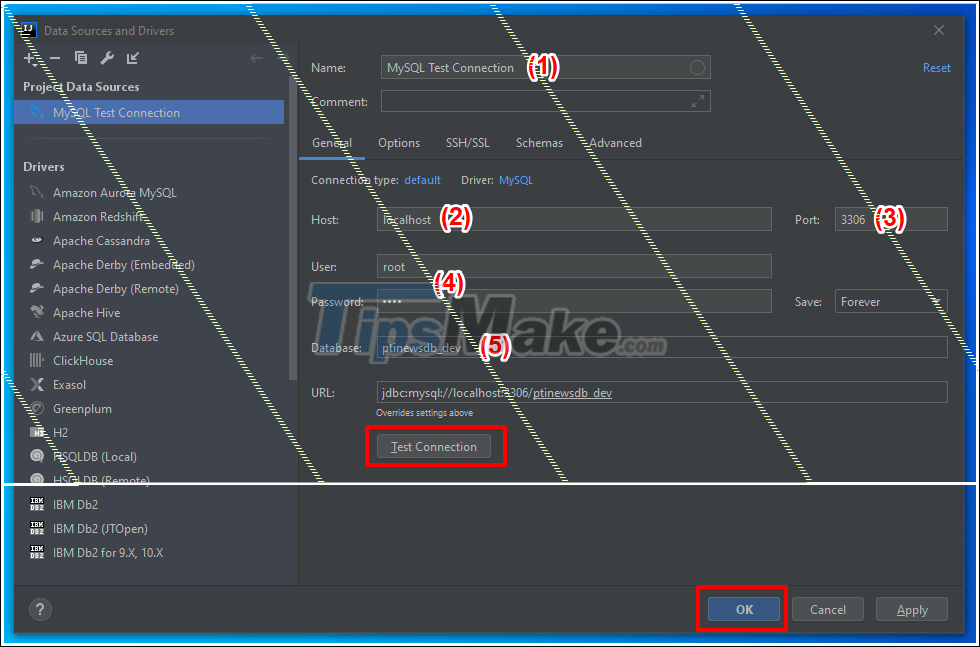
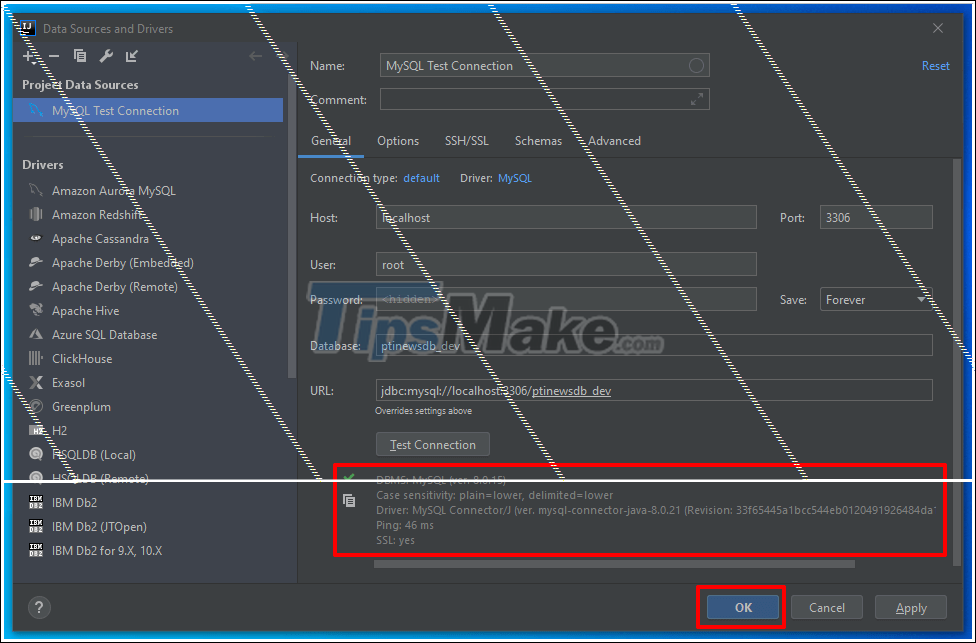
+ Step 3: Next, you fill in the required information.
- (1) The name of the link
- (2) Hostname (if on one machine, it is localhost)
- (3) The default gateway is 3306
- (4) Username and password that you set up when installing MySQL Server
- (5) Database name (note that this database must already exist in case you want to link to that database).
+ Step 4: Before clicking Test Connection and Ok, you must download the driver file as shown below first (if you create the link for the first time).
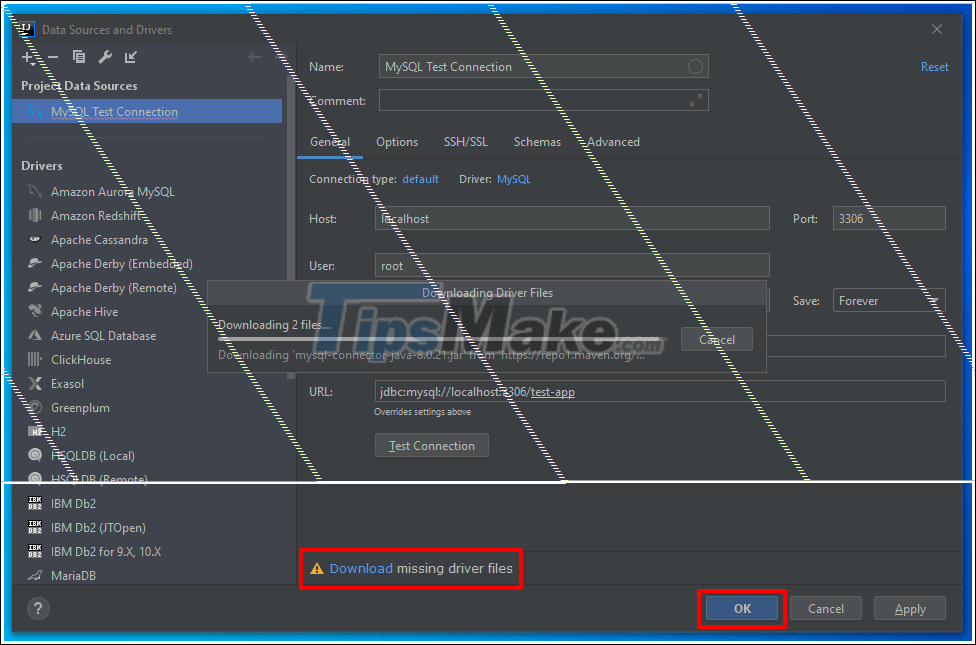
+ Step 5: After downloading the driver file, we will click on Test Connection and OK to test the connection.
If you see the tool displaying a message with a green area as shown below is fine.
If you cannot connect, check the above information and check if MySQL Service is working.
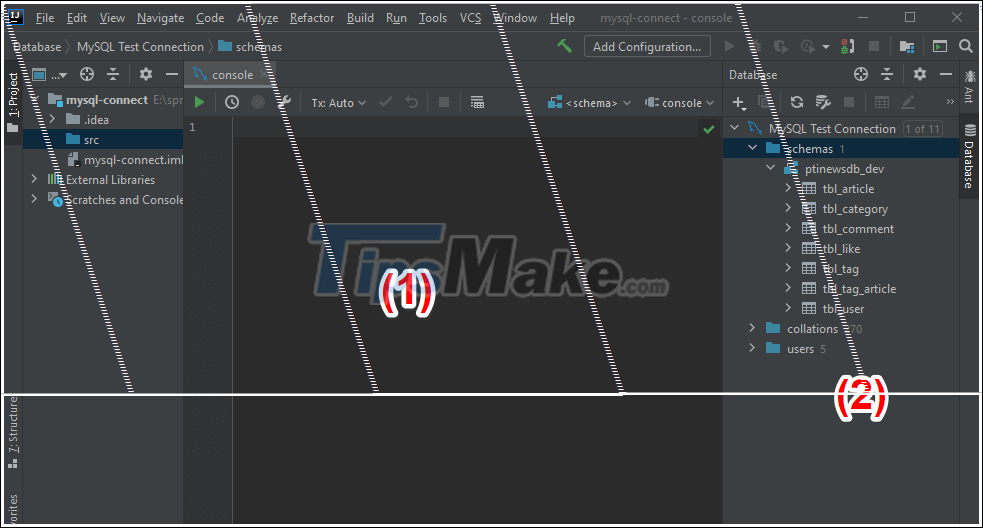
+ Step 6: After connecting, the whole area (2) is the database-related information that we want to link to.
- (1) is the console location so that we can write queries that execute queries to the database.
+ Step 7: Here I will perform a sample query to show you the power of this tool.
- Having code hints, exact suggestions, which words are used a lot will be pushed up first -> very convenient to follow.
- The query speed has not been fully tested yet, but it is quite good, feeling much faster in MySQL Workbench.
After writing the query, you click on the blue triangle button (2) to execute the query. Below (3) are the records found by the query.

+ Step 8: Next I will guide you to another basic operation that is creating a new table. Right-click and Database name => New => Table as shown below.

+ Step 9: This is the interface for us to add tables to the database.
- (1) Table name
- (2) Operations to add new fields (+), delete data fields (-), change the position of fields (up arrow)
- (3) Add attributes for data fields
- (4) Script corresponding.
- (5) After adding all the information, click Execute to execute the script and create a new table.

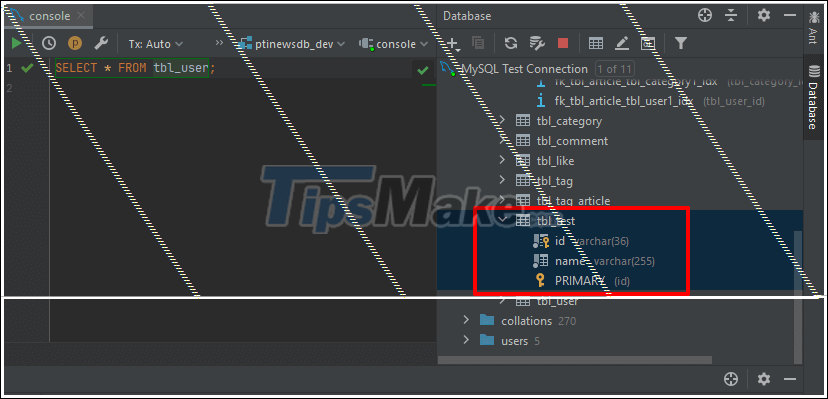
+ Step 10: This is the newly created data table.
Ok, so I have just guided very in detail with you how to connect MySQL Server in IntelliJ already.
It can be said that IntelliJ has integrated almost everything that MySQL Workbench has, to be able to work with MySQL Server.
However, to say that it is completely replacement, I think it is not quite. Because most users are familiar with MySQL Workbench, even when installing MySQL, they install MySQL Workbench by default to work.
So I think, depending on the purpose as well as their convenience, it is possible to use both of these products in combination. See you in the next posts!
Was this article helpful?
Your feedback helps us improve.
Related Articles
 How to Connect to MySQL Using PHP5 minutes read
 Instructions on how to connect to MySQL Database in Eclipse5 minutes read
 How to install and configure MySQL server on Pi6 minutes read
 Instructions for installing MySQL on Windows and remote access8 minutes read
 How to Send Sql Queries to Mysql from the Command Line1 minutes read
 POJO Generator: Support creating Pojos automatically in Intellij Idea5 minutes read
Reader Comments 0
Sign in with email or Google to join the discussion.