Some notes when removing and installing CD ROM drive
Disassembling the internal parts of the computer's CPU is not really difficult, but for some non-professional users, there is a fear of "touching" their hands and feet on sophisticated computer devices. "that.
This article explains how to remove and install a computer CD Rom drive, which is often removed and upgraded with the CD, Rewrite CD, DVD, Rewrite DVD drives you removed from the device. Then go to the other machine, make it easier for friends to borrow.
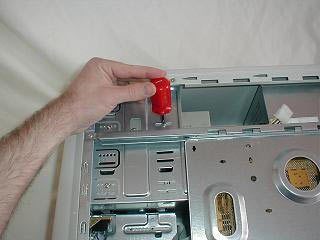
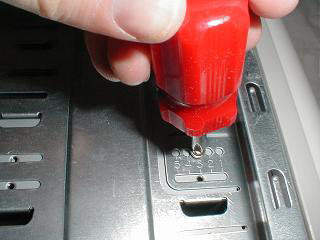
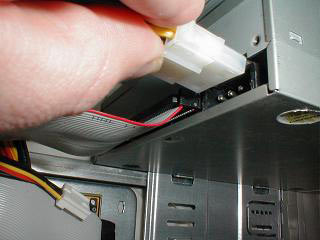
The first operation is always to unplug the power and flip the Case (computer case) up. If it is installing the CD ROM drive and it is not placed on the horizontal bar, you need to remove both sides of the Case. The CD drive is fitted with two screws on each side if you are not saving, otherwise the CD drive will be able to vibrate strongly if they are not properly protected. We remove all the plugs into the connector on the back of the CD drive (see the picture to see how to connect) and remove the four screws.

The fact that the CD drive or CD burner (Rewrite CD, burn CD) is exactly the same as the DVD drive or DVD burner, you can't tell the difference between them except the face label. out of the drive. These drives are removed or installed from the front of the Case, because the CD tray is used from the front. If there is more than one compartment used, then it doesn't matter when you put the drive in, the lower compartments are more convenient because of the lower center of gravity and the need for shorter cable lengths. Don't forget to unplug the power, IDE or audio cable from the back of the CD drive. Sometimes, the power cord is relatively tight, the girlfriend's hand is usually not easy to remove at all.

Both CD and DVD drives, and equivalent recording devices (Burner), are parallel IDE drives. There are even more expensive SCSI drives suitable for special applications, usually array types, but we don't mention them here. Parallel IDE drives equipped with the Master / Slave (Jumpers) jumper allow IDE drivers to designate only two separate drives on a single channel. The drive describes three jumpers: Master, Slave, and Cable - Select cable (cable used to select). The easiest way to make sure a newly installed CD burner is set is to put it next to the old CD drive to make sure that the selected jump pair is the same.

The next CD burner is installed in the case, and is protected with 4 screws. If you do this with a straight case, make sure that the CD drive is actually supported from the bottom when you push it in because for some super cheap cases, they have an open frame and therefore the The drive can fall off your hand and damage the Main. Because the outside of the CD burner will open in front of the Case, make sure it is on par with the case's front before you tighten the 4 screws. twist on.

Now we will show you how to connect the CD burner, and note that it is exactly the same as connecting a CD ROM, DVD ROM or DVD burner. The first connector you need to connect when installing a CD drive (because at the bottom and hard to get the most) is the audio line when playing music, the cord is attached to the sound card. If you skip this step, everything will work normally, including hours in games, but you will not be able to listen to music from the CD.
A 40-wire cable can fit snugly into the CD drive's connector, or you may have to press it into it. The red cord on the side of the cable will run to the "Pin 1" of the connector, and if the drive does not have a label, the red cord will plug into the power slot.

If the CD burner you just installed is still not receiving the device from your computer, you should review the tight viewing plugs and the driver (device driver software) to see if there is any conflict with other devices. Wish you could manipulate it more easily after reading my article.
Mai Huong