Set up FreeNAS for the central File server - Part 2
In this article, I will show you how to login to the user interface; Set up drives and configure sharing protocols for Windows, Mac OS X and Linux..
 Set up FreeNAS for the central File server - part 1
Network Administration - In the first part of this two-part series, I showed you that FreeNAS can help you focus, protect, and share files on your network. In this article, I will show you how to login to the user interface; Set up drives and configure sharing protocols for Windows, Mac OS X and Linux.
In Part 1 of this series, we built a FreeNAS machine and connected it to the network. In this part 2, we will log in to the user interface to set up storage drives and configure sharing settings.
Access the web interface
Now that we have started and connected FreeNAS to our network, you can access the web interface to set up the above tasks.
Open the browser of a computer connected to the same network and enter the IP address of the FreeNAS machine. When prompted to login, use the username " admin " and the password " freenas ".
Figure 1 shows an example of the web interface.

Figure 1: FreeNAS web interface
Perform some initial configuration
Before starting to manipulate settings or experimenting with services, you need to change at least one encrypted HTTPS connection - and change the default password for FreeNAS.
On the main menu of the web interface, click System> General . Scroll down to the WebGUI section, select the HTTPS for the Protocol option , scroll down to the bottom of the page and click Save .
In order for the changes to take effect, you must restart FreeNAS. Before doing so, you should scroll down to the Time section to set the date and time information.
Now, click the reboot link in the status area near the top of the page.
When you finish booting, click System> General again, then click the Password tab.
Type in the " freenas " password, then type in the new password in the two input boxes and click Save .
Next, you must reboot for the changes to take effect; Click on the reboot link .
Add, format, mount and encrypt discs
Before you can format, encrypt or share a drive, you must add it to FreeNAS.
Click Disks> Management , and click the add a disk button (plus sign). When you're done, click Apply . If you want to encrypt the drive to increase security, then you need to do it right now.
Any drive you use with FreeNAS needs to be reformatted using the UFS file system. Old Windows drives often use FAT or NTFS file systems.
If you have used one of the FreeNAS installation methods, it has definitely been formatted for you. However, in other cases you should format the drive.
Click Disks> Format and format with the default settings.
Next you need to mount the drive to be able to use it. Click Disks> Mount Point , click the plus button, enter the details, and then click Add .
You can now configure and activate services.
Shared Windows configuration (CIFS / SMB)
To support Windows computers, you should enable CIFS / SMB. Click Services> CIFS / SMB and check the Enable option in the upper right corner.
Figure 2 shows an example of this page
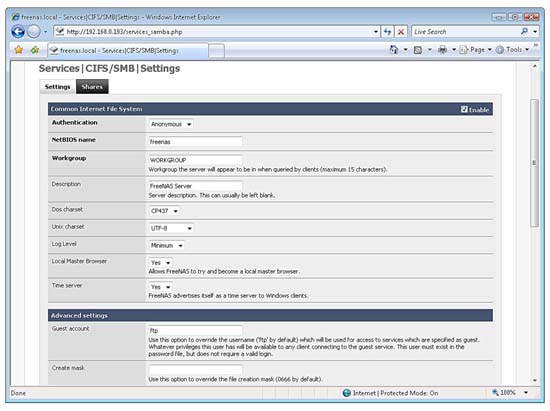
Figure 2: CIFS / SMB page of the FreeNAS web interface
If you do not want the user to login, leave the Authentication option set to Anonymous . Otherwise, select Local User to request the username and password you created in FreeNAS, or select Domain if you defined the user in the Active Directory server.
NetBIOS names will distinguish the server on the network, just like the computer name of Windows computers.
Just like in Windows, you need to make sure that all computers are in the same Workgroup. The default settings should be left untouched.
When you're done, click Save and Restart .
To share files now, click the Share tab and add the folders. If you want to create additional folders, click Advanced> File Manager and create folders in the mounted location ( mnt / mountname ).
It should be noted that some versions of Mac OS X and Linux are easy to set up with Windows. So if there are computers that have these operating systems installed, you should enable SMB / CIFS on them, so you don't need to configure all other protocols.
If you only want to provide password protected access, you should use SMB / CIFS instead of NFS in Linux.
Unix / Linux sharing configuration (NFS)
To support the default sharing protocol of Unix and Linux computers, you need to set up NFS. Click Services> NFS and check the Enable option at the top of your right hand (shown in Figure 3).
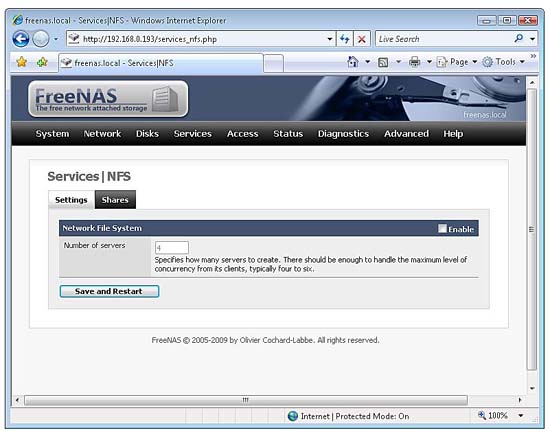
Figure 3: NFS page of the FreeNAS web interface
If you plan to use more than 4 people to share on FreeNAS with this protocol, you can increase the number of servers. However, you should only use up to 6 people on one server at a time.
When done, click Save and Restart .
Next you can specify which directory you want to share with this protocol. Click Shares tab. Then browse to the desired directory to insert the path.
Be careful with the Map All Users to Root option ; Only enable it when you really trust the user.
With the Authorized Network field, enter the router's IP address and change it to the correct entry. Change other settings as needed and click Add .
Apple sharing configuration (AFP)
To share with Mac OS X computers using the default AFP protocol, click Services> AFP (see Figure 4) and check the Enable checkbox .
Then specify the Authentication method you want, whether you want to ask the user to enter a username and password (loaded in FreeNAS) when accessing shared folders with this protocol. Once done, click Save and Restart .
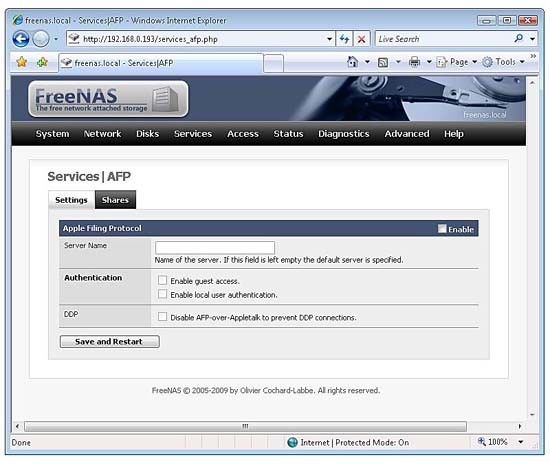
Figure 4: Share with the default protocol
Like other sharing protocols, you must click the Shares tab and specify the folder you want to share. When adding shares, you must at least fill out the first three fields, then you can use the default options for the following settings.
Set User and Group
If you manage a network using Active Directory or LDAP, you can configure FreeNAS for reference instead of having to enter all user details.
However, if you don't use one of those databases, you need to use an internal database. So if you are using a shared protocol or another service that is configured to use internal user authentication, click Access> Users and Groups on the FreeNAS main menu. Then manage the groups and add the desired accounts.