Mount Network Drive on Windows Client using Group Policy
The job of mapping network drives is one of the most commonly done tasks of system administrators, this process was often done by scripting. In the following article, we will show you how to do this via Group Policy in Windows ...
TipsMake.com - The job of map network drives is one of the most commonly done tasks of system administrators, this process was usually done by script . In the following article, I will show you how to do this through Group Policy in Windows.
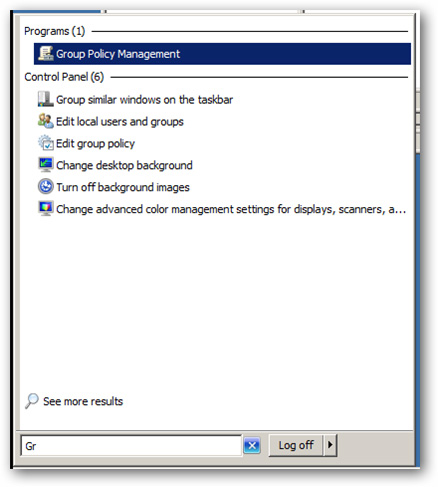
First, open the Group Policy Management Console from the Start Menu:
Scroll down to the list of domains until you see the Machines object, right-click and select Create a GPO .

Name this new policy, for example here is Mapped Drives (General):

Then, right-click that policy and select Edit :
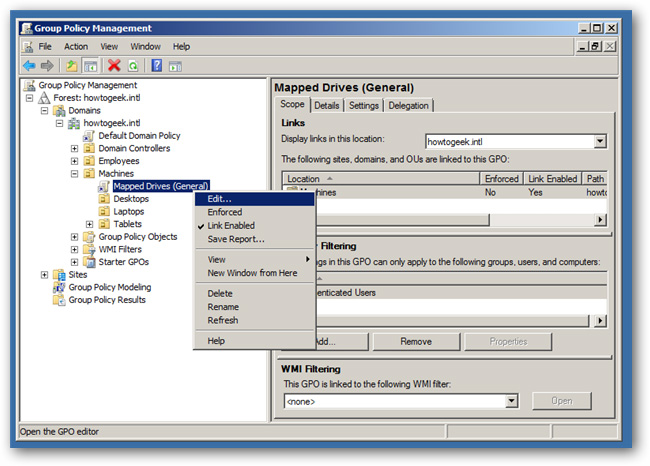
Policies that control the disk connection process are fixed in position:
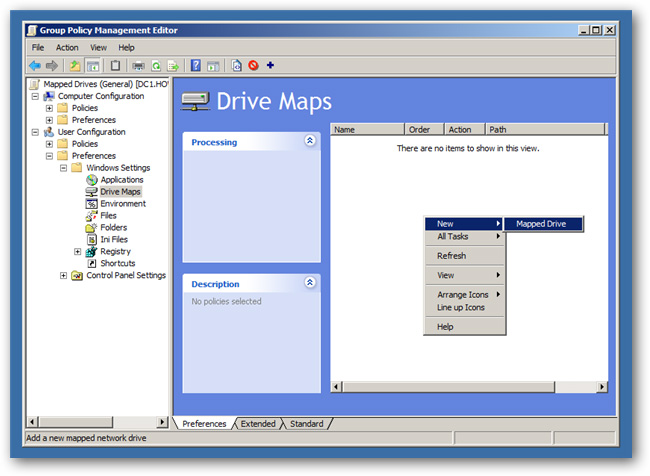
User ConfigurationPreferencesDrive Maps
After selecting policy, right-click on the white window on the right and select New> Mapped Drive:
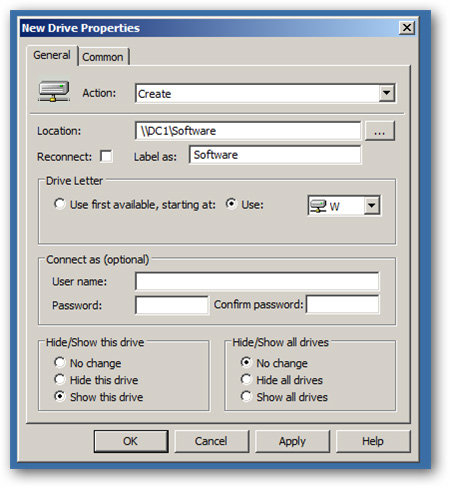
Change Create in the Action section, enter the path to the shared folder:
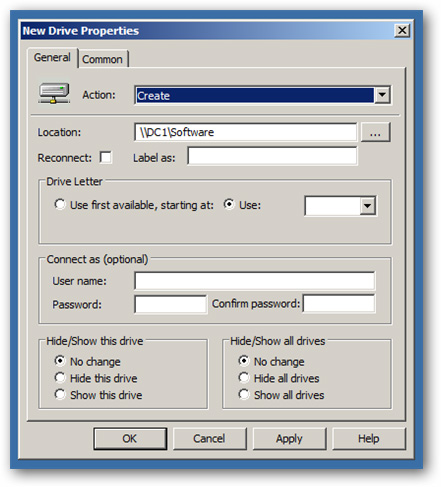
Name in the Label section - this is the name that will appear when connecting to another computer, select the drive letter in the Drive Letter section , change the Show this drive setting as shown below:
Then, when the user logs on to the computer, the system drive is automatically connected. Good luck!
Was this article helpful?
Your feedback helps us improve.
Related Articles
 4 tips to open Local Group Policy Editor on Windows 8 / 8.13 minutes read
 8 'tweak' Windows Group Policy any Admin should know12 minutes read
 Use Group Policy Filtering to create a NAP DHCP enforcement policy - Part 111 minutes read
 Use Group Policy Filtering to create a DHCP enforcement policy for NAP - Part 211 minutes read
 Control Wifi access using Group Policy11 minutes read
 How to reset Local Group Policy settings on Windows 104 minutes read
Reader Comments 0
Sign in with email or Google to join the discussion.