Instructions for installing TMG 2010 RTM
In this article, I will show you some basic knowledge and how to install Microsoft Threat Management Gateway 2010 EE RTM.
In this article, I will show you some basic knowledge and how to install Microsoft Threat Management Gateway 2010 EE RTM.
Introduce
The first stage is the planning phase, which is the stage in which you need to determine the hardware requirements, the role of the TMG firewall will be present in the network. However, if you are completely new to the TMG firewall, you will definitely want to install it and see how it is. Planning for deployment can happen later if you decide so. So in this article (the first part of a two-part series), we will show you the whole installation process and point out the problems that you may encounter during the installation process. put.
Begin
The first step before installing is to make sure you have the minimum hardware requirements, you can refer to the link here.
There may be many who want to perform the first installation for testing and evaluation as the main. Therefore, we will install the RTM release of the TMG firewall in the virtual machine, the VM will have two network interfaces:
- An external interface, the interface is bridged with the production network to allow it to connect to the Internet, and
- The internal interface only allows it to connect to other virtual machines.
In this example, the remaining virtual machine is a domain controller and the TMG firewall is in the same domain as the domain controller.
This is a completely simple installation. The only thing that we do for advanced purposes is to join the TMG virtual machine to the domain and then install Windows Updates. In the guide we do not install any Exchange components or other software. The goal here is to do what most administrators will do - install the software then make it perform the necessary tasks when learning more about a product.
Note: One thing you should know before we start is to configure DNS on TMG virtual machine NICs. Since you may not have an external DNS server on the firewall's NIC, so we have configured the external interface without setting up the DNS server, the internal interface with the IP address of the internal DNS server, also is a domain controller. This way of doing things can cause some problems that we will show you later in the series.
This is a simple network diagram of what we have done at this time and for this part:
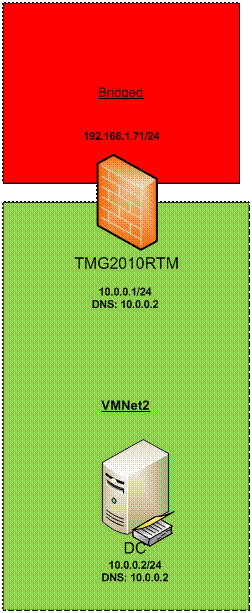
Diagram 1
The first step is to download the software evaluation version. At this point, TMG is not available on MSDN, but you can download the evaluation version here.
Once you've downloaded the evaluation version, double-click it and release the files. After the files are released, you will see the Welcome to Microsoft Forefront TMG page . This welcome page is a bit different from what you see with the ISA firewall and it includes a number of other options. Notice the Prepare and Install section - you can run Windows Updates from the settings page. In the example we have done this before, so here we don't need to do it at this time. Another new option, Run Preparation Tool , is an option that we will use. Click on this option.
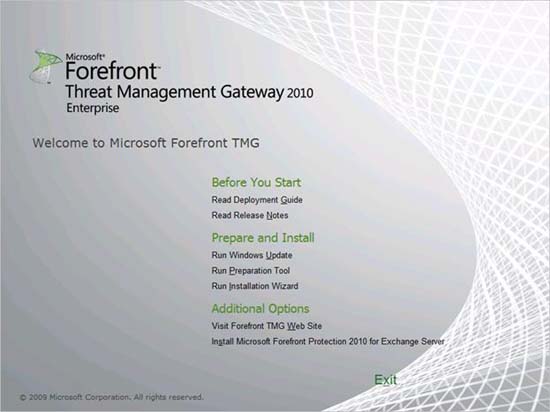
Figure 1
Certainly, TMG developers have large screens when they create this interface. The dialogs here are very large. This is really good for both users and developers.
In the Welcome to the Preparation Tool page for Microsoft Forefront Threat Management Gateway (TMG) , click Next .
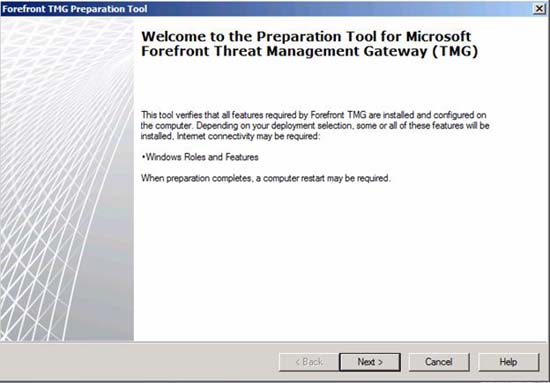
Figure 2
On the License Agreement page, check the box to accept the terms of the License Agreements , then click Next . Here you will have to accept the registration agreement for Microsoft Chart Controls for Microsoft .NET Framework 3.5 and 3.5 SP1 and Microsoft Windows Installer 4.5 .
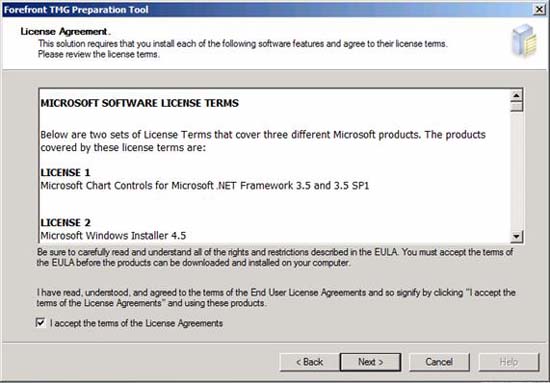
Figure 3
On the Installation Type page , you have three options:
- Forefront TMG services and Management
- Forefront TMG Management only
- Doanh sở sở Ho
TMG lets you work more easily with TMG EE, contrasting with the complexity of EE management with ISA firewall. This is because we will install EE in this series - to show that you can install EE easily. Then we will create a standalone array and cancel this standalone array and create an enterprise array. It sounds interesting, but first we need to understand the basics and choose the Forefront TMG services and Management option . Click Next .
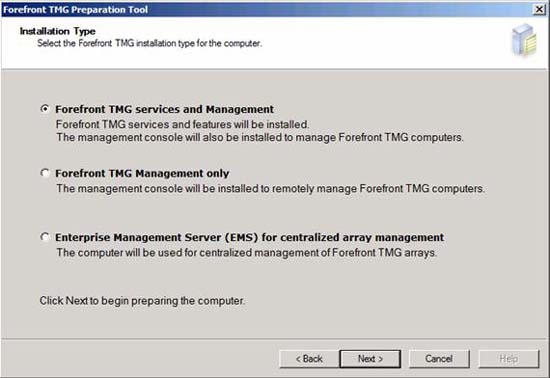
Figure 4
On the Preparing System page, you will see the installation process for prerequisite software.
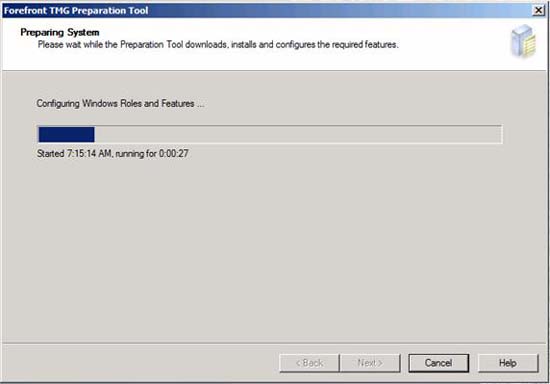
Figure 5
The Preparation Complete page shows that the prerequisite software has been successfully installed.
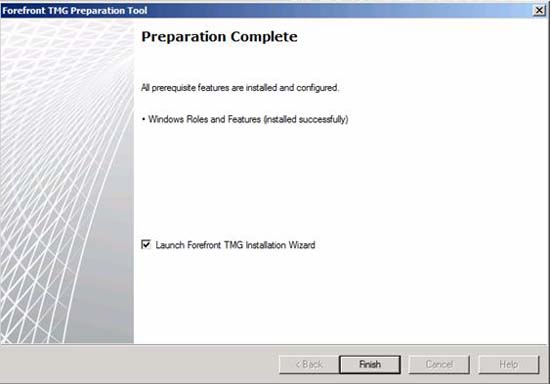
Figure 6
At this time, the Welcome screen for the Installation Wizard for Forefront TMG Enterprise will appear. Click Next to install TMG EE.
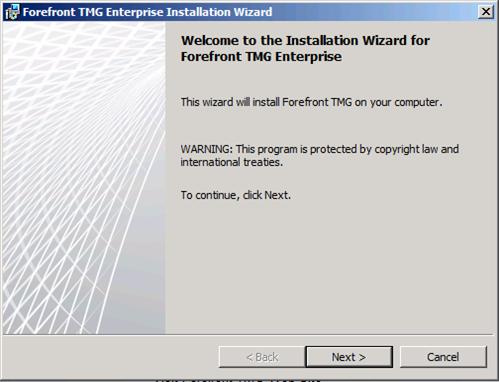
Figure 7
On the License Agreement page, select the option I accept the terms in the license agreement and click Next .

Figure 8
Enter the customer information (username, organization and product number) on the Customer Information page and click Next .
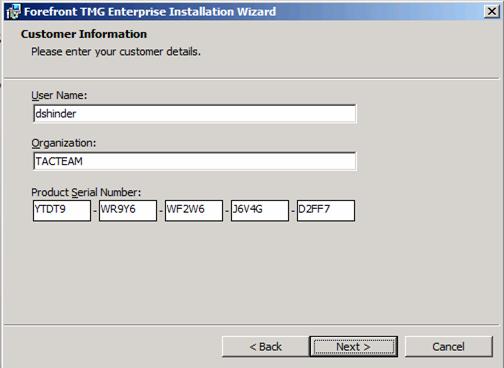
Figure 9
On the Installation Path page, you can use the default path or select your own path to specify where you want to install the TMG firewall files. In this example, we will use the default path and click Next .
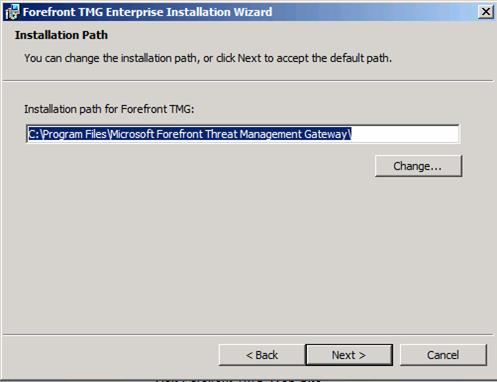
Figure 10
Here you will see the Define Internal Network page . With the TMG firewall, as with the ISA firewall, the default Internal Network is where your core infrastructure services are contained; they include Active Directory, DNS, DHCP and WINS. You can change this definition later if you like, but we need to be able to access these resources during the installation process, so define the default Internal Network at this time.
Click the Add button in the Define Internal Network page. You will then see the Addresses dialog box. There are several ways to add the addresses for the default Internal Network, but the preferred method we use is to use the Add Adapter method. Click Add Adapter .
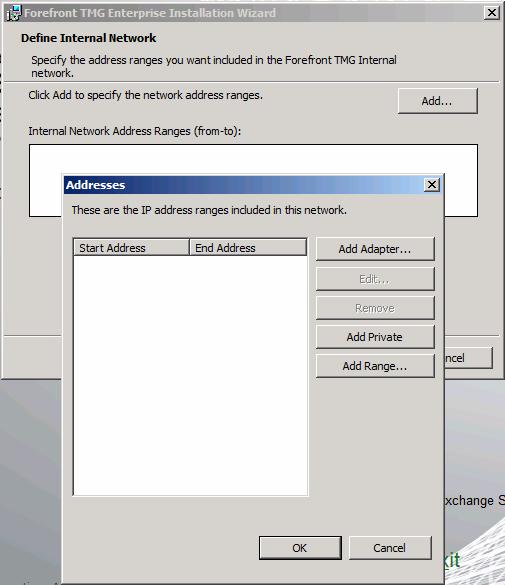
Figure 11
In the Select Network Adapters dialog box, select the LAN NIC (or whatever name you defined for that NIC), then tick the check box for that NIC. Make sure that the information in the Network adapter details section reflects the details of the NIC you selected. Next click OK .
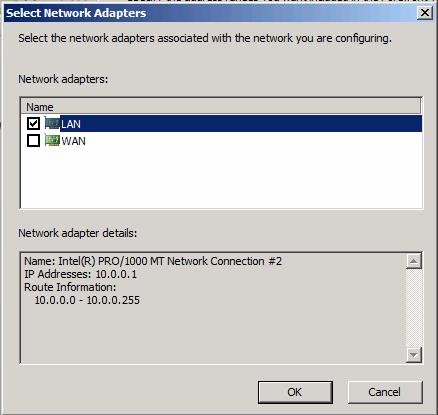
Figure 12
The addresses associated with the internal NIC will now appear in the Addresses text box. The addresses are based on routing table entries on the firewall - if you have not configured routing table entries on the firewall, these addresses may not be completely correct, but this problem has can be overcome later.
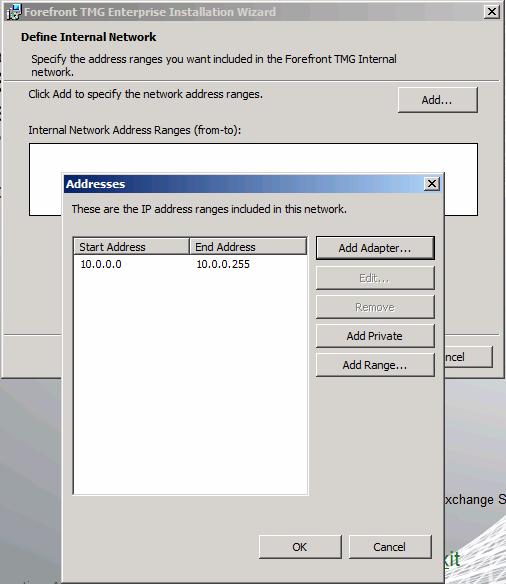
Figure 13
Click Next on the Define Internal Network page.
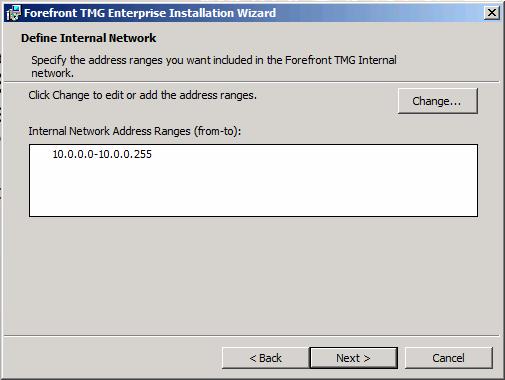
Figure 14
Like installing the ISA firewall, some services will need to be restarted or disabled when you install the TMG firewall. In this case, the services include:
- SNMP service
- IIS Admin service
- WWW Publishing Service
- Microsoft Operations Manager Service
Note: TMG does not say that they are currently installed - it only tells you if they are installed or not, or they will be disabled or restarted.
Click Next .
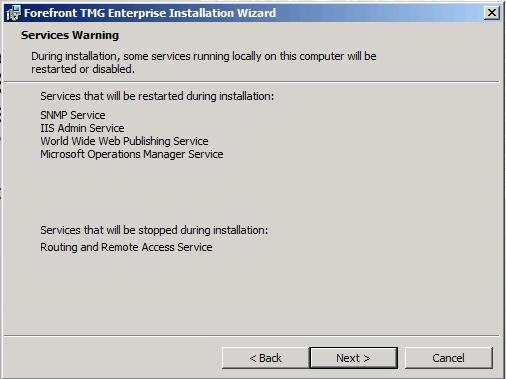
Figure 15
Click Install on the Ready to Install the Program page.
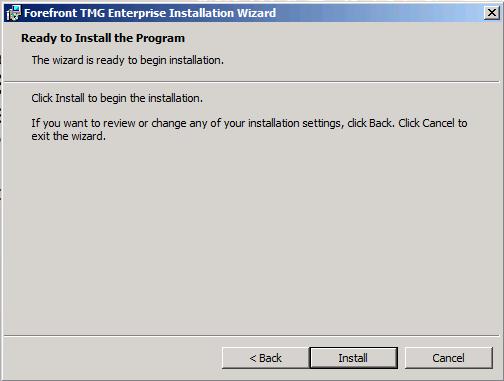
Figure 16
The progress bar will show you the installation progress.

Figure 17
Another dialog box will appear and give you more detailed information. Note that these are estimates only.
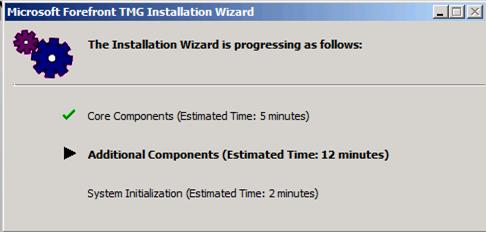
Figure 18
Now when the Installation Wizard is complete, you may think you are finished. In the past, this was the case with the old ISA firewall, but now you still need to go to the ISA firewall interface and configure Networks, Access Rules and other components so they can work.
If you select Launch Forefront TMG Management when the wizard closes, then there are three other wizards that can be launched at the end of the installation. We will introduce you to these wizards in the next section.
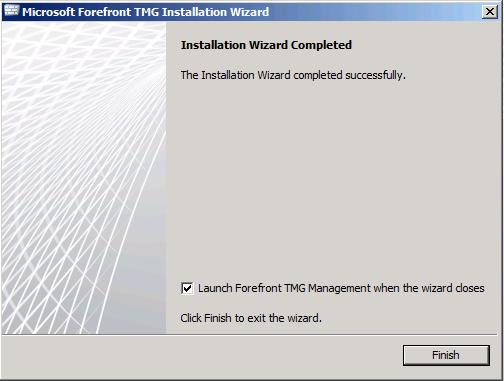
Figure 19
Conclude
In this section, we have introduced the new TMG 2010 EE firewall installation in a simple configuration. Only settings on the virtual machine are DNS settings, the virtual machine has been joined to the domain before installing the firewall software. Next we have started the installation process, configured the default Internal Network and enabled the installation to complete. In the next part of this two-part series, we will complete the firewall installation by introducing you to three new wizards that are added in the Getting Started Wizard .
Was this article helpful?
Your feedback helps us improve.
Related Articles
 Instructions for checking and installing more RAM for laptops as quickly as possible10 minutes read
 Instructions for registering and installing Dropbox3 minutes read
 Instructions for installing Vietnamese for IDM for all versions3 minutes read
 Instructions for installing Node.js3 minutes read
 Instructions for installing screensavers on Windows6 minutes read
 Instructions for installing SPSS on your computer are simple and easy to follow3 minutes read
Reader Comments 0
Sign in with email or Google to join the discussion.