Table of Contents
Use this guide to understand instructions for installing and using Android os on iPhone 2g / 3g and the factors that affect it. The information is organized to make the topic easier to apply in practice.
In essence, the process is similar to when you were working on a dual-boot operating system, but this time with the iPhone. You don't even need a computer to do this, but it's required to have the Cydia app - Bootlace.
How Instructions for Installing and Using Android OS on iPhone 2G / 3G Works
Bootlace profile:
Basically, Bootlace is an iPhone application, allowing you to install OpeniBoot and iDroid into the iPhone 2G or 3G model. Users can set up, configure OpeniBoot after installation, and QuickBoot will be supported after successfully installing Bootlace. Here, QuickBoot is a feature that comes with Bootlace to boot iPhone with your operating system, and not have to reconfigure the default options.
Some requirements:
Here are some mandatory requirements, you need to remember carefully and carefully:
This method only applies to IPhone 2G and 3G Models.
That iPhone needs to be jailbroken first with PwnageTool , Blackra1n And RedSnow . If you jailbreake with JailBreakMe or Spirit , don't continue.
There will be conflicts between Backgrounder and Bootlace, so turn off Backgrounder first.
Assign more Repository:
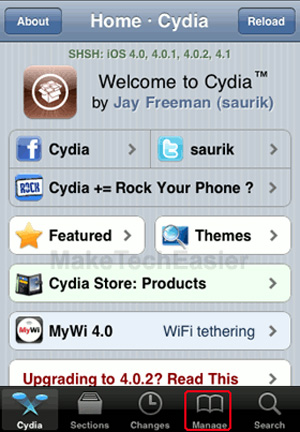
This step is very important so you cannot ignore it. It sounds simple, but it is really necessary for the steps to take later. First, start Cydia And select the Manage Tab:
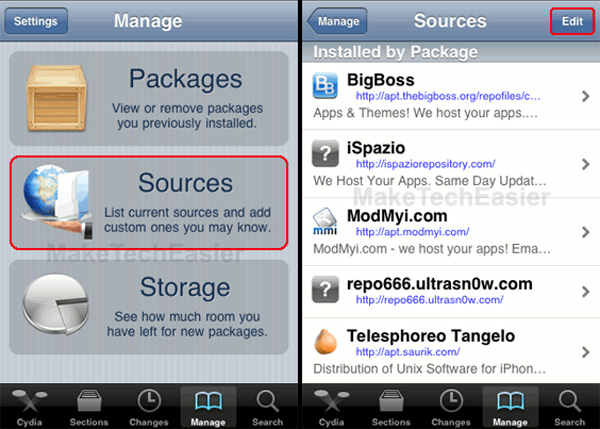
There will be 3 items here, we select Sources> Edit , this button is located in the upper right corner of the screen:
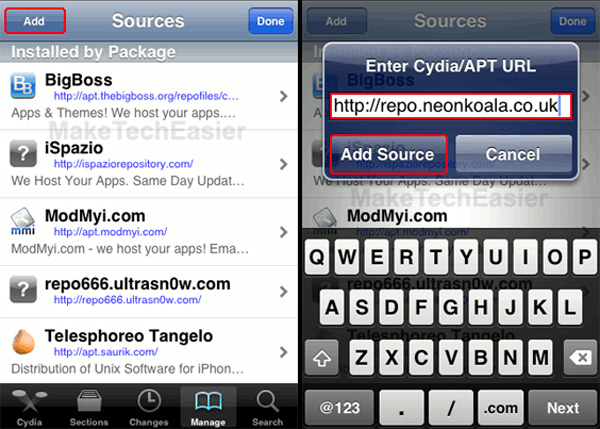
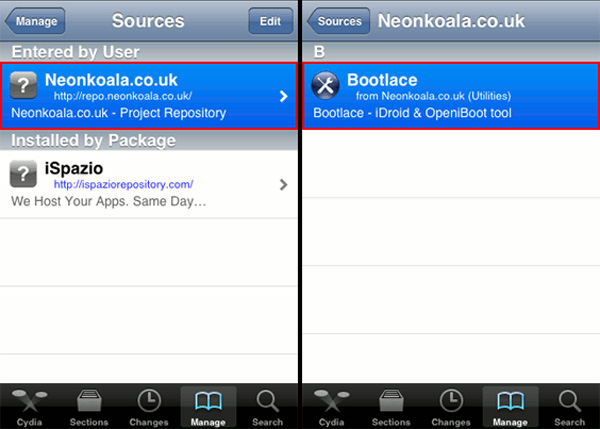
Next, click the Add Button in the upper left corner of the screen and enter the address: Http://repo. neonkoala. co. uk In the Cydia / APT URL box And click Add Source:
When completing the above step, press the Return to Cydia Button and Done After returning to the main Source Screen:
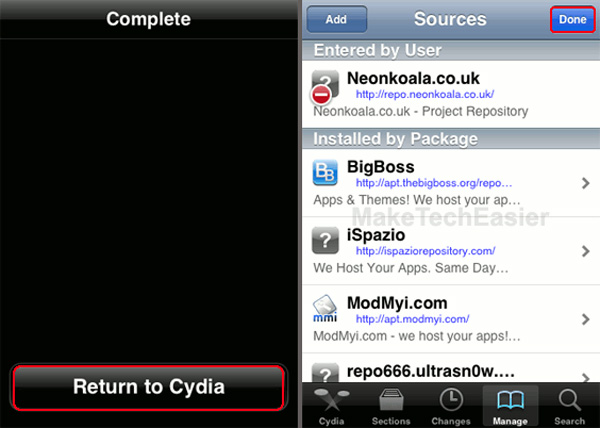
When finished, you can install any other applications from the Repository Just added, here is Neonkoala .
Install Bootlace:
Continue, at the Source Page, select Neonkoala. co. uk> Bootlace As shown below:
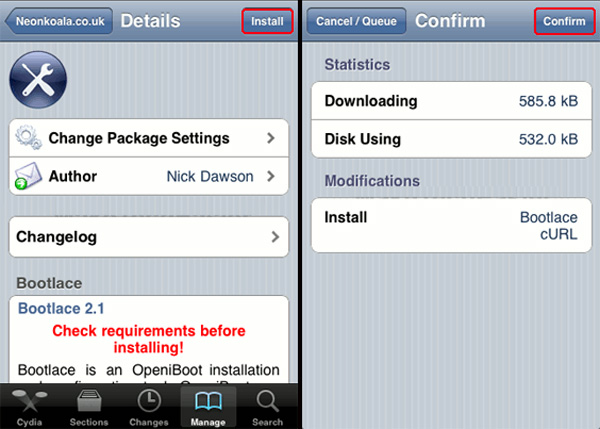
When ready to install Bootlace , you just need to press the Install Button in the upper right corner of the screen and confirm how to press Confirm :
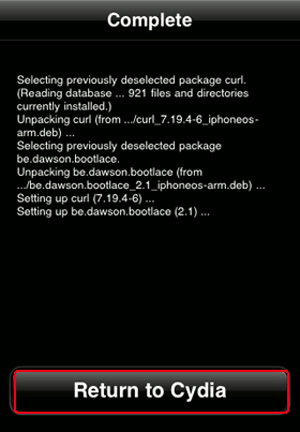
This process is quite fast, and when finished you will see a notification screen as shown below, press Return to Cydia To continue:
Configure and set up Bootlace:
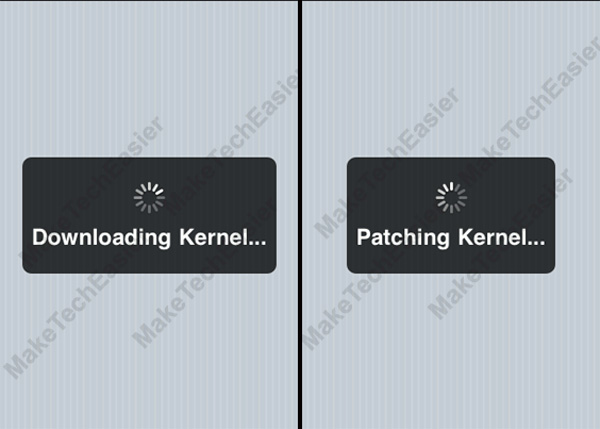
At this step, the steps will be different, so you should be careful when applying. After finishing the installation, click the Home Button to return to the Springboard Main screen, where you will see the Bootlace Icon. When you boot Bootlace , the system will automatically download and install the necessary patches:
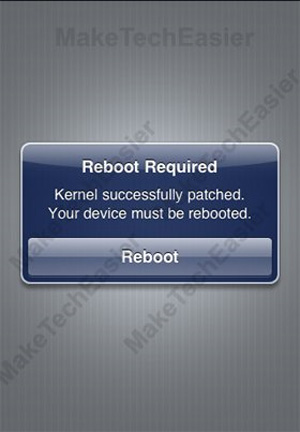
When finished, the system will ask you to reboot the device, click the Reboot Button:
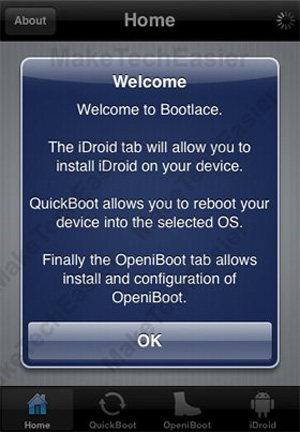
After booting, enable Bootlace Again, click OK At the Welcome Screen:
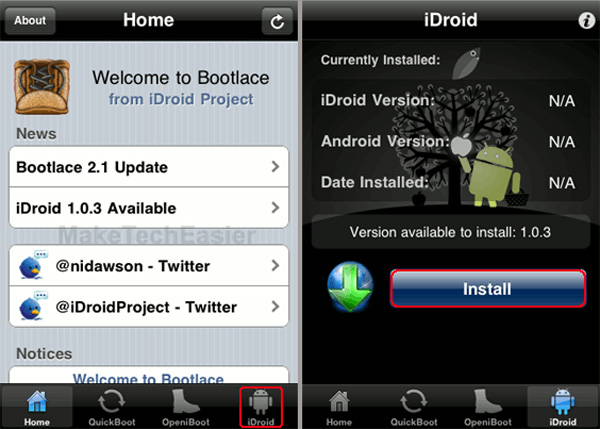
And when this step comes, we will then install IDroid . Select the IDroid Tab as shown below and click Install :
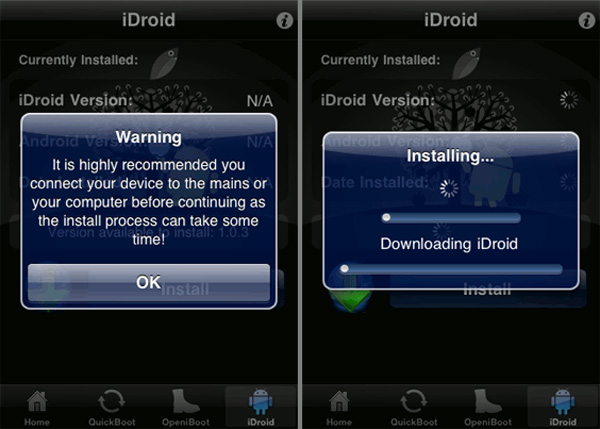
The next warning message appears, click OK To continue:
When finished, select the OpeniBoot Tab and click the Install button to install OpeniBoot :
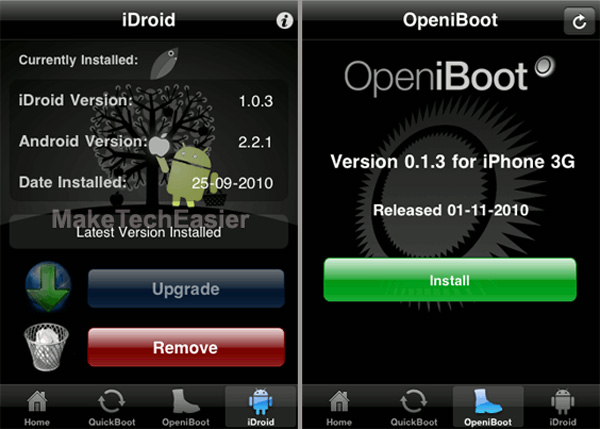
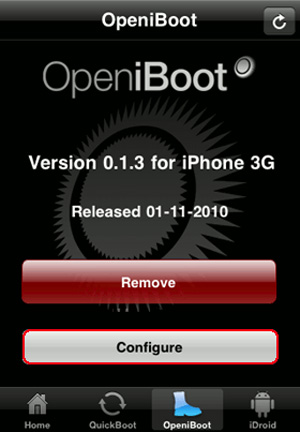
Once completed, we need to configure OpeniBoot By pressing the Configure Button:
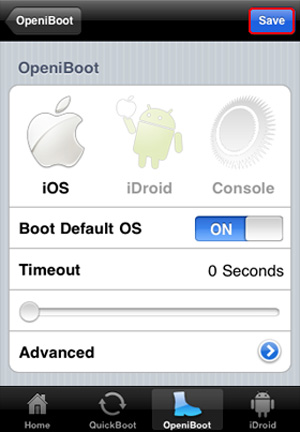
On the next screen, we need to select which default operating system the iPhone uses to boot first. After selecting, remember to click the Save Button in the upper right corner to save the changes:
At this test, we have implemented Android OS 2.2.1 Froyo And everything goes smoothly when working with other Android versions. Good luck!
FAQ
What is the main benefit of instructions for installing and using Android os on iPhone 2g / 3g?
The main benefit is a clearer understanding of the topic and a practical way to apply the information covered in this guide.
What should I check before using instructions for installing and using Android os on iPhone 2g / 3g?
Confirm compatibility, review the required settings, protect important data, and use the latest supported version whenever possible.
What should I do if the result is different?
Repeat the steps carefully, verify permissions and version differences, and consult the product's official support documentation for changes not shown in the article.
Related Articles
 Instructions for Installing Xposed Framework for Android5 minutes read
 Install Android on Your Computer, Run Android in Parallel with11 minutes read
 Is It True That Android Costs More RAM Than iOS?12 minutes read
 How to View the Emoji Emoticons of iPhone on Android6 minutes read
 4 Common Problems When Installing Custom Roms on Android9 minutes read
 How to for Connecting a USB Keyboard to an Android Phone?7 minutes read
Reader Comments 0
Sign in with email or Google to join the discussion.