Instructions for connecting the camera to the computer
The best way to avoid having to delete photos if the camera memory is full is to move the image from the camera to the computer, a good way to free up the memory and store the image in a safe place.
- Part 1: Connect devices together
- Part 2: Transferring photo folders
- Step 1: Open your computer by pressing lightly on the Power button
- Step 2: Open your camera
- Step 3: Use a cable to connect the camera to the computer
- Step 1: Check your connection again.
- Step 2: Click on the DCIM folder, the image folder will appear.
- Step 3: Copy photos from the camera to any drive in your computer.
The memory in your camera is full but you do not want to delete the image. The best way to avoid having to delete photos is to move the camera image to your computer, a good way to free up memory and store images in a safe place.
If you don't know how to connect the camera to a computer, the following article will help you understand the steps to take.
Part 1: Connect devices together
Step 1: Open your computer by pressing lightly on the Power button

Step 2: Open your camera

To connect successfully, your camera must turn on just like when you are about to take pictures.
Step 3: Use a cable to connect the camera to the computer

Use a cable to connect the camera to the computer. One end of the cable you plug into the computer, the other end of the cable plugs into the camera. If you do not know which cable to plug into the camera, read the instructions that came with the camera.
Part 2: Transferring photo folders
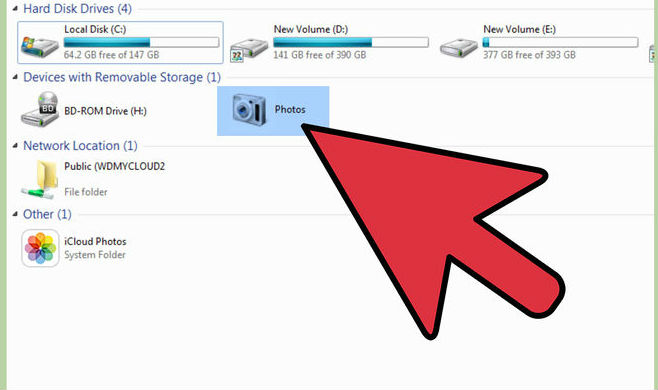
Step 1: Check your connection again.
In the large folder 'My Computer' you check whether the camera icon appears or not. If a camera icon appears, just double-click the icon. In case if there is no icon, you have to repeat the steps as in part 1.
Step 2: Click on the DCIM folder, the image folder will appear.

Step 3: Copy photos from the camera to any drive in your computer.
Good luck!
- Synthesis of 5 software for viewing wifi cameras on computer phones
- Fix iPhone error not connecting to computer
- Advice on how to use the camera to reverse the car for new drivers
- Instructions for connecting a computer to a projector, connecting a laptop to a projector
- How to view Camera on computer simply and quickly
- What to do when the indoor Wifi Camera is defective and hacked?
- Instructions for installing Camera Ezviz on the phone
- The best camera app for Android
- Instructions for installing a wired security camera system
- Instructions for Connecting iPhone to Computer Using iTunes
- How to record on computer using Adobe Audition
- 7 creative ways to reuse or recycle old speakers
- Learn about 2.5 inch, 3.5 inch, 1.8 inch hard drive sizes ...
- This is a list of all CPU sockets
- These free utilities check and diagnose hard drive health
- 7 mistakes easily 'kill' SSDs
- What factors affect CPU performance?
- How to fix keyboard and mouse error when Boot USB installs Win
- What is VRM and how does it affect the performance of the processor
- Basic measurement units in computers
-
 How to open the camera on a Windows computer or laptop.
-
How to turn the camera on and off in Windows 11
-
5 Android camera features only available on foldable phones.
-
These minimalist camera apps will help you fall in love with photography again.
-
Transfer files from computer to phone using just camera – no internet needed
-
How to turn your old phone into a security camera
 How to open the camera on a Windows computer or laptop.
 How to turn the camera on and off in Windows 11
 5 Android camera features only available on foldable phones.
 These minimalist camera apps will help you fall in love with photography again.
 Transfer files from computer to phone using just camera – no internet needed
 How to turn your old phone into a security camera