How to Use Trello
Trello, a virtual whiteboard for project management, has virtually unlimited organizational uses. When you sign up for Trello, you can create boards for different projects and tasks. In each of these boards, you'll create lists for....
Part 1 of 6:
Signing Up
-
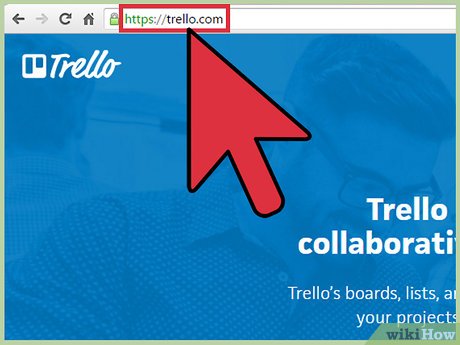 Visit the Trello website. You can create an account using either the website or the Trello mobile app. The app is available for Android and iOS, and can be downloaded from the app store on your device.
- It may be best to get started using the Trello website so that you have access to all of the features and can get used to the interface.
-
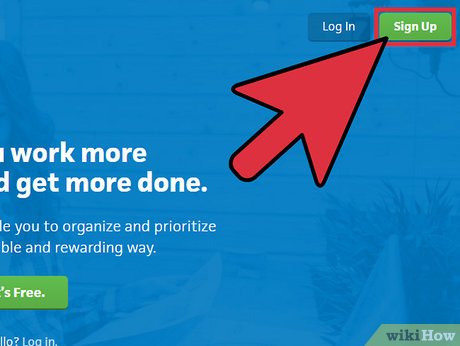 Click or tap "Sign up." This will begin the account creation process.
 -
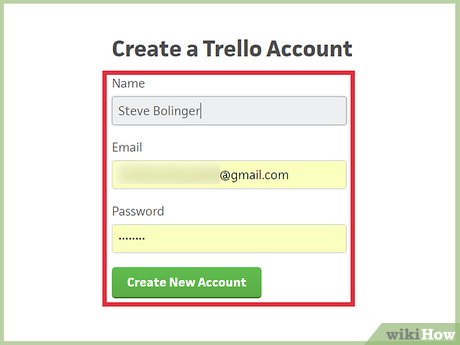 Create a Trello account. You can enter a name, email address, and password to create your account, or you can sign up with your Google account. This will automatically create an account using your Google profile information.
Part 2 of 6:
Creating a Board
-
 Click the "+" button next to your name and select "Create Board." You'll find this in the upper-right corner.
- Boards are the backbone of Trello, and each one serves as the main organizational area for individual projects, events, or collaborations. For example, at home you may have a board for weekly chores, a board for planning an upcoming birthday, and a board for your fitness plan. At work you might have a board for your main project, a board for your calendar, and a board for employee resources.
-
 Enter a title for the board and click "Create." The title is how you'll identify the board in your list. Make sure that the name is clear enough for all of the users you may be inviting to join it.
 -
 Click "Add a list" to add a list to the board. Your board starts without any lists, so you'll need to create one. Lists are the categories for your board, and entries called "cards" will be added and moved between them.
- For example, for a to-do list for your home, you could have a "To-Do" list for everything that needs to get done soon, an "In-Progress" list for tasks you're working on, and a "Done" list for tasks that are complete.
-
 Continue adding lists until your board is properly categorized. After creating the first list, you'll automatically be able to start creating the second. Continue creating lists until you're satisfied with the structure of your board.
 -
 Rearrange lists by clicking and dragging them. You can click and drag a list to move it to another position horizontally on the board. Any cards in the list (see below) will be moved with it.[1]
 -
 Close a board when you don't need it anymore. It's not possible to completely delete a board in Trello. When you don't want to use a board anymore, you can close it so that it no longer appears:
- Delete any cards with sensitive information. While you cannot delete a board, you can delete the cards from it. This is important if you have cards with sensitive information that you want to permanently delete. Open the card you want to delete and then click "Archive." Click the "Delete" button that appears to permanently delete it.
- Open the board menu to close the board. Once you've deleted any sensitive cards, you can safely close your board. You can do this from the board menu.
- Click the "More" option, and then click "Close Board." Click "Close" to confirm.
Part 3 of 6:
Using Cards
-
 Click the "Add a card" button at the top of an empty list. This will allow you to add a card to the list.
- Cards are individual entries that you add to lists. Each card can be a task, idea, recipe, or any other entry that matches your board. You can move cards back and forth between lists as necessary.
-
 Give the card a name. Think of this as the "Front" of the card. For example, in your to-do list for home, you may create a card called "Get lawnmower working."
 -
 Click and drag cards to move them between lists. This is one of the main features of Trello. You can think of it like moving cards across a whiteboard. Moving cards between lists is typically used to show progression, such as moving a card from the "To-Do" list to the "Done" list.
 -
 Click a created card to view the details. This is like viewing the "Back" of the card. You can add detailed descriptions here, add checklists, attach images, and more.
 -
 Click the "Edit the description" link to add a description. You can add more details to the card here, such as detailed instructions, links, phone numbers, or anything else you may need.
- When a card has a description, you'll see a small Description icon underneath the card name.
-
 Click the "Labels" button to add a label to a card. You'll find this button on the back of the card, in the "Add" section. A new menu will appear, allowing you to select from several different colors.
- You can simply label with a color, or you can click the pencil button next to a color and give the label a name. This name will appear over the selected color.
- Cards can have multiple labels as required.
-
 Add a checklist by clicking the "Checklist" button. This creates a checklist for the card. On the main board, a #/# will appear beneath the card name to indicate how many of the checklist items have been completed.
- For example, if your card was to "Get lawnmower working," your checklist may include entries like "Change the oil," "Replace the cord," "Check the belts," etc.
-
 Attach files to cards. Clicking the "Attachment" button allow you to link files from your various cloud storage services, or upload a file to Trello to link.
- If you add an image file as an attachment, it will be added as a "Card Cover" and will be visible from the board list.
- There is a 10 MB file size limit for files uploaded to Trello, but no limit to the size of files shared from Drive and other cloud storage services.
Part 4 of 6:
Collaborating
-
 Open the Board menu. You can open this by clicking the "Show Menu" link in the upper-right corner.
- Trello allows you to invite as many people as you'd like to join your board. You can invite your family members for household boards or your coworkers for your work boards.
-
 Click the "Add Members" button. This will allow you to invite other people to view and edit your Trello board. Adding members will only give them access to the current board.
 -
 Enter the Trello name or email for the person you want to add to the board. If the email address is associated with a Trello member, you'll be able to click their Trello name to immediately add them to the board. If the email address is not associated with a Trello member, you can send an invite to join Trello. When the recipient signs up, they'll immediately join the board you sent the invite for.
 -
 Add members to cards. You can add members to specific cards, which acts like assigning it to them. When a member is assigned to a card, you'll see their profile picture in the corner of the card on the board list.
- Open the back of a card and click the "Members" button in the "Add" section.
- Select the member that you want to assign to the card.
- Assigned members are automatically subscribed to card updates.
-
 Mention other members in card comments. The comments section of a card can be used to communicate with other members. Type @name and then select the member you want to mention in the menu that appears. That member will receive a notification that they've been mentioned in the card comments.[2]
 -
 Create a team. Teams are groups of users that all have access to a set of boards. Using teams allows you to ensure that everyone can see the boards they're supposed to.[3]
- Click the "+" next to your Trello name and select "Create Personal Team" or "Create Business Team."
- Enter the name of the team and give it a description.
- Add members to the team from the Members tab of the Team page.
- Create new boards for the team in the Boards tab of the Team page. You can also transfer existing boards to different teams by clicking the current team when viewing a board and selecting "Change team."
Part 5 of 6:
Getting More from Trello
-
 Create multiple boards to get your life organized. There's no limit to the number of boards you can create, so feel free to make as many boards as you need to get everything organized. To get the most benefit, each board should be for a separate task or concept that will benefit from having multiple lists and cards.[4]
 -
 Use Trello for your creative endeavors. Trello isn't just for business or to-do lists. You can use it to track ideas and structure your creative work.
- For example, you can use Trello to outline a book you want to write, or manage ideas you have for blog articles, or keep a journal.
-
 Use Trello to plan an event. Because of its collaborative nature, Trello makes getting an event organized much easier than relying on emails and phone calls. You can create a board for your event and then invite everyone that will be involved in the planning and execution of it.
- Different lists can be used for different parts of the event that needs planning (food, entertainment, setup, etc.). You can then add specific tasks to each of those lists (potato salad in the "Food" list, put out chairs in the "Setup" list, etc.).
- Once you have your lists and cards setup, you can assign different people to different cards so that they know exactly what they need to do.
- Create a "Done" list that your helpers can drag their cards to after they've finished their tasks.
-
 Add Power-Ups to Trello. Power-Ups are application and service integrations that you can add to your Trello account. There are Power-Ups created by Trello, such as the Calendar Power-Up, and there are Power-Ups created by third parties, such as the Publicate Power-Up.
- Open your Board Menu and click "Power-Ups." If your board is not part of a team, you will be prompted to add it to one.
- Click the "i" button next to a Power-Up name to see details about what it does and how to use it.
- Click the "Enable" button to turn the Power-Up on for your board.
- Start using the Power-Up. The process for using them will vary depending on the Power-Up. Most Power-Ups are integrated into the backs of cards.
-
 Create cards from a spreadsheet. If you have a list of entries into a spreadsheet and you want to convert each one into an individual card, Trello can handle this automatically:
- Highlight all of the entries in your spreadsheet and copy them to your clipboard.
- Start a new card in Trello and paste your copied entries into the card's text field.
- Select "Create # Cards," which will create individual cards from each of the entries you copied.
-
 Use special markdown to add text formatting to your cards. You can make the text on your card bold, italic, or code, and you can create hyperlinks by using special characters:
- **bold text** - bold text
- *italic text* - italic text
- `code text` - code text
- [Hyperlink text](http://www.example.com) - Hyperlink text
Part 6 of 6:
Using the Mobile Apps
-
 Install the Trello app on your mobile device. Trello is available for Android and iOS. You can download it for free the app store on your device.
 -
 Log in with your Trello account. You'll be asked to log in when you start the app for the first time. Log in with your Trello account, or click "Log in with Google" if you created your account by linking your Google account.
 -
 View your boards. When you log in, you'll see all of your available boards. Tapping on a board will open it so that you can view the lists and cards.
 -
 Swipe left and right to view your lists. When holding your phone vertically, each list will take a screen, and swiping will move to the next list. When holding your phone horizontally, swiping left and right will scroll smoothly through your lists.
 -
 Tap a card to view the back. When you tap a card, you'll see the details on the back. You can add items like checklists to the back of the card by tapping the "+" button.
 -
 Tap the "Add Card" button at the bottom of a list to add a new card. You'll be prompted to enter a card name. You can tap the Camera button to take a photo with your phone's camera or attach a different file to the card.