How to use iMessage on Android with AirMessage and Mac
There are several reasons you want to use iMessage on an Android device. For example, you have friends who use iPhone and don't want your messages to appear as green bubbles. You may also use an iPhone as your main phone, but sometimes use an Android phone.
It seems that Apple will not bring iMessage to Android, but fortunately, you do not have to wait in vain anymore. AirMessage allows you to use Apple services on Android, but with an important note: You will need to run server software on your Mac. Here is how to do it in detail.
Use AirMessage and Mac to set up iMessage on Android
- What special iMessage?
- Set up AirMessage server on Mac
- Set Port Forwarding (port forwarding)
- Set up AirMessage on Android device
- Customize AirMessage
- How to use iMessage on Android forever
What special iMessage?
Unlike text messages, use SMS protocols for text and MMS for images, iMessage uses the Internet. This allows iMessage to perform more standard messages and also means that you can use iMessage over WiFi (or with mobile data).
Until now, the main problem with iMessage is that it only works on Apple devices. What AirMessage does is use a server software to send messages via iMessage on a Mac.
Technically, you're still sending messages on your Mac and just need to use an Android device to activate it.
Set up AirMessage server on Mac
To get started, visit the AirMessage website and download the AirMessage server for macOS. The software runs on OS X 10.10 via the latest macOS version. Double-click the file in Finder to extract the AirMessage application, then drag the file to the Applications folder in the list on the left.
Then, double-click the AirMessage icon in the Applications folder to open the software. You may receive a message stating that the application cannot be opened because it comes from an unknown developer. Therefore, you will have to launch the application from elsewhere.
Open System Preferences and go to the Security & Privacy section . In the General tab , you will see a similar message at the bottom of the window. Click the Open Anyway button to launch the application. The message indicates that you need to change the settings to run the application that will appear.
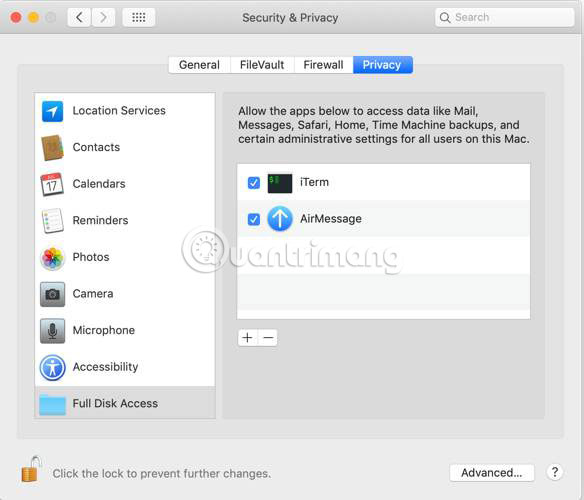
Go back to the Security & Privacy menu, but this time click on the Privacy tab . Scroll down to Full Disk Access , click the lock icon and enter the admin password. Now press the plus button near the center of the window and select AirMessage from the application list. Make sure the checkbox is selected before continuing.
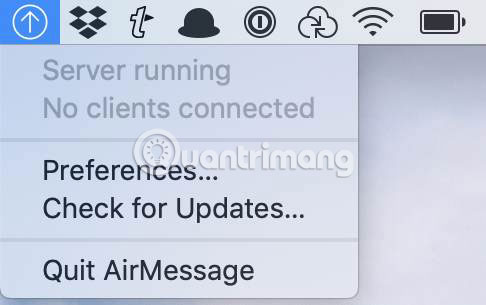
Now all that's left is to open AirMessage again to start the server. Make sure that the drop-down menu is listed in Server Running. For security, change the default password.
Set Port Forwarding (port forwarding)
Next, you'll need to set up port forwarding on the router, to allow AirMessage to communicate with the server software on the Mac over the Internet. This allows AirMessage to be used no matter where you are, as long as the computer is running at home.
The process of setting up port forwarding will vary depending on the router, but the manufacturer will have its own instructions. The article will point to the basic steps. The actual implementation may be slightly different.
First, you will need to note the computer IP address. Open Preferences, then go to Network. Near the top of the window, you will see a message showing the connected network. IP addresses are also listed here.
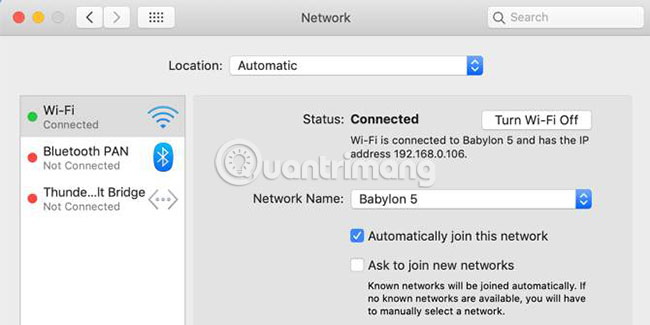
Now navigate to the router settings. Access 192.168.0.1 or 192.168.1.1 in the web browser. If both of these addresses are inactive, click the Advanced tab in the lower right corner of the WiFi window, where the computer IP address has been checked. Select the TCP / IP tab and you will find the address next to the Router.
In the router configuration table, find the port forwarding settings (possibly in the Advanced heading) . Create a new entry with the computer IP address and the AirMessage port used. By default, it is 1359. For the protocol, select TCP. After doing this, restart the router.

Now, check carefully if the port is relayed correctly. To do this, you can use a website like PortCheckTool.com.
Set up AirMessage on Android device
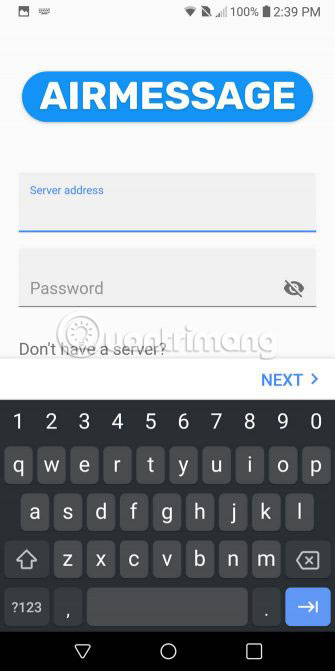
Now, the complicated setup has ended. You can download and install AirMessage from Google Play. After opening the application, it's time to log in to the server.
You will need a public IP address on your computer, by entering 'My IP Address' on Google or by visiting a website like WhatIsMyIP.com.
Enter the server IP address and password previously set. If everything is successful, you will be logged in and prompted to download old messages. Now you can send and receive messages via iMessage on Android just like when using iPhone.

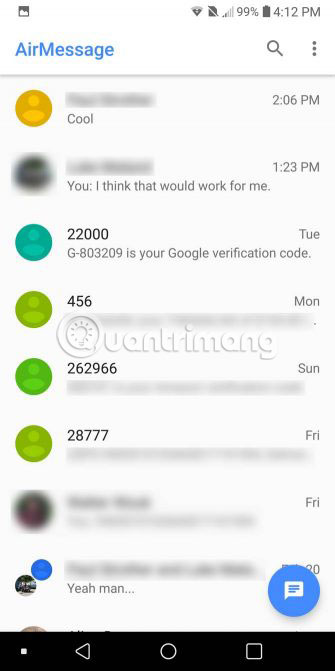
Customize AirMessage
There are a few options that you can use to adjust AirMessage to your liking. The application has both a light and dark theme. You can leave the system default options or change them to suit the time of day. To make chatting more fun, you can also enable Rainbow Chat.
You can also customize notification settings. You can turn it on or off completely, skip the Do Not Disturb option and select the number of messages displayed on the lock screen.
How to use iMessage on Android forever
If you like AirMessage and plan to continue using it, there are a few suggestions to consider. First of all, for AirMessage to work, the computer must run continuously. When using a laptop, that could be a problem. If you have an old Mac Mini, this will be the time to take advantage of it.
Another problem is that both Private and Public IP addresses tend to change after a while. This can cause problems with both port forwarding and using the AirMessage application.
For Private IP addresses, you can use the Address Reservation feature (preset the dedicated address for the computer or the device that runs the services) in the router to ensure that the IP address remains the same. Refer to the router documentation to learn how to do this. For public IP addresses, everything is somewhat more complicated.
You will need to use a dynamic DNS provider for a public IP address. This ensures that even if your ISP changes your IP address, you can still use the same IP address with the AirMessage application on your Android device. If you need suggestions, consider the 6 best free dynamic DNS providers suggested by TipsMake.com .
Hope you are succesful.