Table of Contents
Follow the instructions below to use face id feature on Android efficiently and safely. Each section focuses on the actions, settings, and troubleshooting details that matter most.
The Face ID feature provides high device security, when users are required to scan their faces when looking directly at the camera on the device. And the app IObit Applock on Android also has the same feature. You can also lock your device by face and fingerprint like Face ID feature on iPhone X. The steps below explain how to use IObit Applock on Android.
How to use IObit Applock on Android
Step 1:
Go to the link below to download IObit Applock application to your Android device.
- Download the IObit Applock app
Step 2:
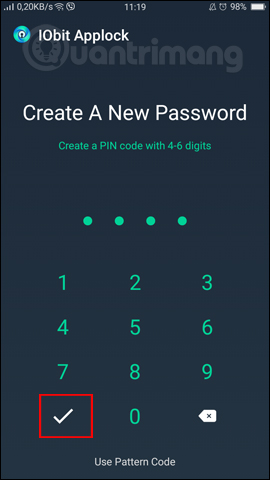
Start the app. In the first interface you need to Create security for the app , by drawing security pictures or using Pin code by clicking Use PIN Code. Press the Tick To set the password.
After that is a confirmation step (Confirm) the picture or password set.


Step 3:
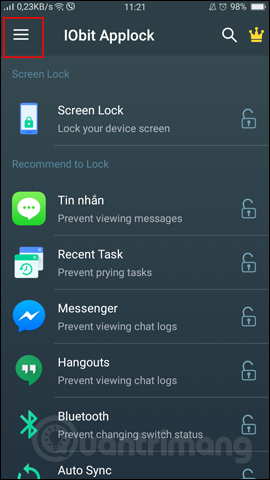
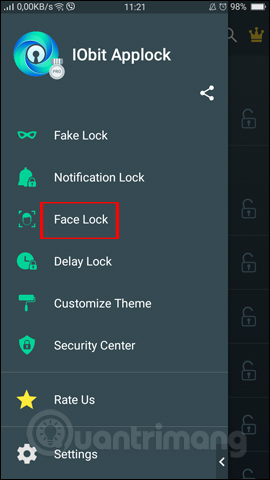
In the main interface of the app, click The 3 dashes icon In the top left corner of the interface. Appears a list of settings options for the app, click Face Lock .
Step 4:
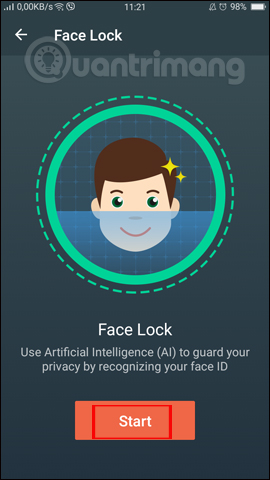
Face Lock interface appears for users to conduct face scanning and device protection. Click Start To start. We wait For AI Face Lock to Complete the Download Process on the device.
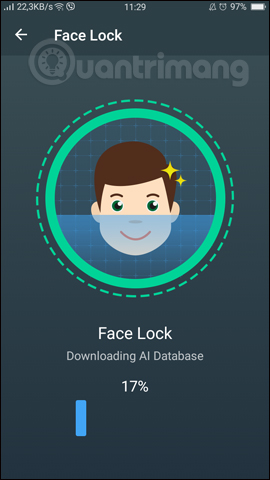
Step 5:
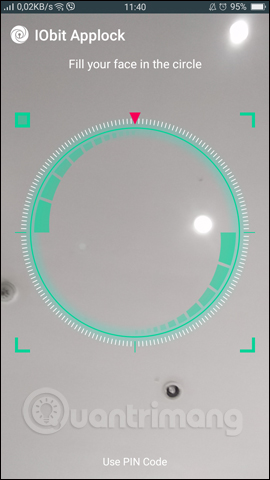
Switch to the new interface, users click the Enable Now Button to conduct a scan of the face and iris. Next, press OK To let IObit Applock Application To use the camera On the device. Finally, sweep the face and iris. Successful scanning when we see a green mark on the interface.
Notice to users , to put the face in the right big green color area, keep the head straight and not the small blue circle to get into your eyes.
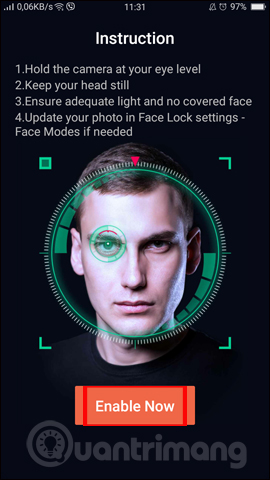
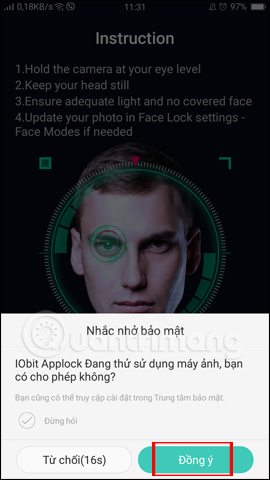
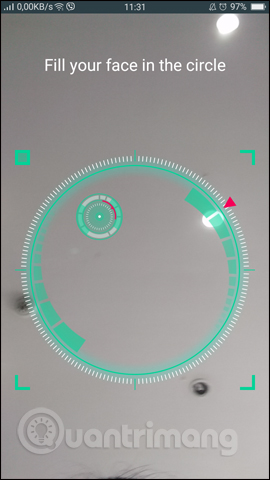
Step 6:
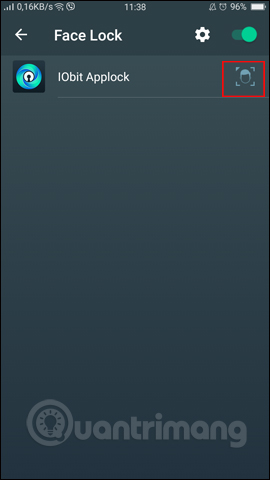
When scanning the successful face will switch to the Face Lock interface, you will see The face scanning icon As shown. So when needed to open the IObit Applock Application , We will have more options to scan the face and iris.
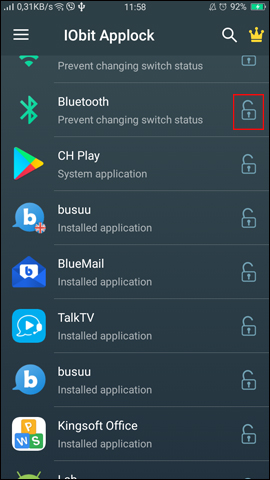
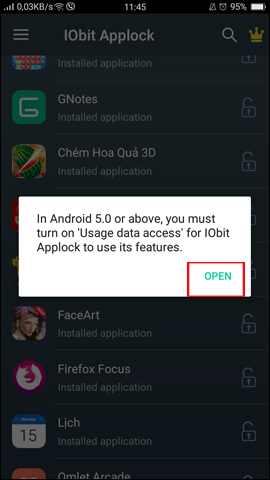
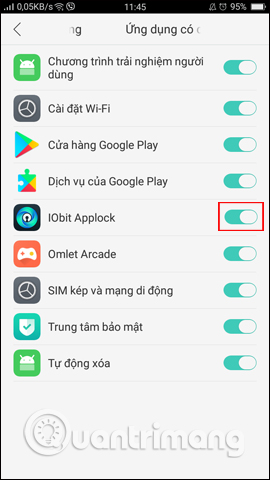
Press the upper arrow to return to the main interface. Here we will have more options to lock the device screen (Screen Lock), messages or applications on the device by scanning the face. click The lock icon Next to the app you want to lock. Then users will be asked to allow the app to use the data, click Open .
Put the horizontal bar to the right at IObit Applock To grant data access.
Step 7:
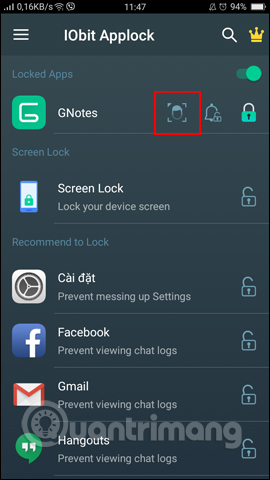
Go back to the app selection interface and you will see that the selected application has more security by scanning the face, clicking on The face scanning icon . Thus the app has been secured by scanning the face. You can take any application or even unlock the screen into face scanning mode for protection.
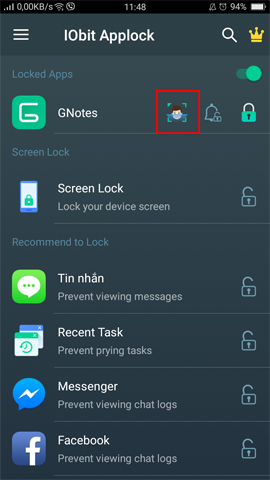
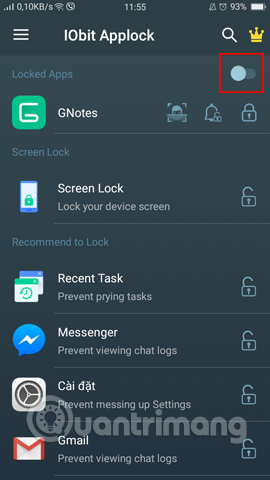
To Turn off the protection of applications with face scanning , Locked Apps Users will push The horizontal bar to the left .
To Turn off protection by scanning faces For all programs that have been set up, including the IObit Applock application, access the Face Lock Section and also Flip the horizontal bar to the left As shown.
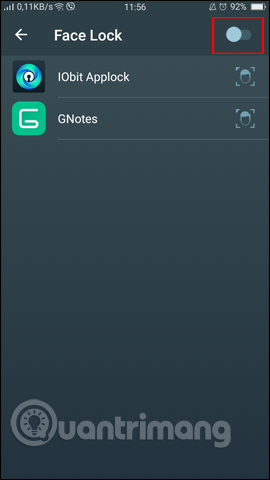
So, with the IObit Applock application on Android, we can lock the screen with the security of scanning faces and faces. You can even put any application or setting item on the device into face scanning mode.
I wish you all success!
FAQ
What should I prepare before I use face id feature on Android?
Review the requirements in the guide, confirm that your device or software is compatible, and save important work before changing settings related to use face id feature on Android.
Why might use face id feature on Android not work as expected?
The most common causes are incompatible versions, missing permissions, incorrect settings, or an interrupted internet connection. Recheck each step and restart the app or device when appropriate.
Can beginners follow these use face id feature on Android steps?
Yes. Follow the steps in order, avoid skipping confirmation screens, and compare your interface with the screenshots because labels may differ slightly between versions.
Related Articles
 Unlock Your Phone with Face on Android 5. 05 minutes read
 What Is Face Id? How to Use It?10 minutes read
 4 Ways to Improve Face ID Stability5 minutes read
 Picasa 3.5: Add Face Classification Feature7 minutes read
 The Face Detection Feature of the OnePlus 6 Is Easily Overcome by a Printed Photo3 minutes read
 What Is 3D Face Security? on Which Phone?6 minutes read
Reader Comments 0
Sign in with email or Google to join the discussion.