How to Turn Off Google Chrome Updates Completely
Today's TipsMake will show you how to prevent Google Chrome from automatically updating on Windows, Mac, iPhone and Android platforms. Note that stopping updating Google Chrome puts your device and other devices and systems at risk of hacking or cyberattacks.
Table of Contents
On Windows

Save unfinished work. You will have to restart your computer at the end of this method, so make sure you save everything before continuing.

Open Start. Click the Windows icon in the lower left corner of the screen. The Start menu will pop up.
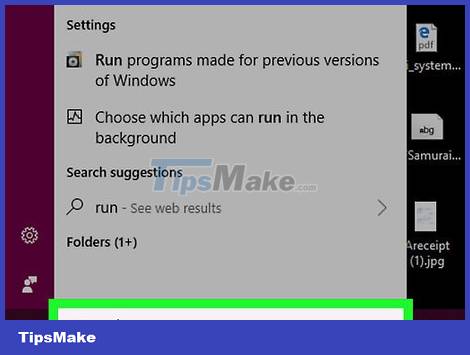
Type run. The Run program will be found on the computer.
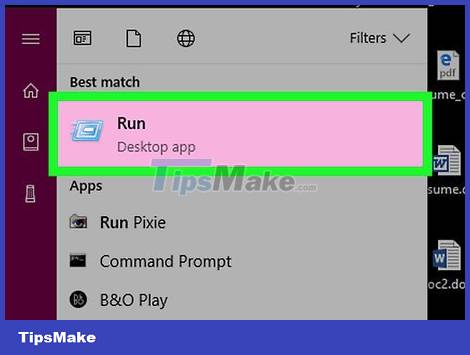
Click Run . The icon with the envelope in flight is at the top of the Start menu. Once clicked, the Run window will open on the left side of the screen.
You can later open Run by pressing ⊞ Win+R.
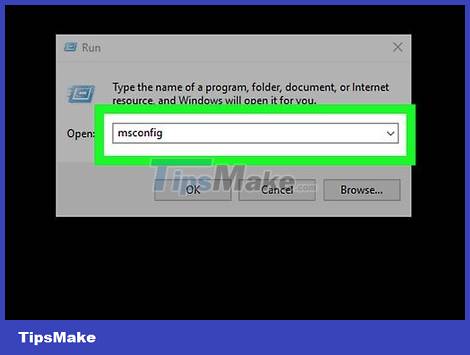
Type msconfig into the Run text box. When run, this command will open the Windows System Configuration window.

Click OK at the bottom of the Run window. The System Configuration window will open.

Click the Services tab at the top of the System Configuration window.
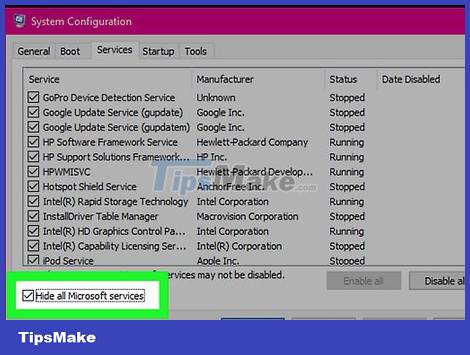
Check the box "Hide all Microsoft services" (Hide all Microsoft services) in the lower left corner of the window. This will reduce the number of services listed here and prevent you from accidentally disabling an important Windows service.
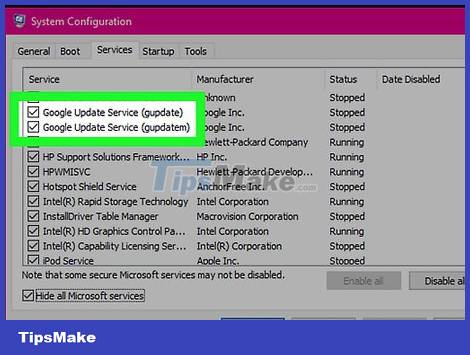
Scroll down until you find two "Google Update Service" services. They are all from the manufacturer "Google Inc." And often lie next to each other.
You can sort by manufacturer by clicking the Manufacturer tab near the top of the window.

Uncheck the "Google Update Service" boxes. Click the check box to the left of each "Google Update Service" item.
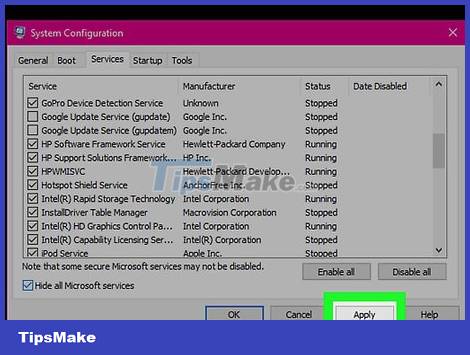
Click Apply at the bottom of the window. All Google Update services will be discontinued.
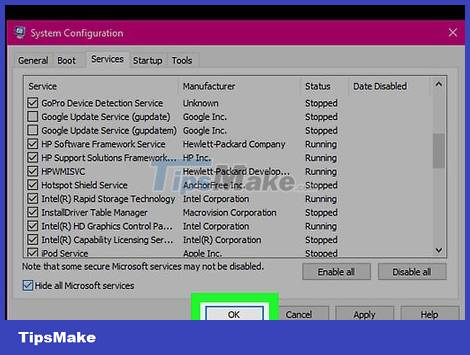
Click OK at the bottom of the window.
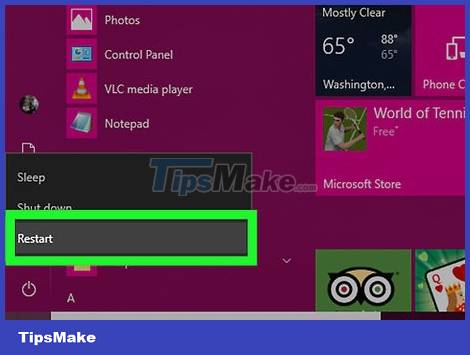
Click Restart when prompted. The computer will save the changes and restart, from now on, Google Chrome will no longer automatically update.
On Mac
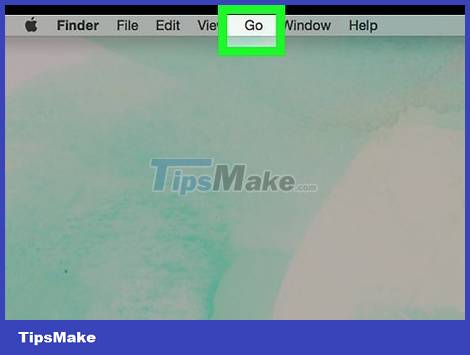
Click the Go preferences item at the top of the Mac screen. A drop-down menu will appear.
If the Go preferences item is not found, click the desktop, or open Finder to turn it back on.

Hold down the ⌥ Option key at the bottom left of your Mac's keyboard. The Library folder will appear in the Go drop-down menu.
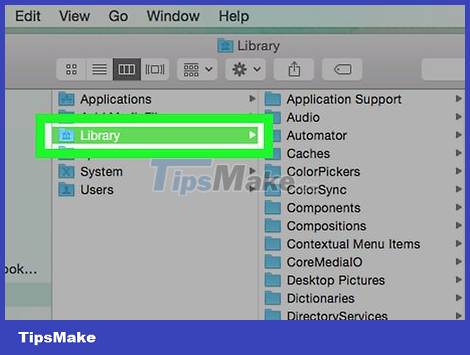
Click Library near the bottom of the Go drop-down menu. The Library folder will open.
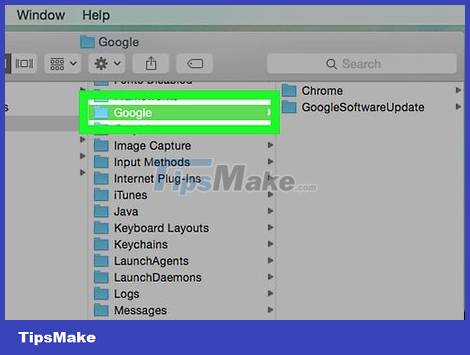
Open the "Google" folder. Scroll down until you find the folder labeled "Google", double click.

Select the "GoogleSoftwareUpdate" folder. Click on this folder (located in the Google folder).
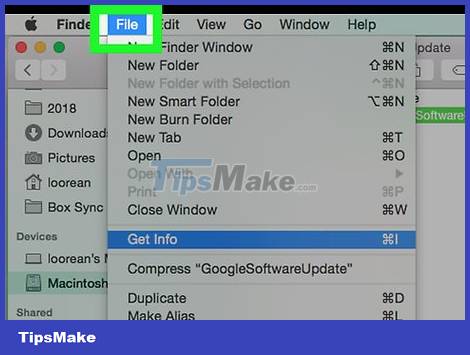
Click the File option in the upper left corner of the screen. A drop-down menu will appear.
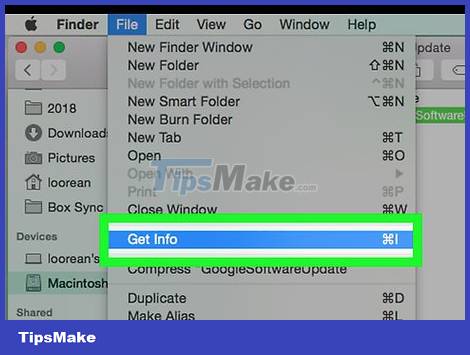
Click the Get Info action in the File drop-down menu. The Info window will open.
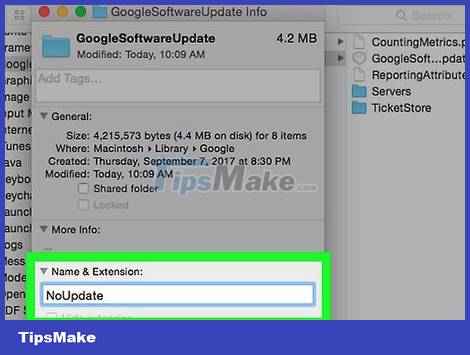
Rename the folder. Select the folder name at the top of the window, then enter a different name (for example, NoUpdate).
You may need to click the clock icon in the lower right corner of the window and then enter your user password.

Click ⏎ Return. The folder name will change.
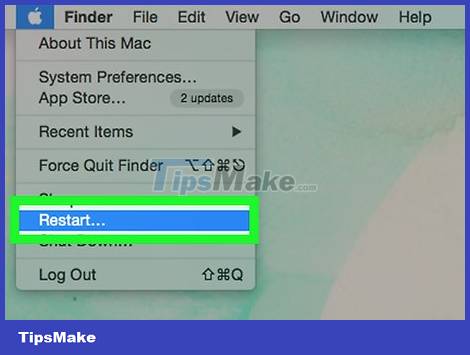
Restart the Mac computer. Click the Apple menu, click Restart., and then click Restart Now. After your Mac restarts, Chrome will no longer automatically update.
On iPhone

Open your iPhone's Settings app. Click the Settings app icon with the gear icon in the gray frame.
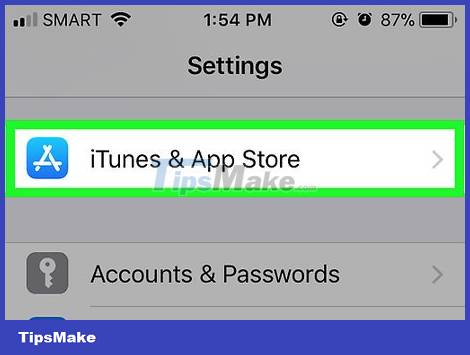
Scroll down and tap iTunes & App Store (iTunes & App Store). This option is located in the middle of the Settings page. The App Store settings page will open.
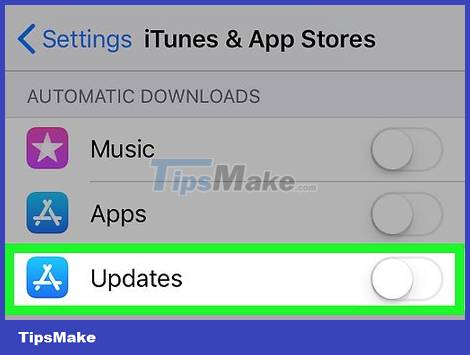
Click the green "Updates" button. The switch will then be grayed out and disable automatic app updates, meaning no apps—including Google Chrome—will automatically update from now on.
On Android
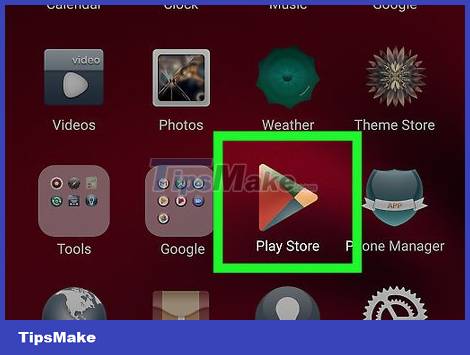
Open the Google Play Store (Google App Store) of Android. Tap the Google Play Store app icon with a multicolored triangle on a white background.
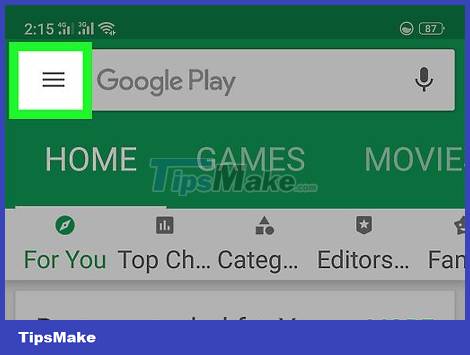
Tap the ☰ button in the upper-left corner of the screen. A menu will pop up.
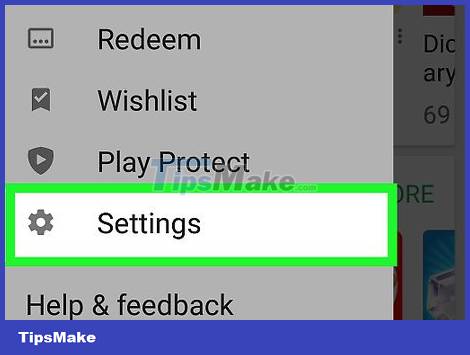
Click Settings . This option is in the middle of the pop-up menu. The Settings page will open.
On some Androids, you may need to scroll down to find Settings.
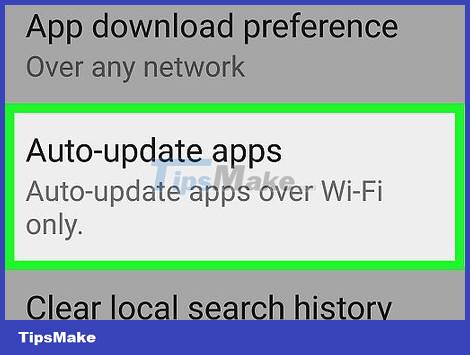
Tap Auto-update apps near the top of the screen. Another menu will open.

Tap Do not auto-update apps . This option is at the top of the pop-up menu. Automatic app updates will be disabled, meaning no apps—not even Google Chrome—will be able to update themselves from now on.
Was this article helpful?
Your feedback helps us improve.
Related Articles
 Google postpones automatic updates to turn off Chrome sound due to many web games2 minutes read
 Instructions to turn off Chrome automatic updates in Windows4 minutes read
 Google Chrome Enterprise updates to be more business friendly2 minutes read
 Why shouldn't auto-update automatically be updated in Chrome?5 minutes read
 Turn off Windows 10 updates, 9 ways to completely block Windows 10 updates15 minutes read
 Google halted Chrome release to 'keep the situation steady'2 minutes read
Reader Comments 0
Sign in with email or Google to join the discussion.