Table of Contents
With ChatGPT, you can add a signature image to a PDF during your workflow without needing to use multiple different tools.
ChatGPT can work with uploaded PDF and image files and may be able to create a revised PDF that places a signature image at a specified location. This is best treated as a document-editing task, not as proof of identity. Pasting an image of a handwritten signature is different from applying a certificate-based digital signature, and it may not satisfy the legal or technical requirements of the recipient.
Before uploading the files
- Use only your own signature or one you are explicitly authorized to place.
- Remove unnecessary personal, financial, medical, or confidential information when possible, and follow your organization's file-handling policy.
- Ask the recipient whether an image signature is acceptable or whether the document must go through an approved e-signature service.
- Keep an unchanged copy of the original PDF.
Describe the exact page, field, size, and alignment. For example: “Place the attached transparent PNG signature inside the signature box on page 3. Do not change any other text, page dimensions, or form fields. Return a new PDF.” After downloading the result, compare it with the original page by page and verify that no text, checkboxes, dates, or pagination changed.
Official OpenAI documentation explains how to create, preview, and refine PDF files in ChatGPT. For dedicated alternatives, see TipsMake's guides to PDF readers with signing tools and PDF editing software.
With just a few simple steps, you can quickly add signatures to documents, check content, and finalize files. This workflow can be convenient for informal documents, provided the recipient accepts an image-based signature. This article will guide you on how to add a signature image to a PDF on ChatGPT.
How to add a signature image to a PDF on ChatGPT
Step 1:
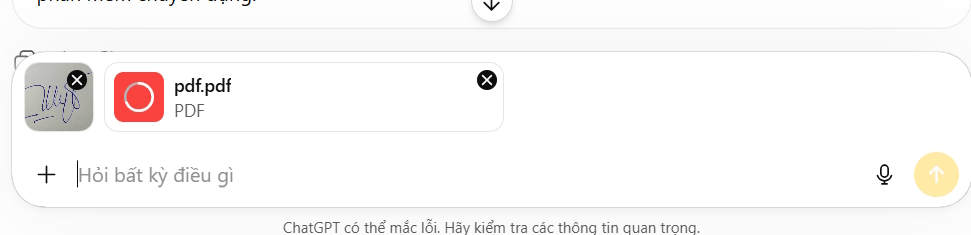
First, access ChatGPT, then select the file upload option, and upload the PDF file and the signature image file. It's recommended to write your signature on a blank piece of paper so ChatGPT can easily recognize it and remove the background.
Step 2:
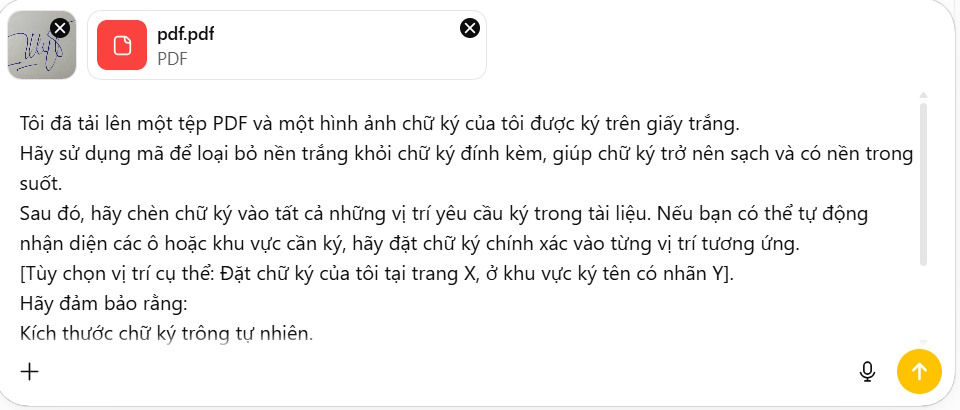
Then, enter the following command to extract the signature from the uploaded file and insert it into the PDF file.
Tôi đã tải lên một tệp PDF và một hình ảnh chữ ký của tôi được ký trên giấy trắng. Hãy sử dụng mã để loại bỏ nền trắng khỏi chữ ký đính kèm, giúp chữ ký trở nên sạch và có nền trong suốt. Sau đó, hãy chèn chữ ký vào tất cả những vị trí yêu cầu ký trong tài liệu. Nếu bạn có thể tự động nhận diện các ô hoặc khu vực cần ký, hãy đặt chữ ký chính xác vào từng vị trí tương ứng. [Tùy chọn vị trí cụ thể: Đặt chữ ký của tôi tại trang X, ở khu vực ký tên có nhãn Y]. Hãy đảm bảo rằng: Kích thước chữ ký trông tự nhiên. Chữ ký được căn chỉnh đúng vị trí. Không che khuất bất kỳ nội dung quan trọng nào trong tài liệu. Sau khi hoàn tất, hãy cung cấp cho tôi tệp PDF đã ký để tôi tải xuống.
Step 3:
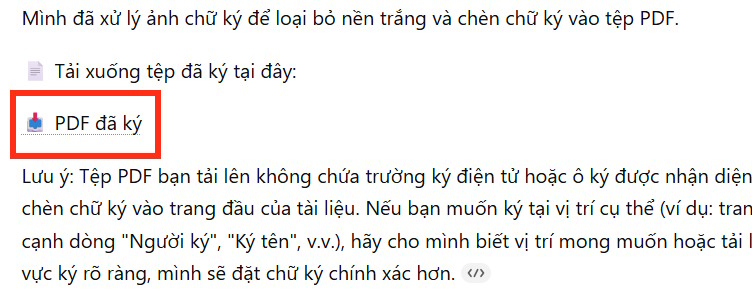
Wait a moment for ChatGPT to read the document. Then ChatGPT will automatically export a PDF file with the complete signature for you to download.
Related Articles
 OpenAI Enables ChatGPT to Chat Directly with Apps: Complete Guide4 minutes read
 How to Sign a Document with GIMP: Step-by-Step Guide5 minutes read
 How to Run Applications Inside ChatGPT9 minutes read
 How to Use Shazam in ChatGPT3 minutes read
 4 Ways to Use Chatgpt to Manage Time8 minutes read
 ChatGPT on the Web Can Now Send Emails Directly: How to Use the New Feature7 minutes read
Reader Comments 0
Sign in with email or Google to join the discussion.