How to Replace a DC Jack in a Laptop
Part 1 of 2:
Dis-Assembly
-
 Turn off the laptop.
- You never want to begin repairing a laptop or any electrical system while the power is still on. It could shock you and/or damage the internal components.
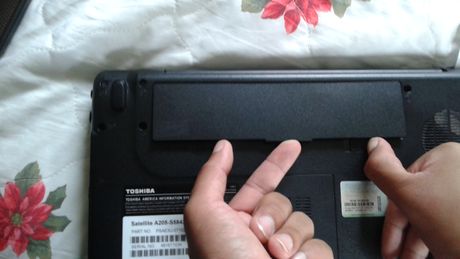
- Pull out the battery.
- It is located at the bottom of the laptop. It will have two spring loaded tabs that you pull out while taking the battery out.

- It is located at the bottom of the laptop. It will have two spring loaded tabs that you pull out while taking the battery out.
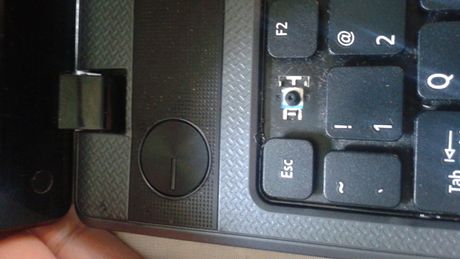
- Hold down the power button for 40 seconds.
- This will discharge static electricity that can damage your laptop's sensitive components.
-
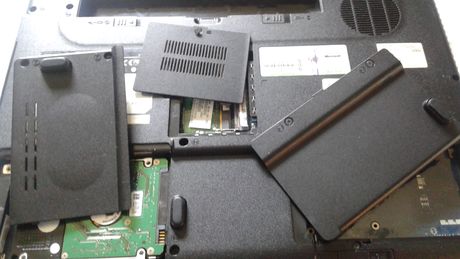
 Unscrew the hard drive and RAM doors.
- Some screws will not come off, they are simply unscrewed, but remain attached to the hole that it is in, when you take the door off.
-

 Pull out RAM cards. Take a picture.
- The RAM card is a small rectangular circuit board, held in to a silver housing.
- Where you see the screwdrivers touching, you must push those tabs out and the RAM card will pop up.
- When pulling these out you want to push the tabs out on each side and the RAM card will pop up and you can pull it out very easily.
- You should never have to force the RAM cards out.
-
 Pull out the hard drive. Take a picture.
- Easily pulled out from its connection.
- Pull out the keyboard screw cover. Use the computer chip lifter.
- You can pop the edges out, when running the computer chip lifter by the joints.

- You can pop the edges out, when running the computer chip lifter by the joints.
-
 Pull off the keyboard slowly. Take a picture
- Unscrew the screws that are holding it to the laptop.
- The is a strip connector in the motherboard that can break if yanked.
- There will be a plastic lock that has two locking tabs you must pull those out in order for it to let the strip loose.


- Unscrew screws from under the keyboard.
- screws are not connected to the keyboard itself, but to the face-plate directly under where the keyboard was.

- screws are not connected to the keyboard itself, but to the face-plate directly under where the keyboard was.
- Unscrew the screws from under the laptop and unscrew the small screws from the battery opening.
-
 Pull out the DVD drive.
- Unscrew its screw.
- Put a paper clip in its manual open hole and the DVD drive will be able to be pulled out.
-
 Pull off top plate slowly. Take a picture.
- Cords from the power button and the touch pad will be attached to the motherboard. These need to be pulled off before you can pull it off entirely.
- Once those have been disconnected pull off the top plat by its edges.
- Once that is off the motherboard will be exposed.
-
 Unscrew the screws attaching the motherboard to the chassis. Take a picture.
 - Pull the fans power cord from the motherboard. Take a picture
-
 Unscrew the fan from the motherboard.
 -
 Pull of any cords connecting to the motherboard and flip it over. Take a picture, possibly more than one in order to get all of the details.
- The DC jack will look like this.
-
 Pull out the old DC jack from the motherboard and from the chassis (input and output). Take a picture.
 - Insert the new DC jack to the motherboard and chassis.
Part 2 of 2:
Re-Assembly
- Place motherboard in place in the chassis that it was taken from before flipping it over.
- The motherboard will have to be played with a little in order to get it in. It will go in in the exact same way it was taken out.
- Sometimes, depending on the laptop that you have, the headphone and mic jacks, the ethernet cord port will have an opening in the chassis that you can fit in.
- During this process, try not to flex the motherboard too much.
- Reconnect all cords to the motherboard.
- This usually includes: touch pad, keyboard, power button, USB cords, Wired internet cords, wifi adapter. Anything that you unplugged while taking the motherboard out.
- Reference the pictures you took during dis-assembly
- Screw in the fan and plug in its cord.
- The fan will go in same way it came out.
- Re-attach the face plate.
- Be sure to plug in its cords while connecting it.
- The joints will be connecting to each other and slicking when they have been connected. That is how you know the chassis and face-plate are connected.
- Plug in the keyboard.
- Be sure to plug in its strip to the motherboard before laying it flat and screwing it in.
- This goes in, in the opposite of its removal. You will have to connect the strip to the locking tab.
- After you connect the strip connector to the locking tabs. Give it a very light tug to make sure it is locked in.
- Screw in screws to the back of the laptop.
- Insert DVD drive.
- It will slide right in to the slot.
- There is a screw that holds the DVD drive to the bottom of the laptop, it will be a small screw. Screw that in now.
- Insert RAM cards.
- Slide Ram into its port the opposite way that it was removed and when you hear a click, its in.
- Insert the hard drive.
- The hard drive will slide in very easily just as it was pulled out.
- Cover the RAM cards and hard drive with their respective doors and screw those in.
- Troubleshoot as needed:
- If you can't remove the DC jack it may not be a plug in type some must be de-soldered. Before beginning the repair search the type of DC jack within your specific laptop.
- If some screws don't go back in, you may have gotten confused with the screws. Different parts of the laptop carry different sized screws.
- Most times the laptop doesn't need half the screws in it, the screws make it stronger against drops. You can purchase the screws in most electronic and/or computer repair stores.
- If after the repair is complete and the laptop still does not charge or turn on, you may have had another problem. Take a look at the Related Article about diagnosing this problem. The problem could have a simple fix.
- If the keyboard is not working, you will have to remove the keyboard and make sure that the strip connector is locked in.
- If the DVD drive doesn't slide into its slot smoothly, don't try to jam it in that could damage a cord. Use the computer chip lifter to move the cords out of the way of the DVD drive.
Share by
Marvin Fry
Update 04 March 2020


