Table of Contents
1. Project the iPhone screen onto the computer with 3uTool
This guide explains how to project iPhone Screen on Computer, with clear steps, practical tips, and important checks before you begin.
After installation, connect your iPhone to the computer with a USB cable and open the 3uTools application. Next, click on ToolBox (1) => Realtime Screen (2) .
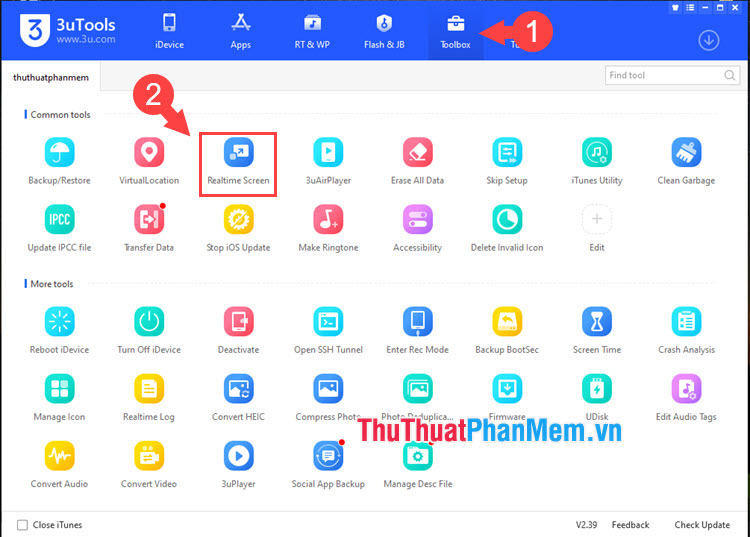
Step 2: After that, the screen on the iPhone will automatically transfer to the computer screen. On the slideshow Realtime Screen of 3uTools there are tools to support us such as:
- Save to Local: Save screenshot to computer.
- Copy to Clipboard: Save screenshots to the Clipboard, so you can paste pictures into Word, folders. quickly with Ctrl + V.
- Open Screenshot Directory: Open the folder containing the screenshot.
- Full Screen: Turn on full screen mode of 3uTools application.
- Lanscape Mode: Rotates the screen horizontally.

2. Use the LonelyScreen application
Note: Before using this method, both the iPhone and the computer must connect to the same network to be able to identify the device.
Step 1: Download and install the software at https://as. lonelyscreen. com/download. html
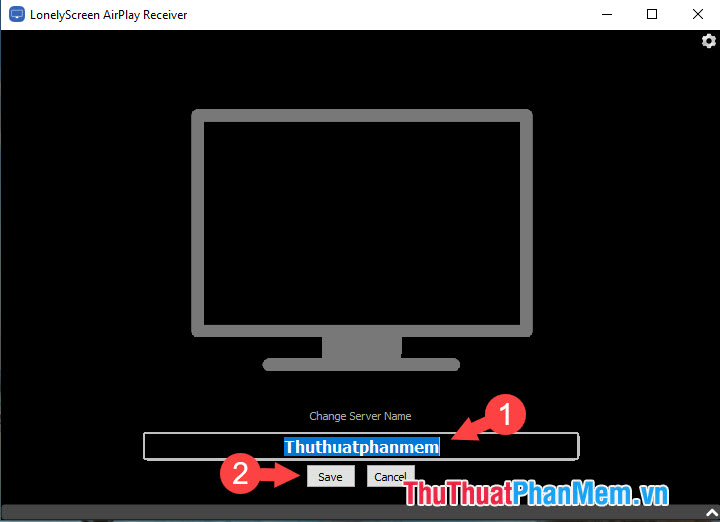
Next, click on Change Server Name (1) to set a new name => Save (2) to save.
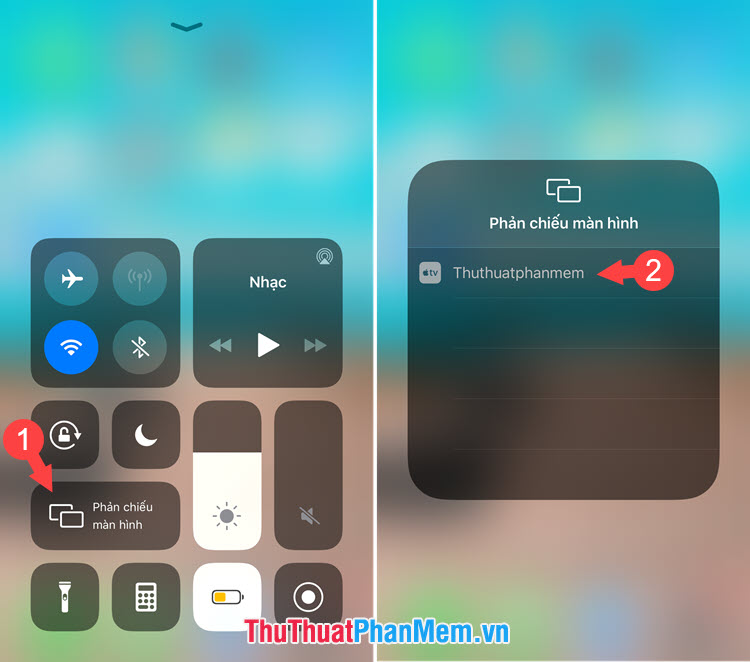
Step 2: You open your iPhone and swipe up from the bottom of the screen to open Control Center. Next, select Screen mirroring (1) => select Server name (2) .
The image on the iPhone will then be instantly reflected.
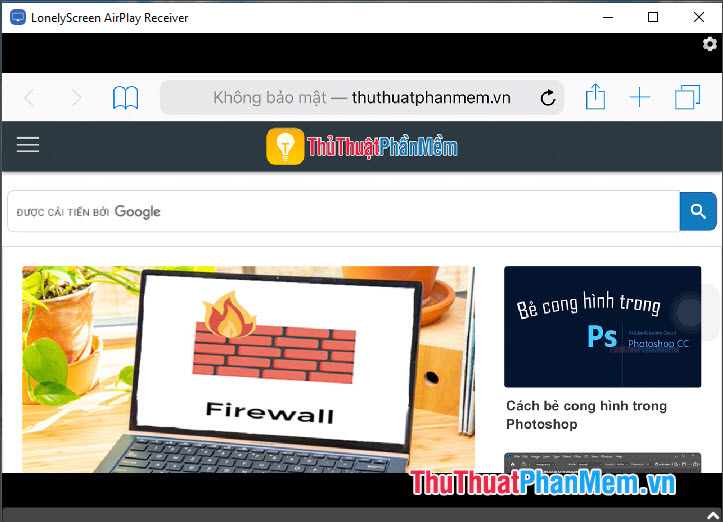
Step 3: To record a screenshot, click the arrow in the bottom right corner.

Next, click on the red circle to proceed to video screen.
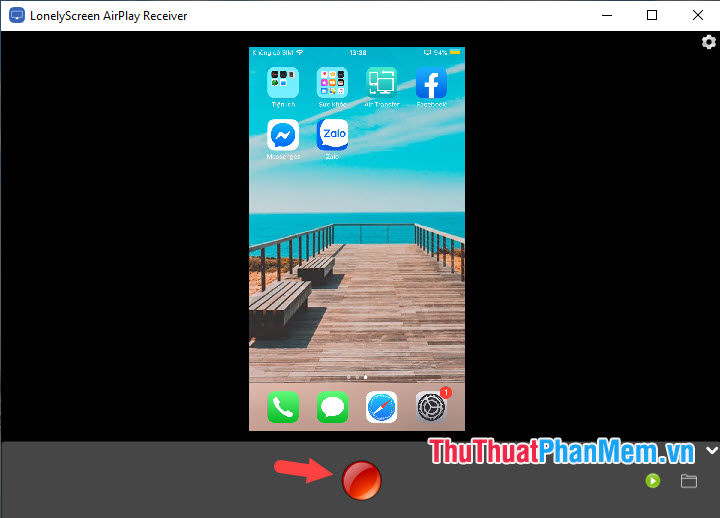
Click that icon again to stop recording.

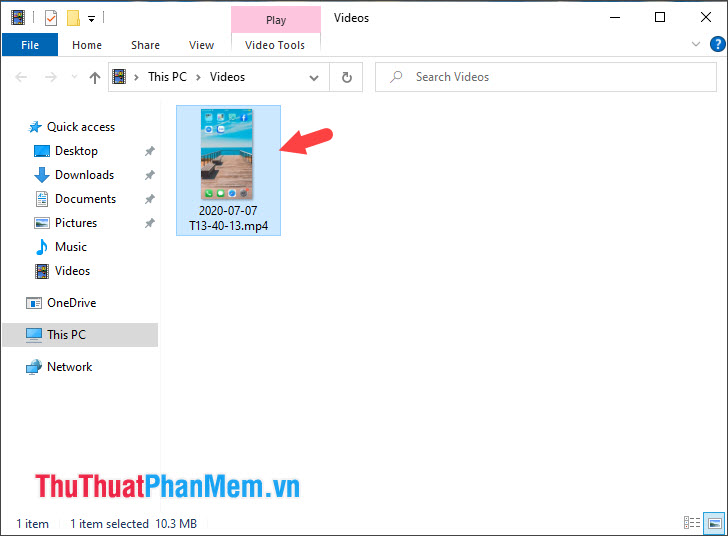
Step 4: To see where the video is from the screen, click the Folder icon as shown below.
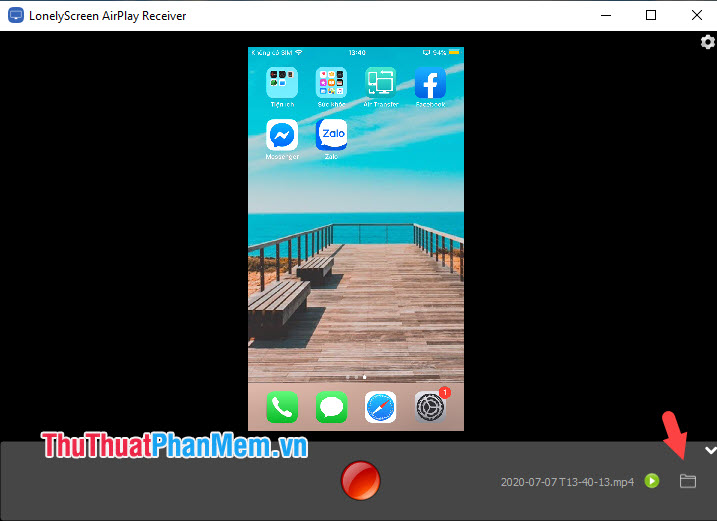
You can then watch the video and edit it on your computer easily.
3. Use ISL Light
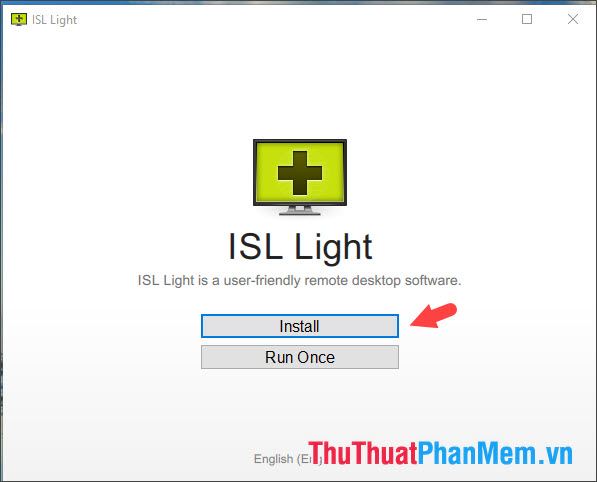
Step 1: Download and install the software at https://www. islonline. com/vn/en/downloads/download-isl-light. htm
Next, click on Install to install on the computer.
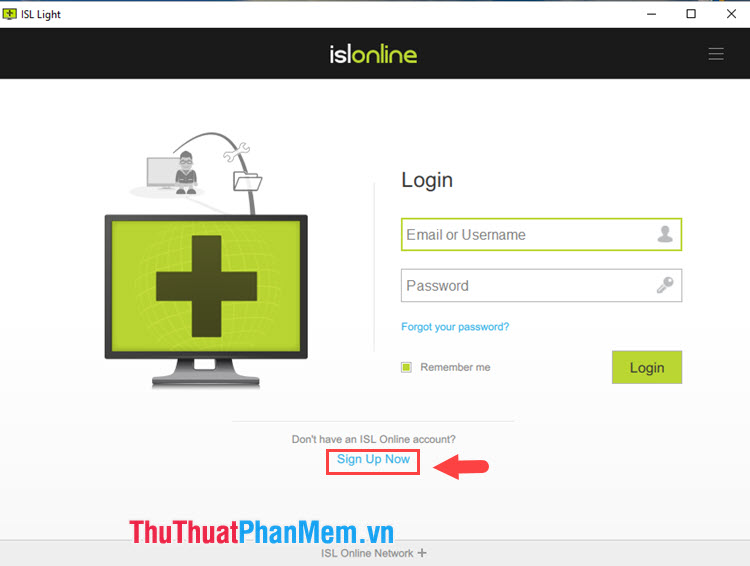
Step 2: Click Sign Up Now to register a quick account and use the software.
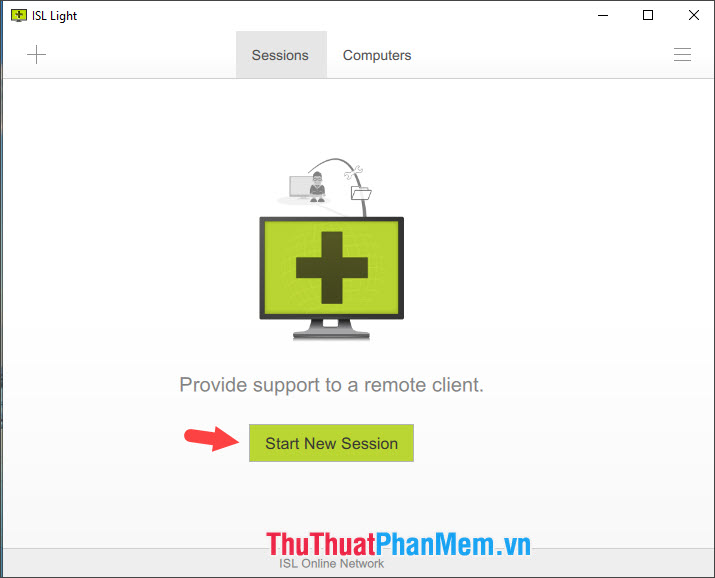
Step 3: Click on Start New Session .
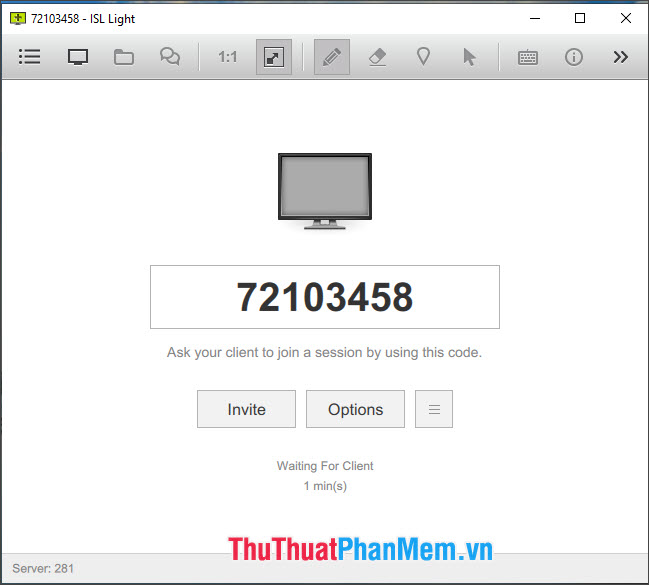
You will then receive a sequence of numbers as shown below. Please save this code to enter on the iPhone.
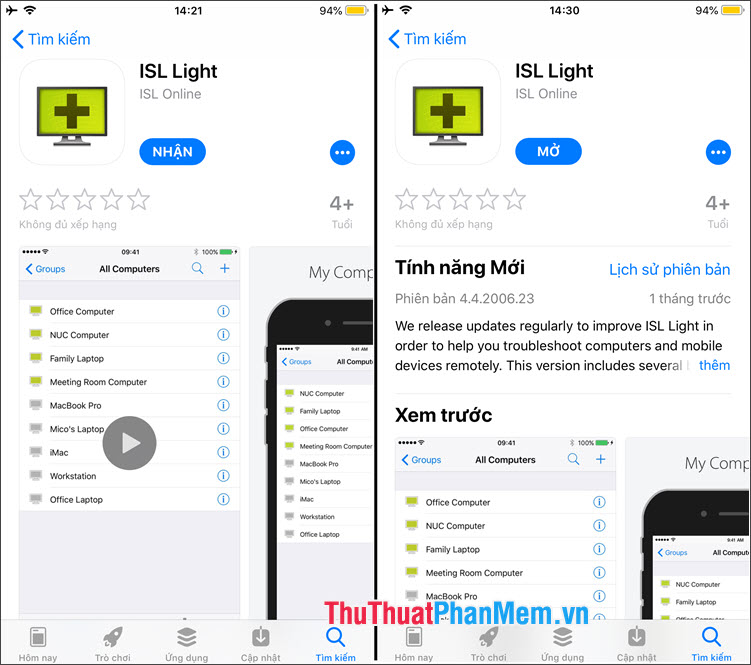
Step 4: Go back to your iPhone and download the ISL Light app at the link https://apps. apple. com/us/app/isl-light/id427579815
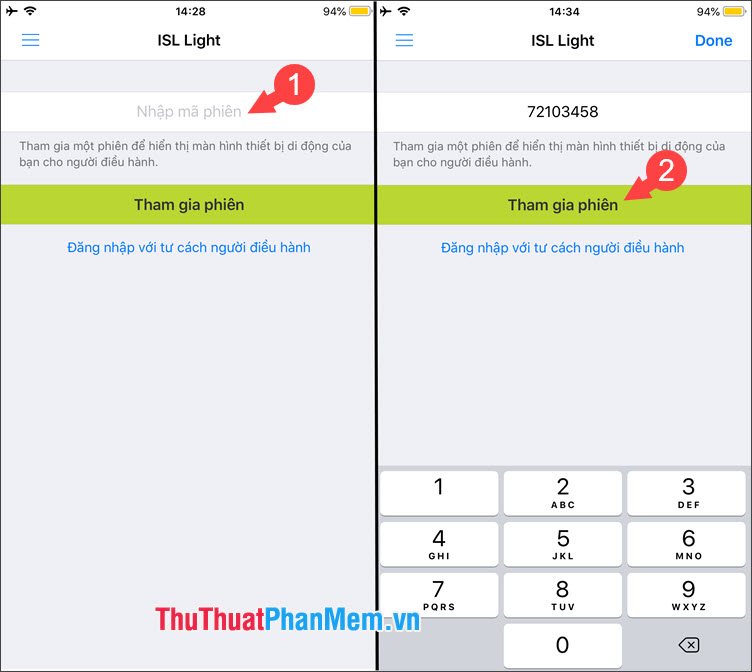
Step 5: Enter the session code (1) on the computer => Join session (2) .
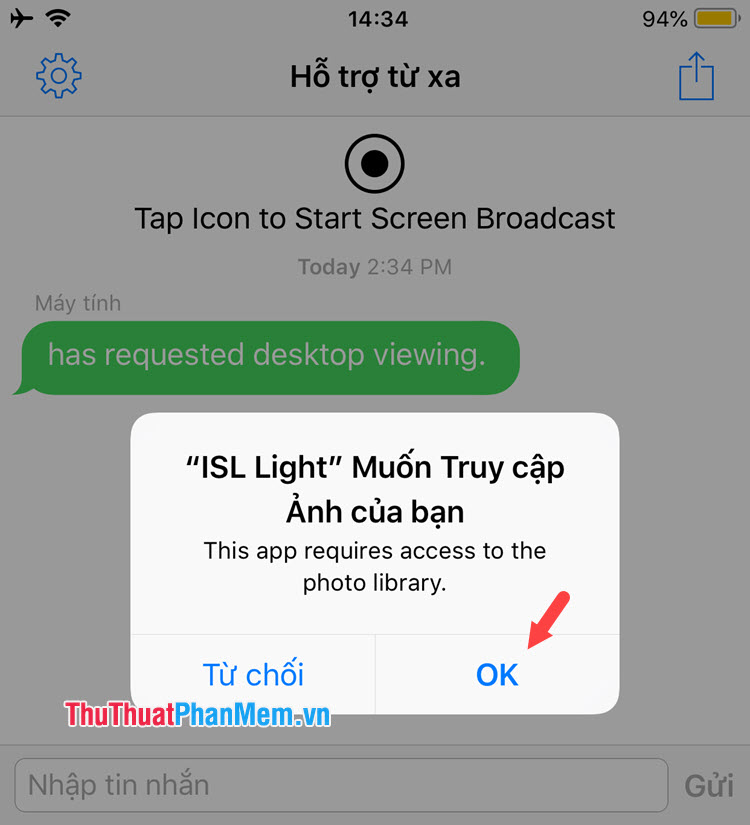
If a message like the one below appears then select OK to grant access.
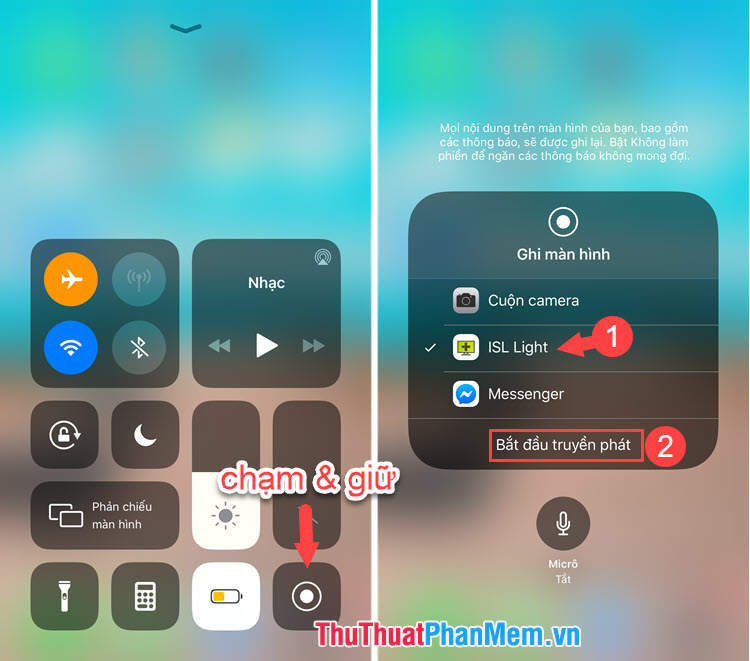
Step 6: You swipe up from the bottom of the screen to open the Control Center . Next, press and hold the Screen Recorder icon to open the submenu. Then, choose ISL Light (1) => Start broadcasting (2) .
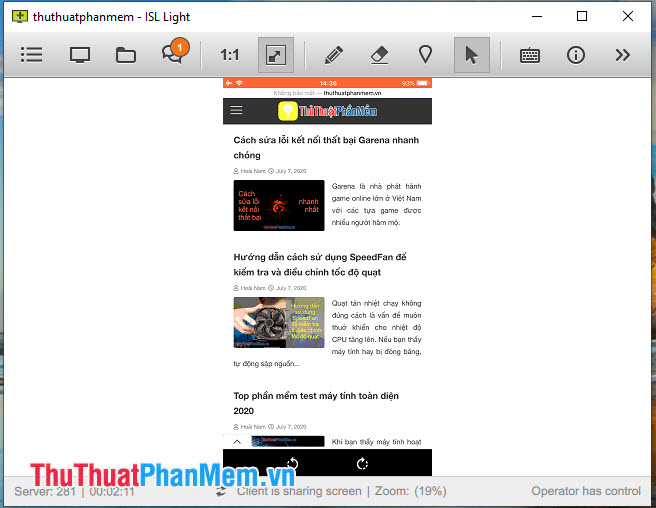
Step 7: Go back to the computer and you will see the video screen will be shown on the computer.
With projection of the iPhone screen on the computer will help you experience content on the iPhone more comfortable and easier to observe. Good luck!
FAQ
What should I know about Project iPhone Screen on Computer?
Focus on the key features, requirements, limitations, and practical use cases explained in this guide.
How do I get the best results with Project iPhone Screen on Computer?
Follow the recommended steps, use current software or information, confirm compatibility, and review settings before major changes.
Are there any risks or limitations?
Potential limitations depend on compatibility, data quality, cost, privacy, support, and how the product or method is used.
Related Articles
 Instructions for Using X-mirage Project the iPhone and iPad Screens5 minutes read
 Instructions for Projecting the iPhone Screen on the Computer5 minutes read
 How to Project a Computer Screen to a TV with Chromecast9 minutes read
 How to Project an Android Screen on a Computer14 minutes read
 Simple and Effective Way to Project Your Phone Screen4 minutes read
 Slide, Screen iPhone on Your Computer6 minutes read
Reader Comments 0
Sign in with email or Google to join the discussion.