How to log in to SSH server with GPG key
Maintaining SSH credentials is an important part of every administrator's security protocol. Today's article will show you how you can reduce the keys you need to maintain by linking your SSH login information with your GPG key..
Prepare GPG key for SSH
The first step when using GPG keys on SSH is to create a new subkey. Doing this will allow SSH authentication details to be shared without affecting your main GPG identity.
Start by opening the GPG prompt for the master key:
gpg --expert --edit-key YOUR-KEY@EMAIL.ADDRESSNote : You can find the email address for your master key by listing the key's contents: gpg --list-keys .
Type 'addkey' on the GPG prompt, select '8' , then press Enter.

Set the subkey capability to '=A' then press Enter.

Enter '4096' in the key size prompt, then press Enter .
Set a reasonable time period for subkey validity. In this case, the example would be typing '1y' to make the new subkey only valid for one year.

Create a new GPG subkey by typing 'y' , then pressing Enter on the wizard's confirmation prompt.
Type 'quit' , then press Enter to exit the GPG prompt.
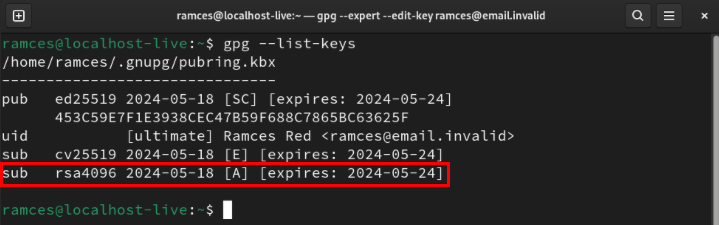
Confirm that the new subkey is working properly by getting details about the master key:
gpg --list-keys YOUR-KEY@EMAIL.ADDRESS
Enable SSH support in GPG
Once the subkey is up and running, you can now configure your SSH daemon to accept incoming gpg-agent requests. To do that, add 'enable-ssh-support' to the current user's 'gpg-agent.conf' file:
echo "enable-ssh-support" >> ~/.gnupg/gpg-agent.confOpen the '.bashrc' file with your favorite text editor:
nano ~/.bashrcPaste the following lines of code at the end of the .bashrc file:
export SSH_AUTH_SOCK=$(gpgconf --list-dirs agent-ssh-socket)
gpgconf --launch gpg-agent
Save the bashrc file, then print the subkey's keygrip:
gpg --list-keys --with-keygrip
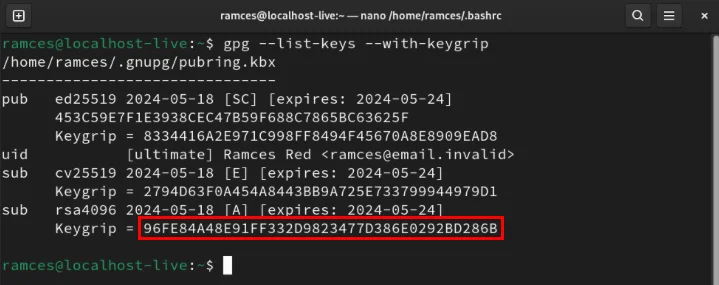
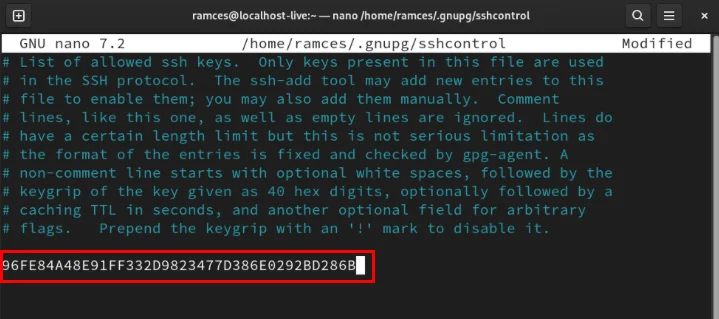
Copy the subkey's keygrip, then create the file 'sshcontrol' in the .gnupg directory :
nano ~/.gnupg/sshcontrolPaste your identity keygrip into the new file, then save it.
Apply the new SSH and GPG configuration by reloading the bashrc file on the current terminal session:
source ~/.bashrcCheck if the SSH daemon is currently working properly by listing its SSH public key:
ssh-add -l

Export and check GPG key
At this point, you should have the SSH daemon correctly linked to your GPG agent. To use it, generate an SSH export key with the following command:
gpg --ssh-export-key YOUR-KEY@EMAIL.ADDRESS > ~/authorized_keysSet the export key's permission bits to be readable and writable only by the user:
chmod 600 ~/authorized_keysSend new authorization file to remote server using scp:
scp ~/authorized_keys YOUR-REMOTE.SERVER.DOMAIN:~/.ssh/authorized_keysLog in to the remote server, then restart the SSH daemon to apply the new key:
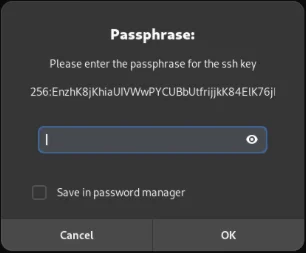
sudo systemctl restart ssh.servicePress Ctrl + D , then log back into the remote SSH server. This will bring up a new prompt asking to enter the master GPG key password.
Binding a GPG key to the SSH daemon and exporting it to a remote server are just some of the things you can do with SSH. Discover what can be done with this amazing software using SSH with UNIX pipes in Linux.