Table of Contents
This guide explains how to resolve the Error Can Not Access 192.168.1.1, starting with the most likely causes and moving through practical troubleshooting steps.
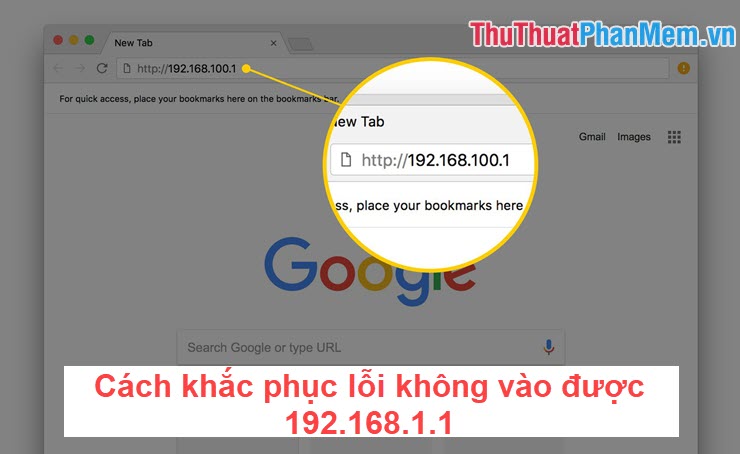
1. The default Modem address is not 192.168.1.1
There are many people mistakenly think that 192.168.1.1 is a golden key and can access many different network modems. But there are carriers that are very hard to play against each other by not leaving this "national" address but replacing it with some other addresses such as 192.168.0.1 or 192.168.1.2. This makes the address 192.168.1.1 become should be completely useless.
Solution: For networks that have changed the default IP address, we just need to harden the Wi-Fi Modem and it will return to the factory default address printed under the Modem that is 192.168.1.1.
Hard Reset Method: Hard Reset Modem you need a small rod and hold the Reset button deep in the hole for 3 seconds until all the lights are flashing.
2. There are multiple transmitters at one point
With the current home system, most often use additional Wi-Fi transmitters to cover the entire family. You need to determine which is the Router and which is the Modem. A modem is a device that provides a network and can play Wi-Fi. And the Router is the device that uses the network from the Modem to generate Wi-Fi. Because of this, you can catch Wi-Fi of the Router, you cannot access 192.168.1.1. You need to be connected to the correct network / Wi-Fi from the Modem to access 192.168.1.1.
Solution: Turn off Wi-Fi / Router transmitters to access the network from Modem.
3. Assign the address directly instead of using the Windows address
On Windows operating systems, if you do not set an IP address, it will use different random, automatic IP addresses. So we can interfere with them by forcing them to use the pre-set IP addresses.
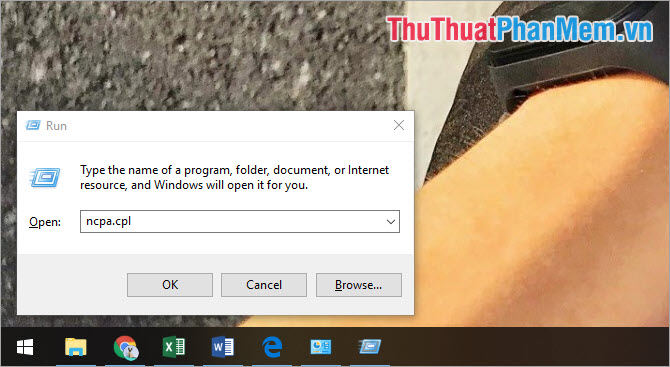
Step 1: You press Windows + R to open the RUN window and enter ncpa. cpl .
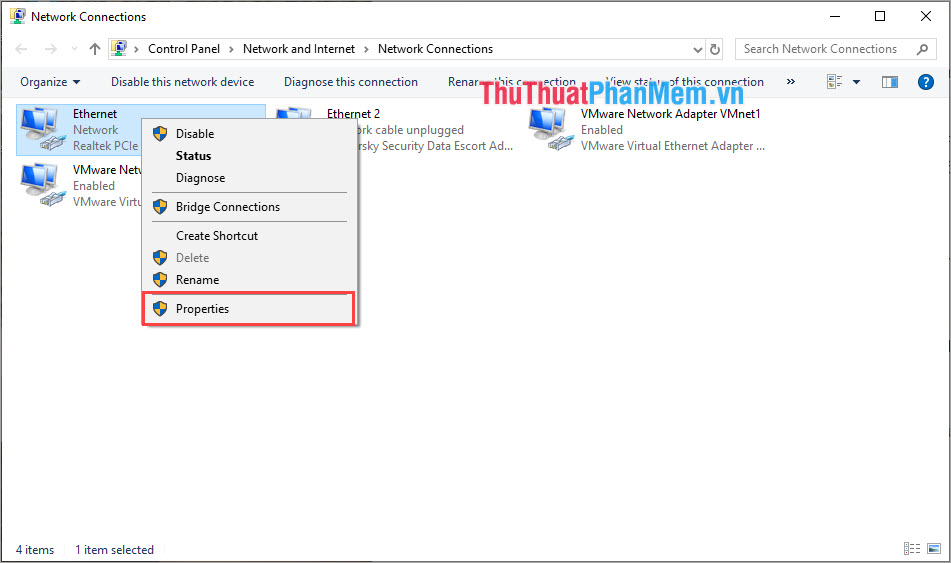
Step 2: Then you Right-click on the network you are using and select Properties .
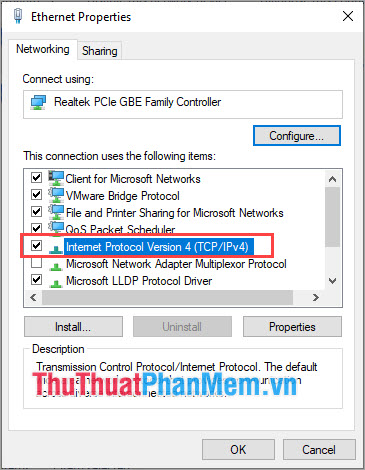
Step 3: Next, you find the Internet Protocol Version 4 (TCP / Ipv4) .
Step 3: Finally, select Use the following IP address and set the following parameters:
- IP Address: 192.168.1.10
- Subnet Mask: 255.255.255.0
- Default Gateway: 192.168.1.1

Finally, click OK to finish and try to access the address 192.168.1.1 .
4. There are many intermediaries Wi-Fi transmitters
If you not only use a Modem but use many different Modems, it is obvious that having many Default gateway addresses. But we can still determine the Default gateway address can be accessed by the following:
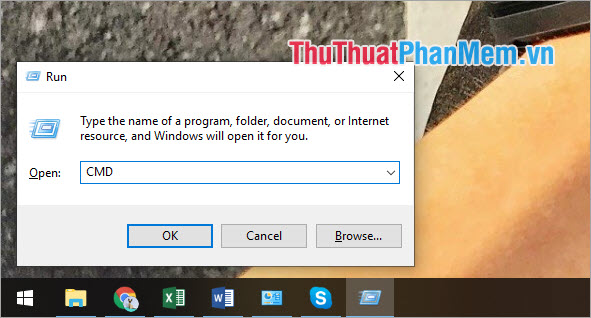
Step 1: You press Windows + R to open the RUN window and enter CMD to open the Command Prompt .
Step 2: Then you enter the command ipconfig and press Enter .
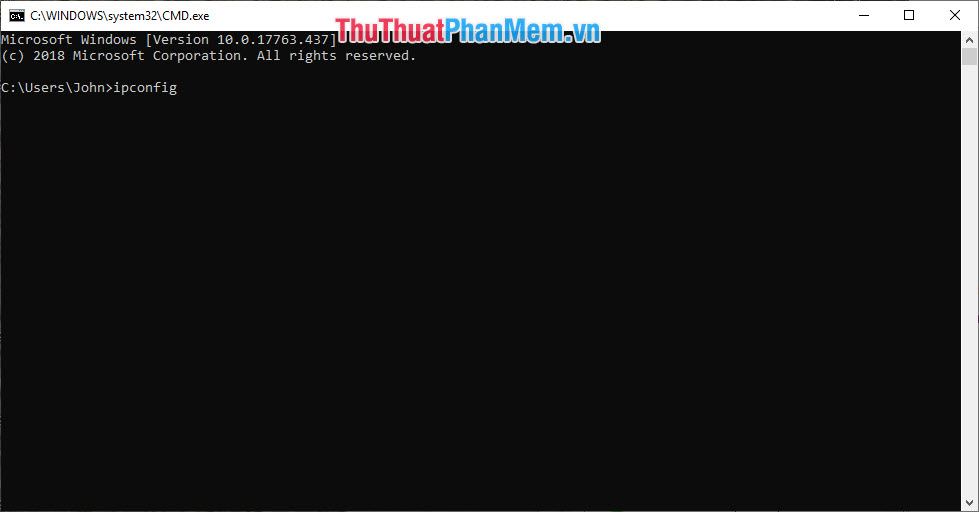
Step 3: Then there will be information for you about the Default Gateway address that you can access.

5. Update Network Card Driver
During use, it may also be caused by your network card is using the old driver version and is no longer compatible. To solve this problem is very simple.
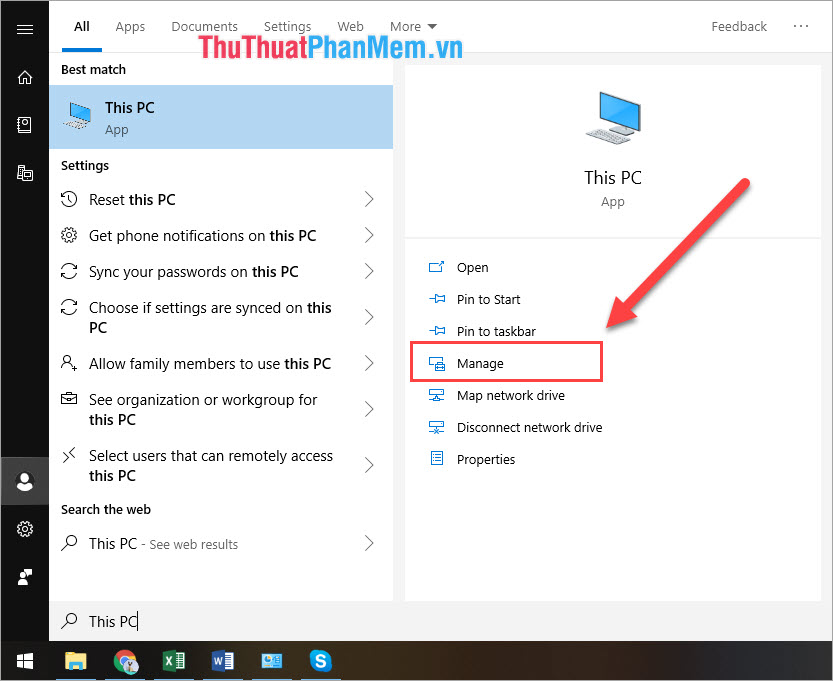
Step 1: You enter This PC into the Windows Start window and select Manage .
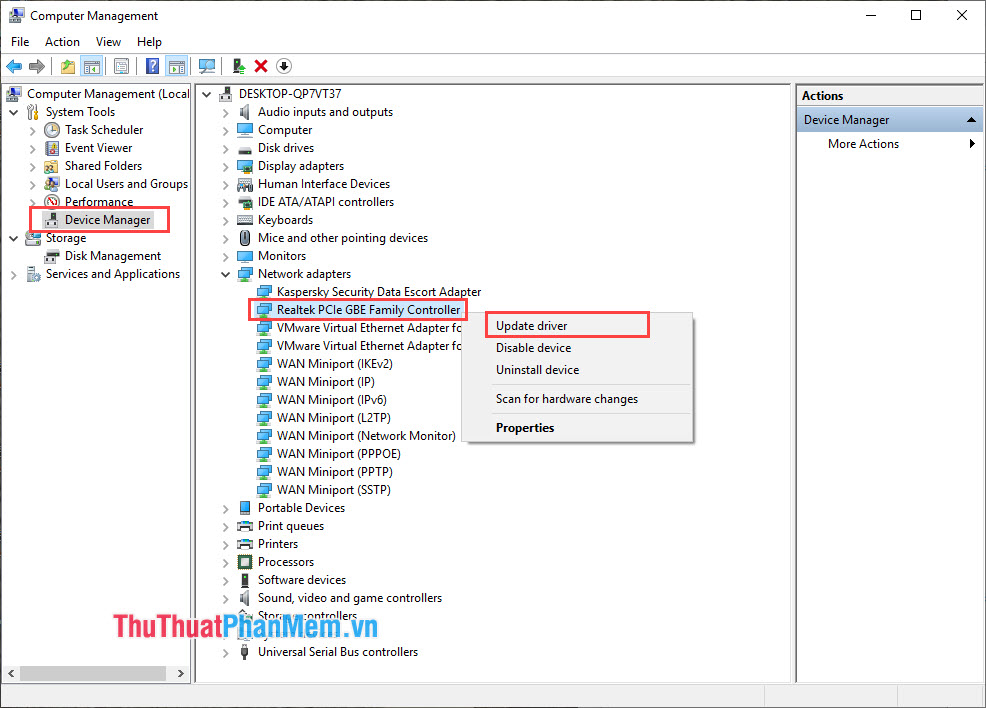
Step 2: Next, select the Device Manager tab and select Network adapter . Here you find your network card (usually the motherboard uses a network card called Realtek PCIe.) and select Update driver .
Thus, in this article, the Software Tips have guided you 5 ways to fix the error of failing to access the address 192.168.1.1 on your computer and network. Good luck!
FAQ
What usually causes the Error Can Not Access 192.168.1.1?
The cause may involve incorrect settings, outdated software, damaged files, permission problems, device compatibility, or a temporary system issue.
What should I try first to resolve the Error Can Not Access 192.168.1.1?
Restart the affected app or device, install pending updates, verify settings and connections, and follow the troubleshooting steps in order.
How can I prevent the issue from returning?
Keep software updated, maintain backups, avoid interrupted installations, and review system or device settings after major changes.
Related Articles
 How to Fix the Error IPv6 No Network Access9 minutes read
 How to Fix the Error of Not Being Able to Access Canva Super Fast6 minutes read
 How to Fix the Error Can Not Access YouTube6 minutes read
 403 Error: How to Fix 403 Forbidden Error6 minutes read
 Instructions for Fixing Access Denied Errors During File or27 minutes read
 Fixes the 'No Access to Disk Manager' Error: Explained4 minutes read
Reader Comments 0
Sign in with email or Google to join the discussion.