Table of Contents
This guide provides a practical overview of Windows Laptop Does Not Catch Wi-Fi and How to Fix It, including its main features, benefits, limitations, and important considerations.
1. Restart network connection on the computer 1
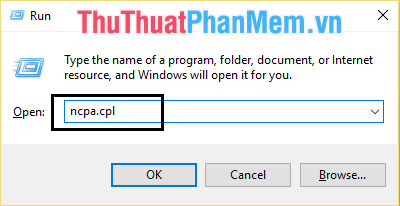
Step 1: You press Windows + R to open the RUN window. Then you enter ncpa. cpl and press Enter .
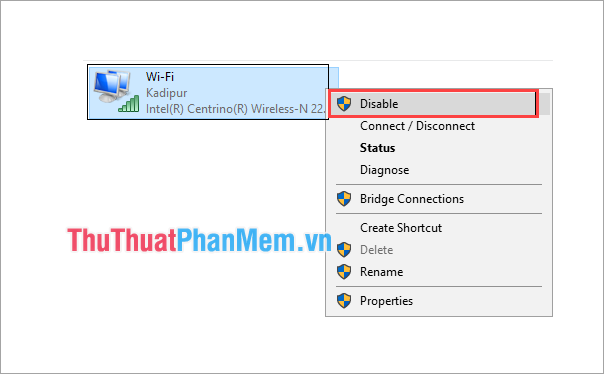
Step 2: Right-click on Wi-fi and select Disable.
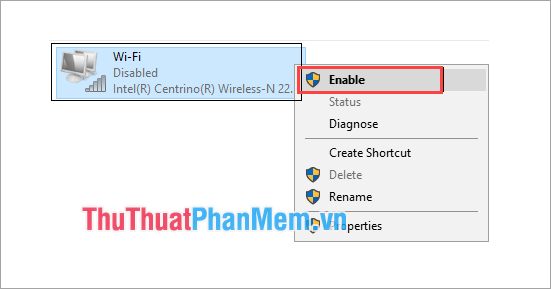
Step 3: Double-click on Wi-Fi or Right-click and choose Enable to restart the network.
2. Use the network error correction procedure
On Windows, there is now an effective and simple automatic error correction software. You can use the following error correction procedure:
Step 1: Open Settings on Windows by pressing Windows + I and selecting Update & Security .
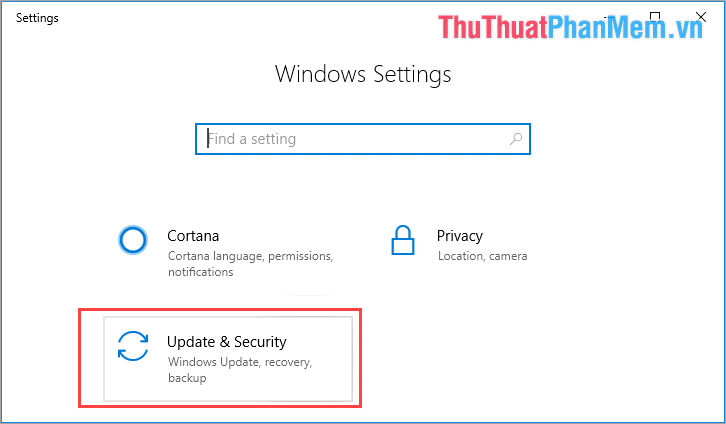
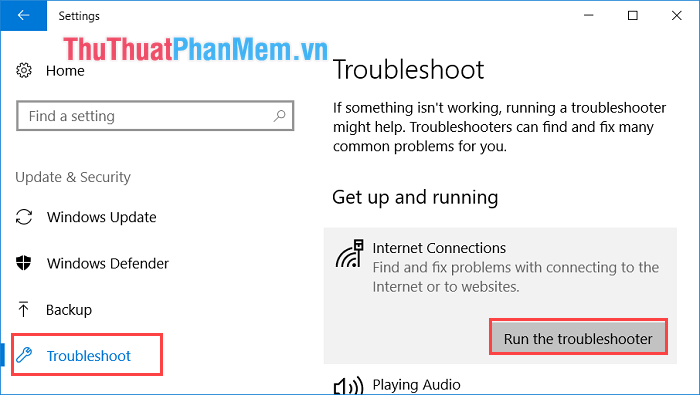
Step 2: Click the Troubleshoot tab and select Internet Connections . Then you select Run the troubleshooter to start automatically repairing network errors.
Step 3: After running the Internet Connections error correction process, continue to pull down Network Adapter and click on Run the troubleshooter to continue running the network connection history.
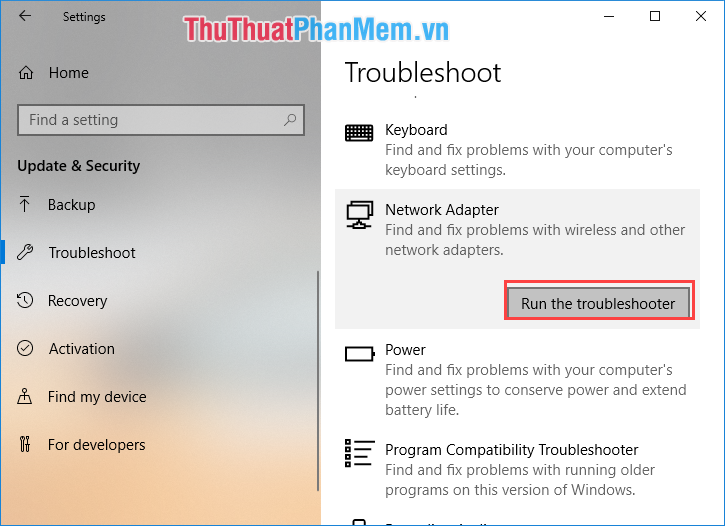
After running, proceed to restart your computer to reconnect to Wi-Fi normally.
3. Reinstall the Wi-Fi network Driver
Sometimes during use, the Driver version is outdated or has other problems so we just need to reinstall the Driver.
Step 1: You open the RUN window through MenuStart window or press Windows + R combination . Then enter the command " devmgmt. msc " and press Enter .
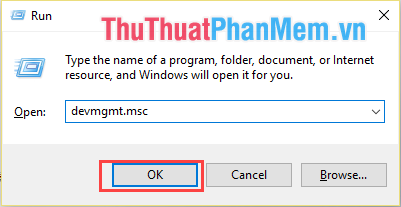
Step 2: When the Device Manager window appears, look for Network adapters and find your Wi-Fi Driver.
How to find the Wi-Fi Driver we will rely on the name, the name of the Wi-Fi Driver is often named: . Wireless.
Then, right-click and choose Uninstall to uninstall the Driver.
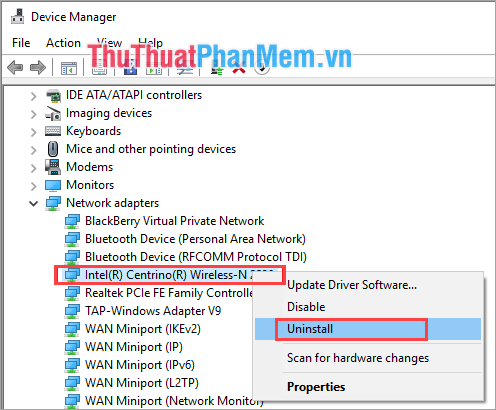
Step 3: After removing the Driver, click Update Driver Software. to update the Driver.
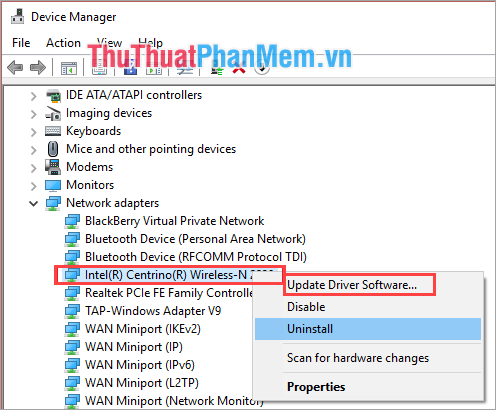
After the update is complete, restart your computer to use.
4. Disable Wi-Fi Sense feature
Wi-Fi Sense on Windows is great but sometimes it backfires with users. Turning off Wi-Fi Sense feature does not affect the usage much.
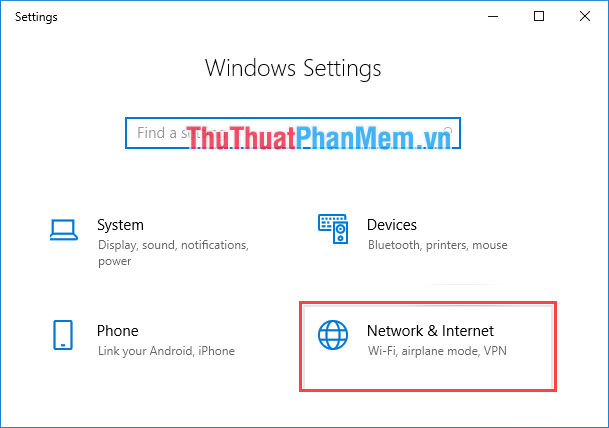
Step 1: You open the Settings on your computer by pressing Windows + I . Then choose Network & Internet .
Step 2: Next, select Wi-Fi and turn off Wi-Fi Sense and Hotspot 2.0 features .
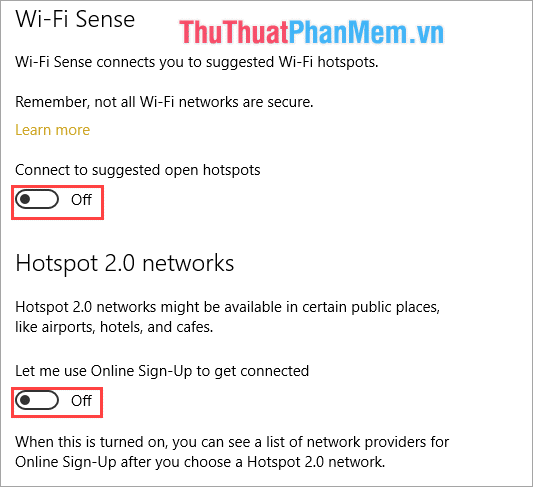
Then you restart your computer.
5. Delete DNS and reset TCP / IP
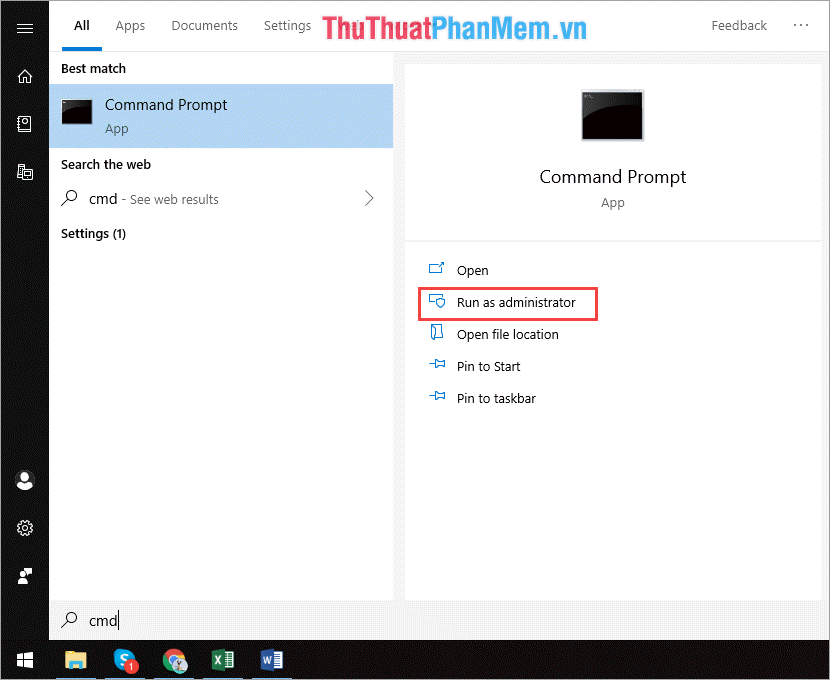
Step 1: You enter CMD into MenuStart to appear Command Prompt and you select Run as administrator .
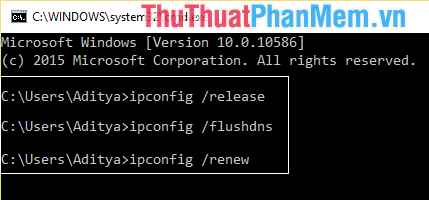
Step 2: When the Command Prompt window appears, enter the following commands.
ipconfig / releaseipconfig / flushdns
ipconfig / renew
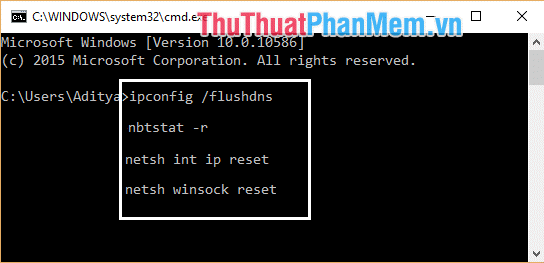
Step 3: Then you continue to enter the following command in turn:
ipconfig / flushdnsnbtstat –r
netsh int ip reset
netsh winsock reset
After entering the commands, you can reconnect your Wi-Fi to check.
6. Update Wi-Fi Driver
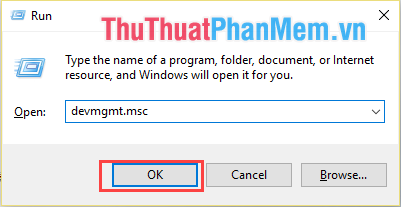
Step 1: Open the RUN window by pressing Windows + R and enter devmm. msc . Then you press Enter to open.
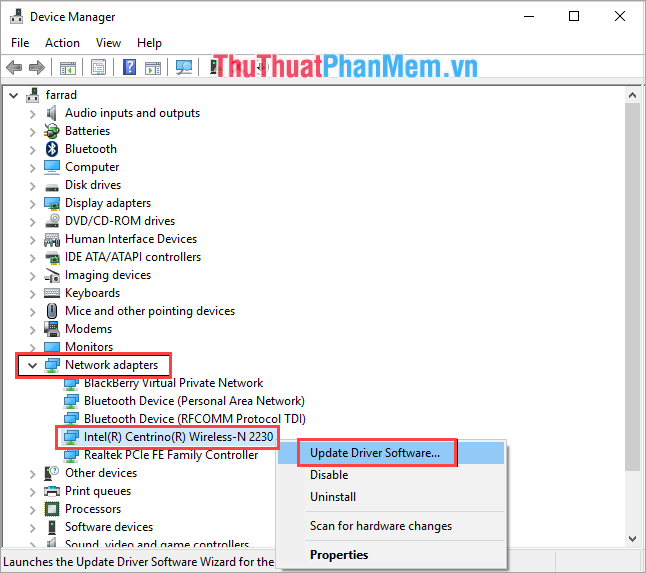
Step 2: When the Device Manager window appears, look for Network adapters and find your Network Driver . Then right-click and select Update Driver Software.
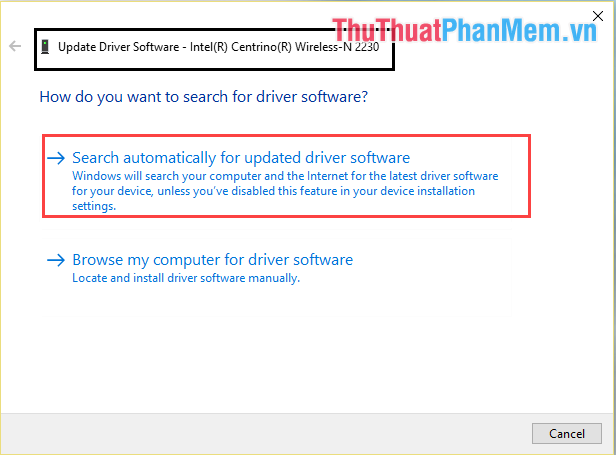
Step 3: A driver update window will appear and select Search automatically for updated driver software to automatically update.
So in this article, Software Tips introduced you to various ways to fix Windows computer not connected to Wi-Fi. Good luck!
FAQ
What should I know about Windows Laptop Does Not Catch Wi-Fi and How to Fix It?
Focus on the key features, requirements, limitations, and practical use cases explained in this guide.
How do I get the best results with Windows Laptop Does Not Catch Wi-Fi and How to Fix It?
Follow the recommended steps, use current software or information, confirm compatibility, and review settings before major changes.
Are there any risks or limitations?
Potential limitations depend on compatibility, data quality, cost, privacy, support, and how the product or method is used.
Related Articles
 How to Fix Laptop Catch Weak Wi-Fi8 minutes read
 6 Simple and Effective Tips to Fix Laptop with Lost Wi-Fi4 minutes read
 The Way to Fix Windows 8 Error Does Not Catch Wi-Fi5 minutes read
 How to Fix Laptop Error That Cannot Connect to Wifi13 minutes read
 Share How to Fix Laptop Not Catching Wi-Fi7 minutes read
 How to Fix Wi-Fi Errors on Windows 10, Simple and Effective10 minutes read
Reader Comments 0
Sign in with email or Google to join the discussion.