How to Export Airtable to Excel and Google Sheets
Airtable lets you create and share relational databases easily. Export your Airtable data to Google Sheets or Excel to enjoy advanced charts and data visualizations. Here are detailed instructions.
Things to note before exporting Airtable to Excel and Google Sheets
- You can't export an entire database — just tables. But there is a workaround. Before exporting your data, adjust one of your existing Airtable views or create a new view so that all the fields you want to include in your export file are visible.
- Attachment fields are exported as attachment URLs. Any attachments—such as images, documents, and audio files—will be included in the CSV file as a file name and URL. URLs expire after just a few hours, so be sure to download them as soon as your export is complete.
- Some information cannot be exported. Airtable does not include record-level comments, field descriptions, database instructions, and data stored only in the extension. Airtable also does not export any color coding applied to your original data.
With all that in mind, let's look at two ways to export data from Airtable.
How to Export Airtable to CSV
Before you can import data into Excel or Google Sheets, you first need to export the data from Airtable.
- Right-click on the name of the view you want to export from the Views menu .
- Click Download CSV .
- By default, CSV files are stored in your computer's Downloads folder.

Now that you have your CSV file, here's how to import that data into Excel or Google Sheets.
How to export Airtable to Excel web app
- Right-click the name of the view you want to export from the Views menu and click Download CSV .
- Go to office.com/launch/Excel/ .
- Locate the CSV file in your computer's default downloads. Drag and drop the CSV file from your computer into the Excel web app.
- In the pop-up window that appears, click Change location to specify the folder where the file will be stored.
- Click Upload .

Once the file upload is complete, click on its name to open it.
How to export Airtable to Excel for desktop
Right-click the name of the view you want to export from the Views menu and click Download CSV .
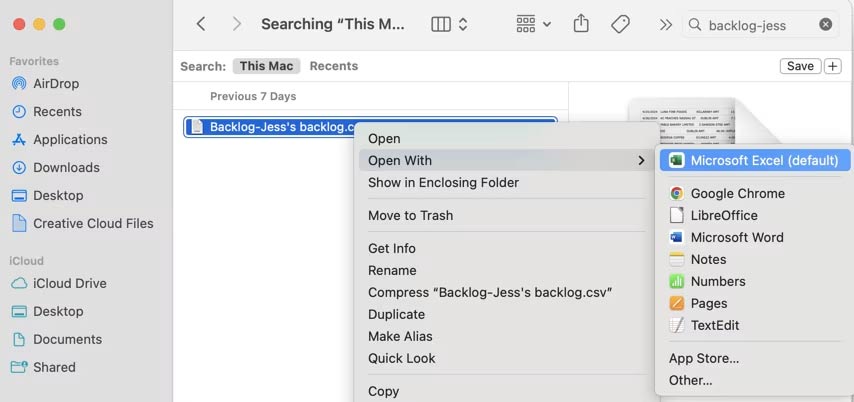
Locate the CSV file in your computer's default download location. Right-click the file, click Open by, and select Excel .

How to Export Airtable to Google Sheets
- Right-click on the view name you want to export from the Views menu and click Download CSV .
- Go to sheets.new to create a new Google Sheet.
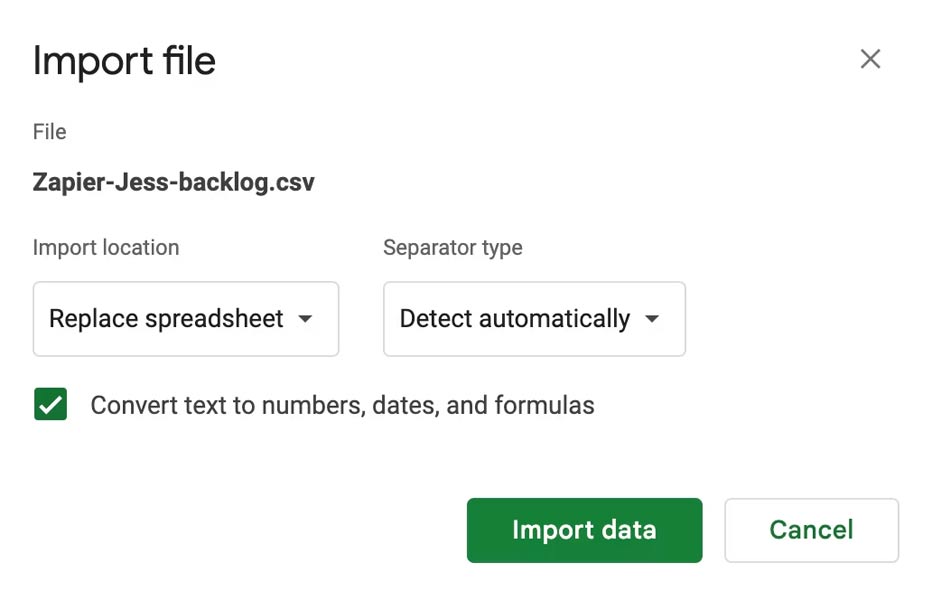
- Click File > Import .
- Click Upload and upload your CSV file.
- Change the Import location and separator type as needed.
- Click Import data .

It's worth mentioning that no matter which spreadsheet application you use to open CSV files, you'll still have to rearrange your spreadsheet a bit, such as wrapping or unwrapping text, adjusting column widths, etc.
Using Airtable Automation
If you want to export data multiple times or export the same data to the same place frequently, you'll want to use Airtable automations. Automations can be configured to trigger on specific conditions, giving you more control over when and how your data is exported.
Here's how to do it, using a simple table that lists people working on the same content.

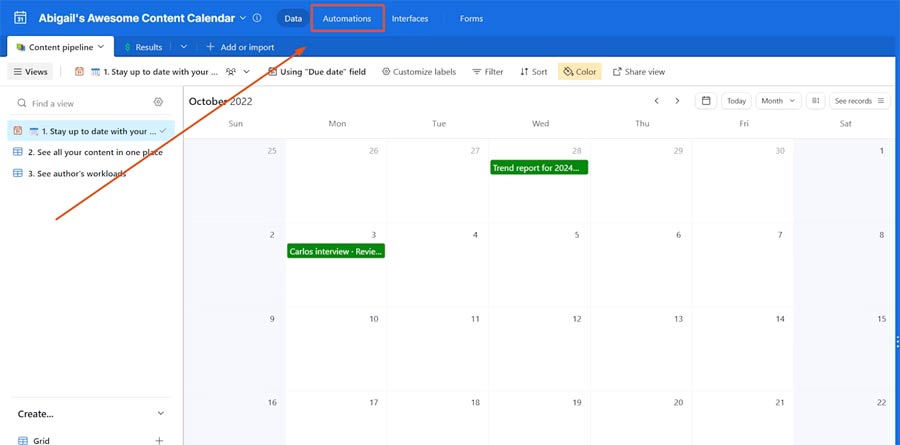
- Click the Automations tab .
- Click Create automation , then Add trigger to choose a start time (for example, when a record is created or updated).
- Select the table and trigger—these options will pop up in the properties menu. In this case, select the " When record created ." trigger.
- Click Add advanced logic or action and choose what happens. In this case, we want to export Airtable data to Google Sheets using automation, so we'll scroll down and select Google Sheets > Append row . That way, every time there's a new record, it'll add the record as a row in Google Sheets.
- Follow the prompts depending on the action, the app you choose, and the amount of data you want to export. For this example, you need to connect your Google account & select Sheets to export to.
- If you're exporting to Sheets, you'll select spreadsheet, worksheet, and row. (You'll need to set headers for this to work by going to File > Print > Headers & Footers . Fill in the blank text field at the top of Sheets on the screen, which will meet the weird arbitrary criteria for this automation.
- Use the Test action button to run the automation with sample data. If successful, enable the automation.
- Data from your Airtable table will sync to your table in Google Sheets.
You should read it
- How to convert Excel file to Google Sheets
- 30+ useful Google Sheets functions
- Google Sheets automatically creates tables with just 1 click, making Excel converters excited
- How to quickly delete multiple sheets in Excel
- This guy broke up with Microsoft Excel to come to Google Sheets after a long time, and this is the reason
- List of common shortcuts for Google Sheets on Mac (Part 2)
 How to secure webcam on Windows to avoid exposure
 4 tools to make audio fade in right on the browser
 How the iPhone 16 turns everyday objects into stunning macro art
 6 Reasons You Don't Need a Notion Plus Subscription
 How to ask about the patient
 How to display full date and time on Windows 11 Taskbar