Table of Contents
Learn how to remove copilot and other AI features in Windows with clear steps, practical tips, and troubleshooting guidance for a reliable result.
Uninstall Copilot in Windows
Although removing Copilot was initially difficult after its introduction, it's now much easier as it's a standalone application. If you're using the latest version of Windows 11, you can uninstall Copilot just like any other application in Windows.
In Windows Settings, go to Apps → Installed apps . Find the Copilot app and select Uninstall from the More options menu next to it.
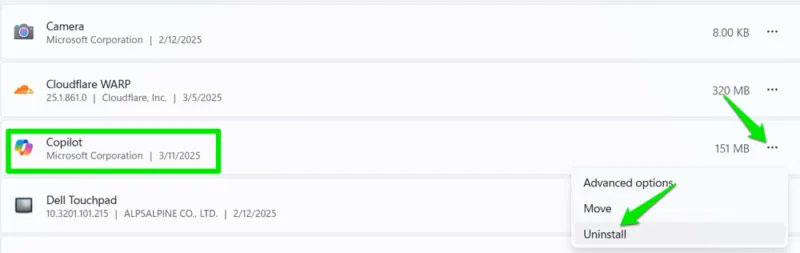
This will uninstall the Copilot application, but it will not render Copilot unusable in other applications. However, it will close some background processes that Copilot runs, even if you are not using the application.
Microsoft Edge AI is primarily found in the Copilot sidebar, AI typing suggestions, and AI search features. Fortunately, you can disable these AI features from the settings or Edge flags.
Remove the Copilot button from the Edge toolbar
Microsoft Edge has a Copilot button on the toolbar that you can click to open Copilot in the sidebar for interactive use while browsing. You can disable this button in Edge's settings.
From the Edge main menu, click Settings , then go to Copilot and sidebar -> Copilot .
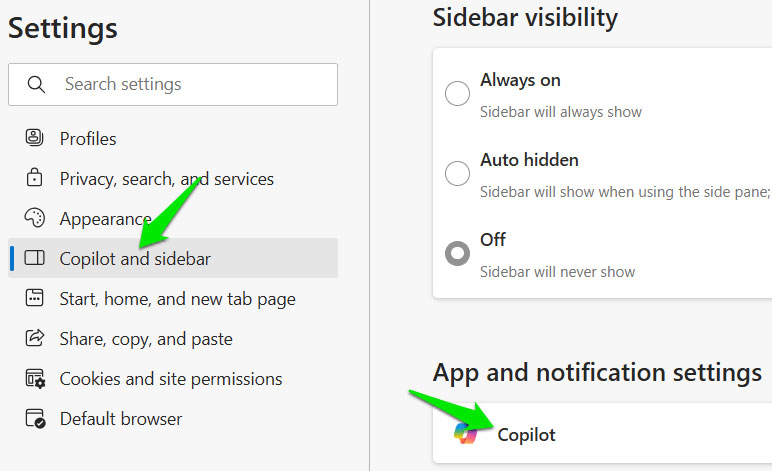
Turn off the toggle switch next to "Show Copilot button on the toolbar ," and the Copilot button will be replaced with a sidebar button.
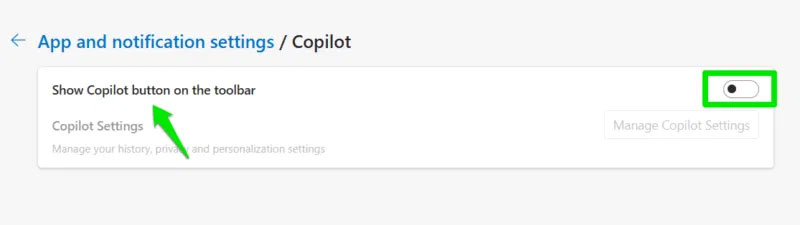
Disable AI writing assistant
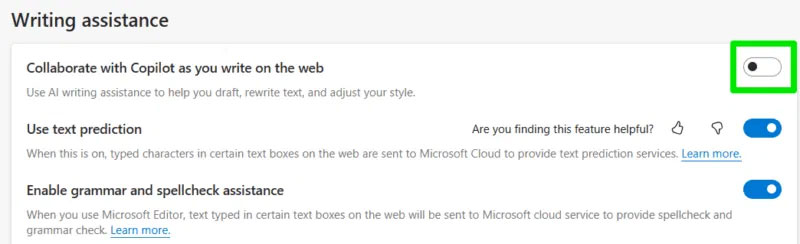
Edge includes Microsoft Editor for grammar and spelling suggestions, but it now also uses an AI-powered writing assistant to help you rewrite text and adjust your style. This additional functionality can be turned off through the settings.
In Edge settings, go to Languages and turn off the "Collaborate with Copilot as you write on the web" option.
Disable AI in DevTools
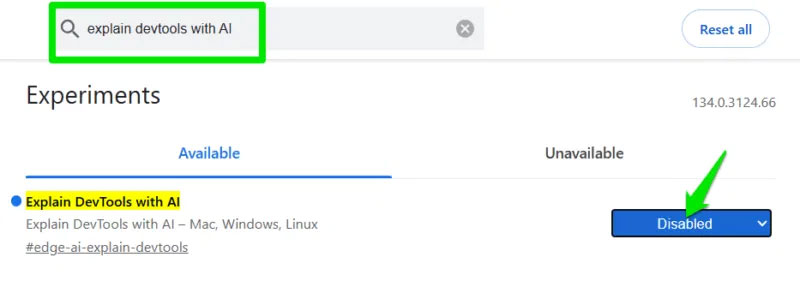
Microsoft Edge can help you resolve website errors within DevTools ( Ctrl + Shift + I ) via AI. Click the Copilot button next to the error, and Copilot will help you learn more. If you don't need this additional help, you can disable it from Edge flags.
Enter edge://flags/ in the address bar to open the experimental features. Search for "explain devtools with AI" in the top search bar and select Disabled next to the Explain DevTools with AI flag. You will need to restart your browser for the changes to take effect.
Remove AI features from Notepad
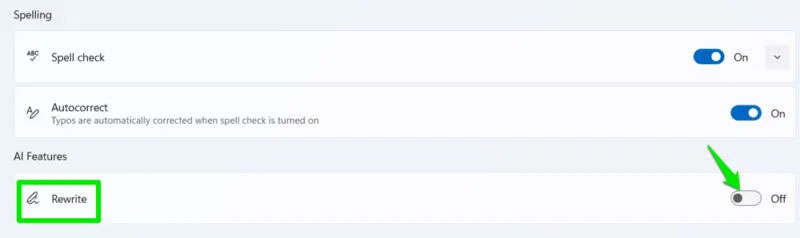
Modern Notepad has many powerful features, and Microsoft didn't take long to add AI capabilities to it. When taking notes, you can click the Rewrite button in the upper right corner to rewrite the content or change the tone/formatting via AI. You can remove this button in Notepad settings if you wish.
Click on Notepad settings next to the Rewrite button and turn off the Rewrite option in the AI Features section.
Disable Copilot in Microsoft Office
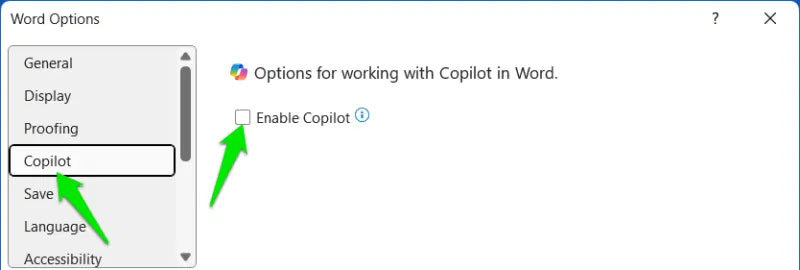
Whether it's Word, Excel, or PowerPoint, Copilot is now part of the Microsoft Office suite – there's always a dedicated button for quick access to it. Fortunately, you can disable all AI features from a single option if you don't want to use AI in Microsoft Office. When using any of these Office applications, you can disable Copilot by following the steps below.
Navigate to File -> Options and go to the Copilot section. Uncheck the box next to Enable Copilot . You will need to perform these steps for each application individually and must have the latest version to disable Copilot.
Additional: Disable Scareware AI blocker
Microsoft Edge has another AI feature: the Scareware Blocker. At the time of writing, this feature is disabled by default, but you may want to ensure it remains enabled. This feature is supposed to detect scareware attempts by analyzing every page you visit, something many users may not want. Find this option in Edge's settings by going to Privacy, search, and services -> Security -> Scareware blocker .
These steps will minimize the impact of AI and remove Copilot, giving you better control over Windows. However, Microsoft isn't slowing down in integrating AI, so you might want to explore the amazing things Copilot can do before removing it.
Final Thoughts
Use this guide as a practical checklist for how to remove copilot and other ai features in windows. Work through the steps in order, verify each result, and adjust the options to match your needs.
FAQ
What do you need before following this How to Remove Copilot and Other AI Features in Windows guide?
Review the required tools, accounts, settings, or materials mentioned in the article. Learn how to remove copilot and other AI features in Windows with clear steps, practical tips, and troubleshooting guidance for a reliable result.
What are the main steps for how to remove copilot and other ai features in windows?
Follow the sections in order, especially Uninstall Copilot in Windows, Remove the Copilot button from the Edge toolbar, Disable AI writing assistant. Complete each step before continuing and verify the result as you go.
What should you do if the process does not work as expected?
Recheck the prerequisites, update the relevant app or service, review the settings, and repeat the step that caused the issue. Use any troubleshooting notes included in the guide.
Related Articles
 How to Turn Off Copilot in Windows 11: Step-by-Step Guide4 minutes read
 How to Remove Ask Copilot from Windows 11 Right - click Menu3 minutes read
 Microsoft May Remove Unnecessary AI Features from Windows 11 Following5 minutes read
 How to Completely Disabling Copilot in Windows5 minutes read
 minutes read
 How to Turn Off or Remove Windows Copilot on Windows 11: Practical Guide6 minutes read
Reader Comments 0
Sign in with email or Google to join the discussion.