Table of Contents
This guide explains how to delete Audio in Video, with clear steps, practical tips, and important checks before you begin.
1. Use Premiere Pro to remove audio from Video
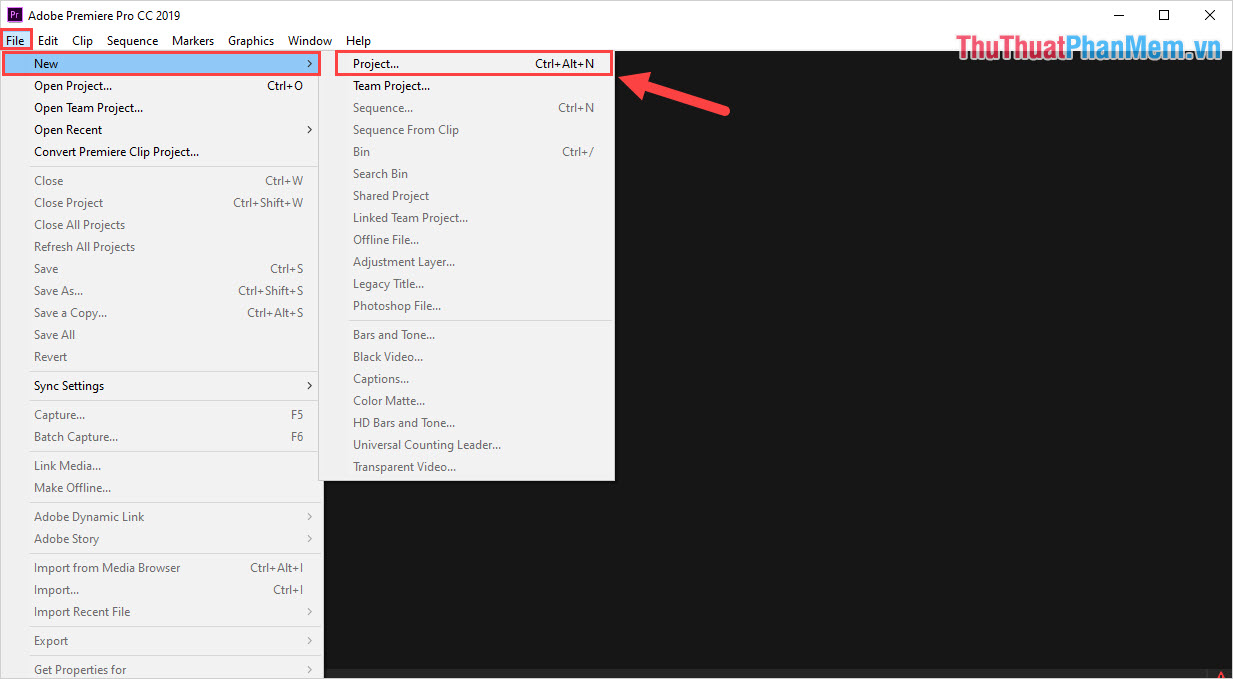
Step 1: First, open the software and select File -> New -> Project to create a new working project.
Step 2: Then, you proceed to drag the video files you want to delete the audio into the software and drop them in the Source section.

Step 3: Next, you hold and drag the Video icon to drop into the V1 bar of the Timeline.

Step 4: When you drag like that, the system will automatically remove the Audio item, leaving only the Video for you. Now choose File -> Export -> Media. to export the file.

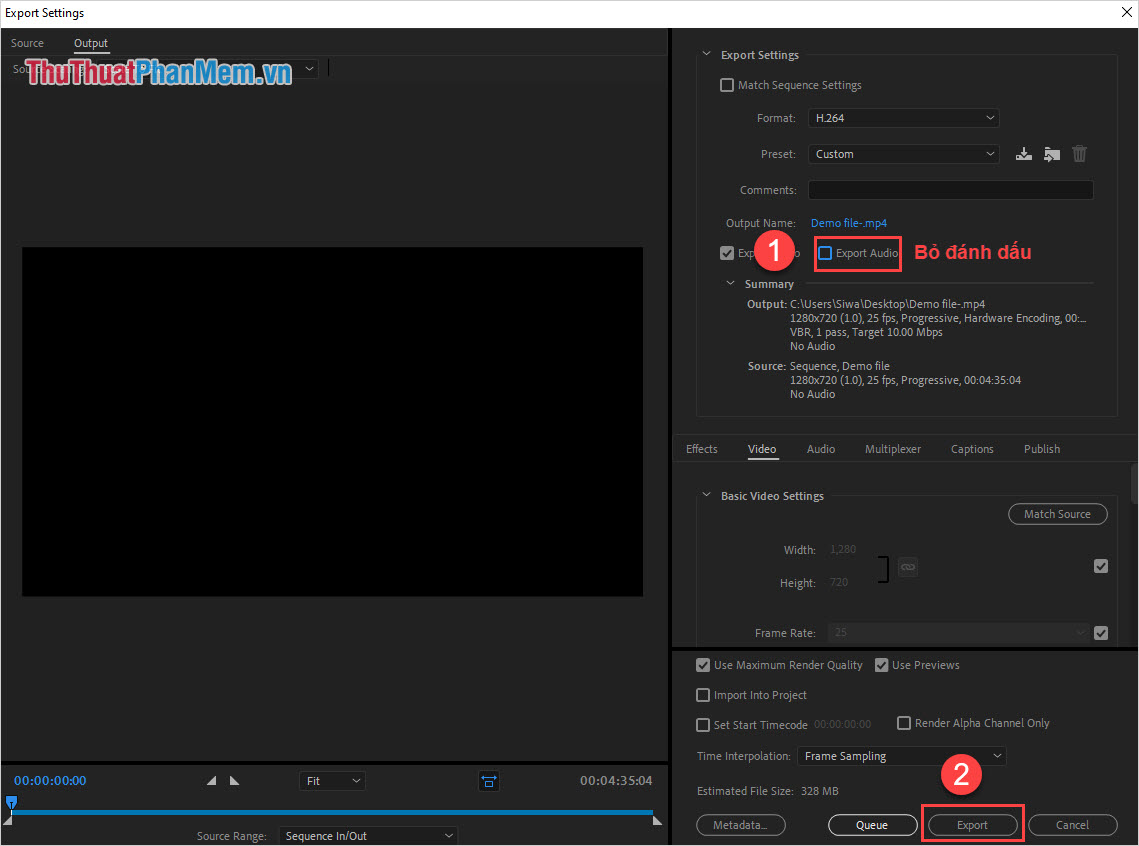
Step 5: In the Video export window, uncheck the Export Audio item and select Export to export the Video without sound is finished.
So you have completed the removal of Audio Video Premiere Pro software on the computer.
2. Use VLC to remove audio from Video
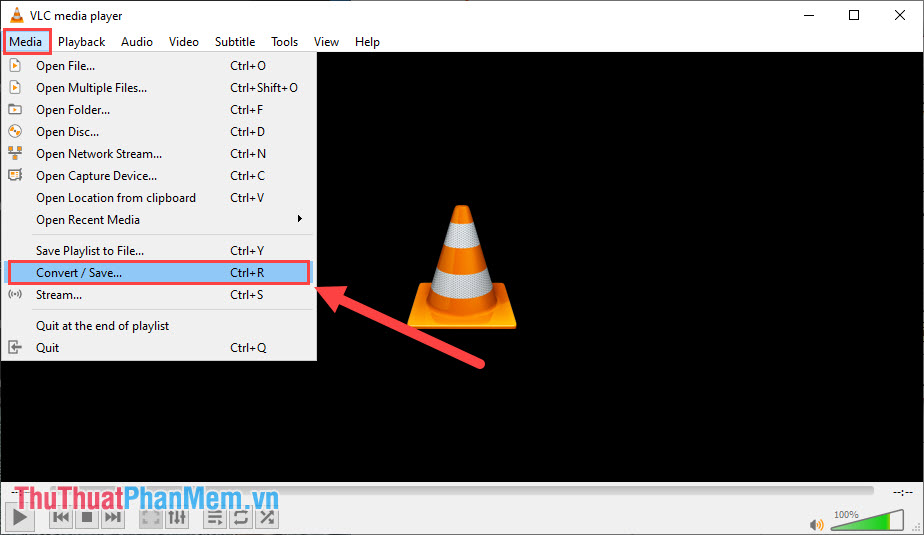
Step 1: First, launch the VLC software and select Media -> Convert / Save. (Ctrl + R) .
Step 2: Then, you proceed to select File (1) and select Add (2) to add Video files to delete audio into the system.
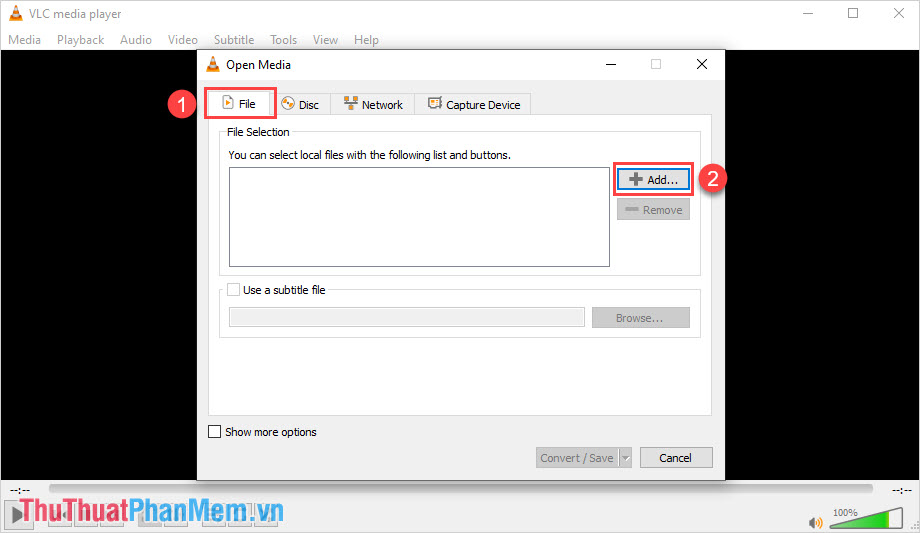
Step 3: After selecting the file to finish editing, you select Convert / Save to proceed to change.
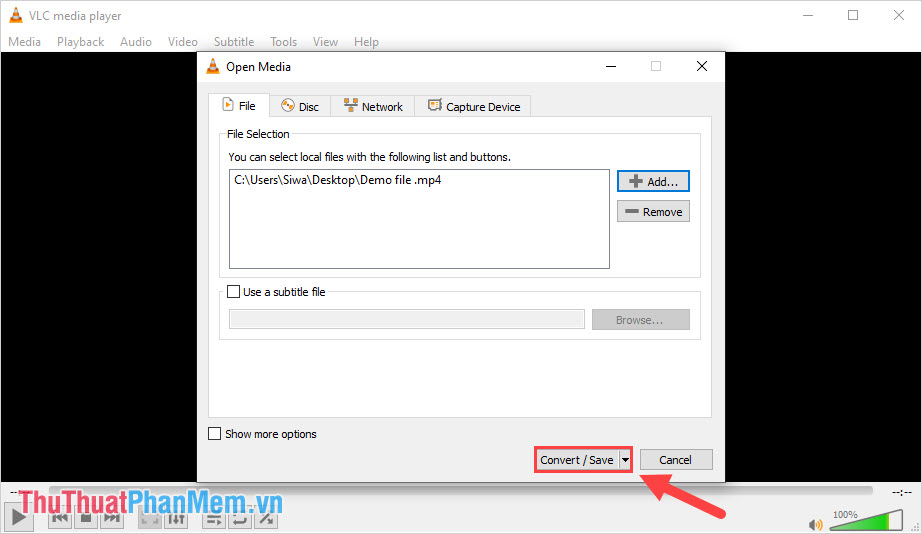
Step 4: Next, you select the Wrench tool icon to proceed to edit.

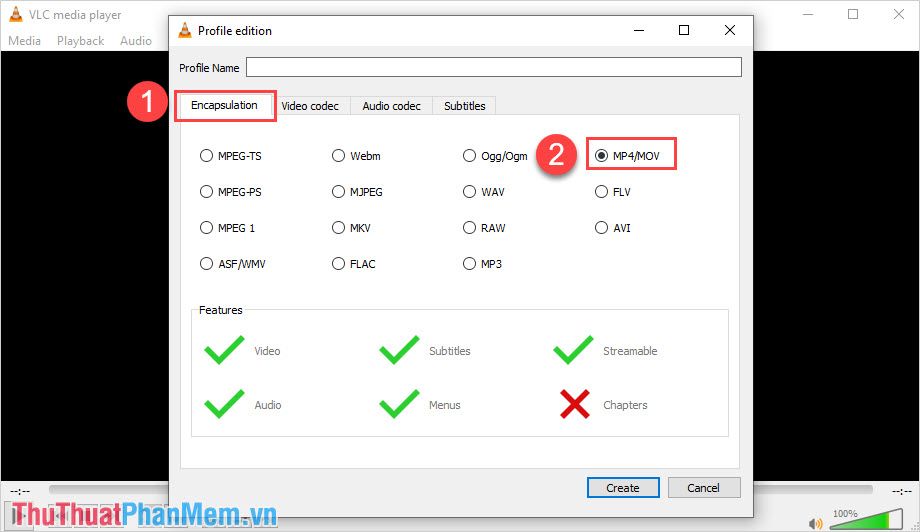
Step 5: In this editing window, select Encapsulation and choose MP4 / MOV .
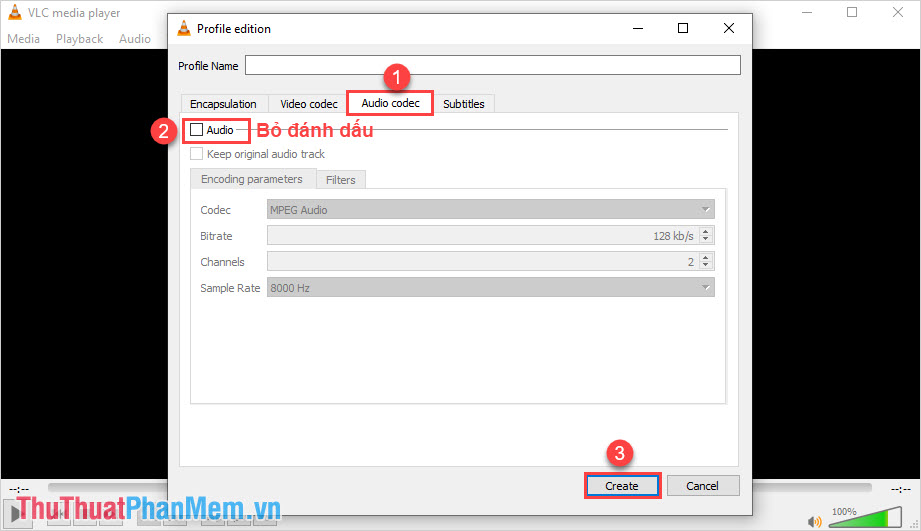
Step 6: Finally, select Audio Codec , uncheck Audio, and click Create to finish. The system will proceed to export the Video file without sound for you.
3. Use Movavi Video Editor to remove audio from Video
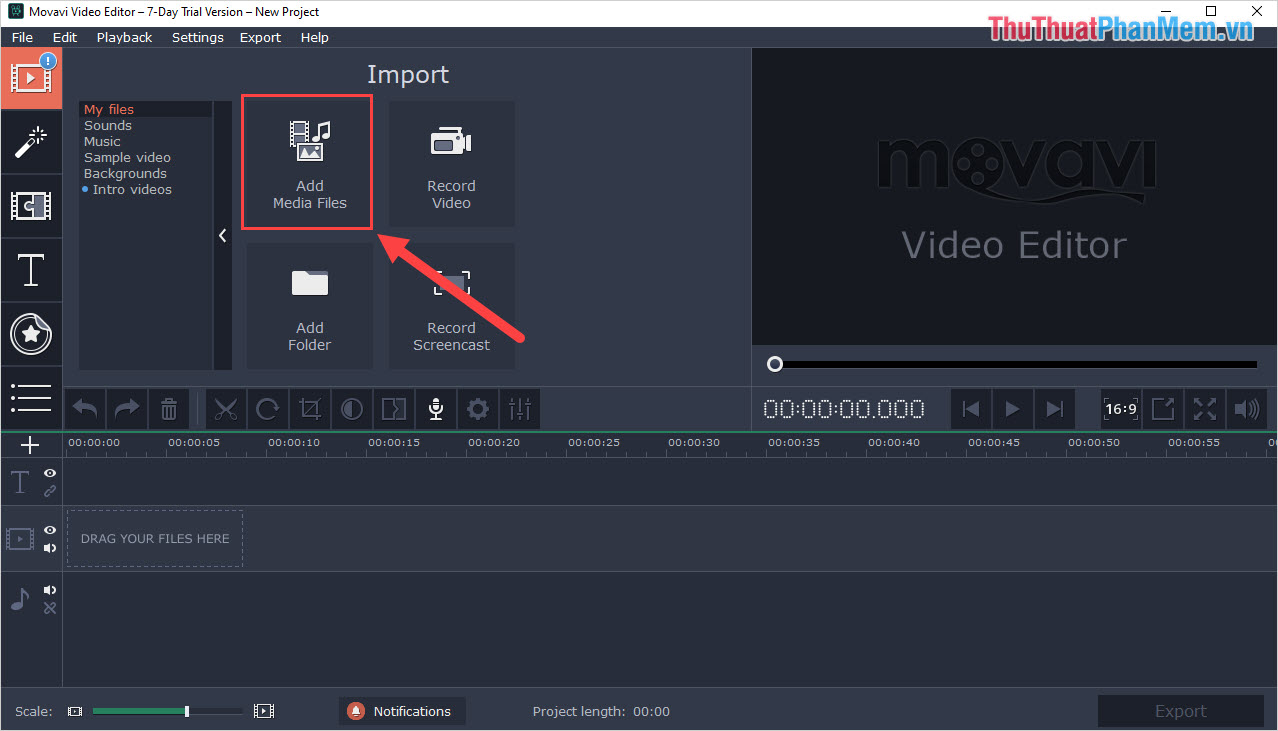
Step 1: First, you proceed to launch the software and select Add Media Files to add Video files to remove audio into the system.
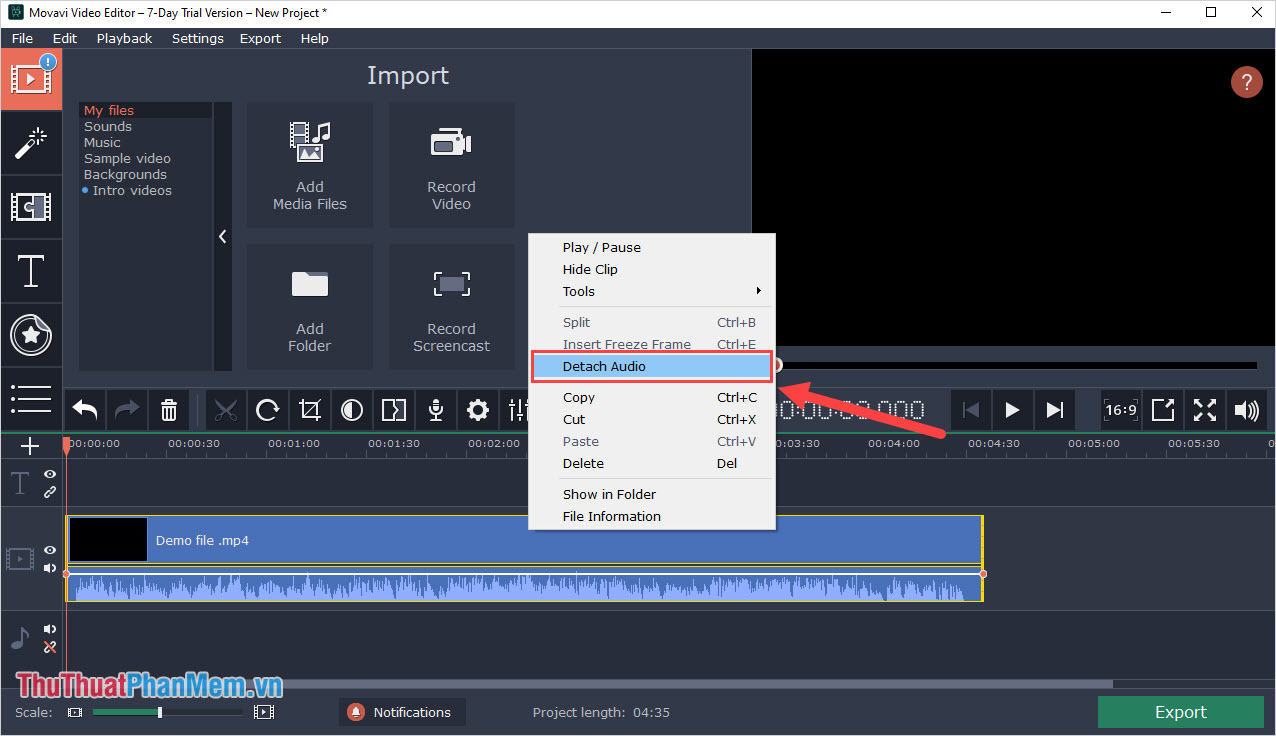
Step 2: After the Video file with audio has been added, right-click on them to select Detach Audio .
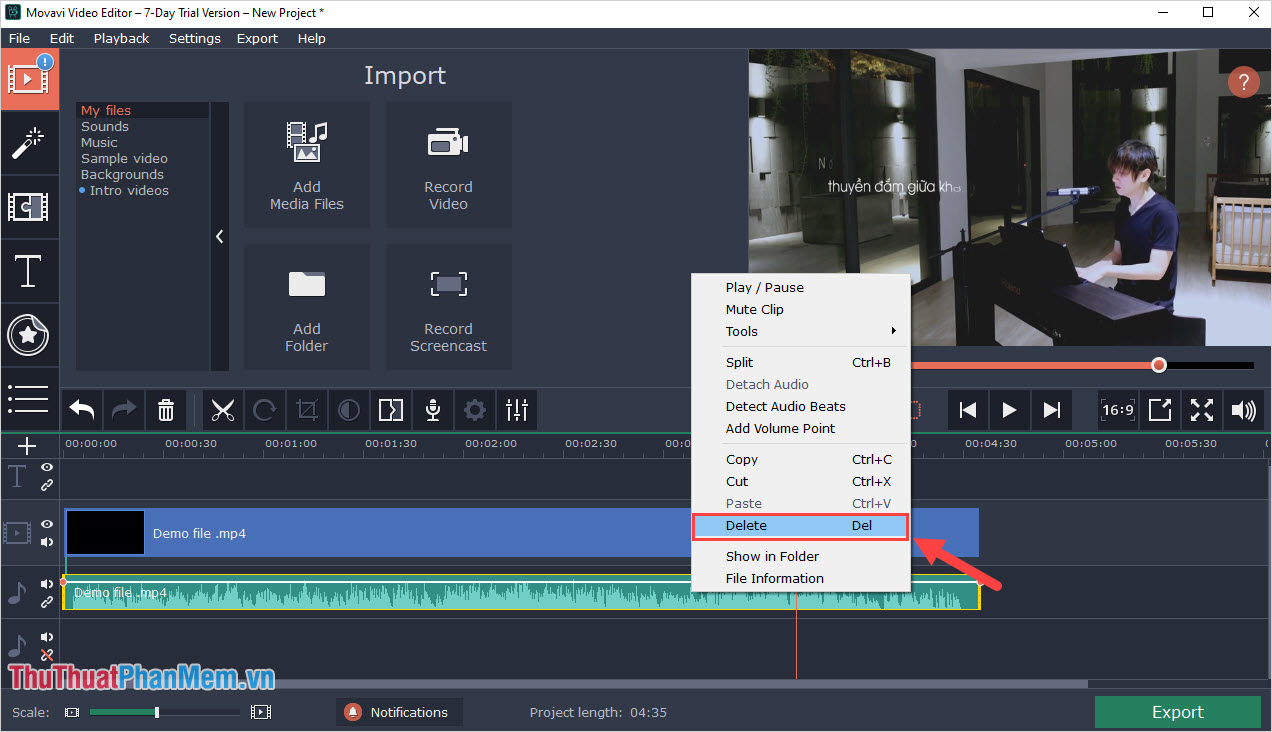
Step 3: Now the Video and Audio files will be extracted, you right-click on the Audio bar below and select Delete is done.
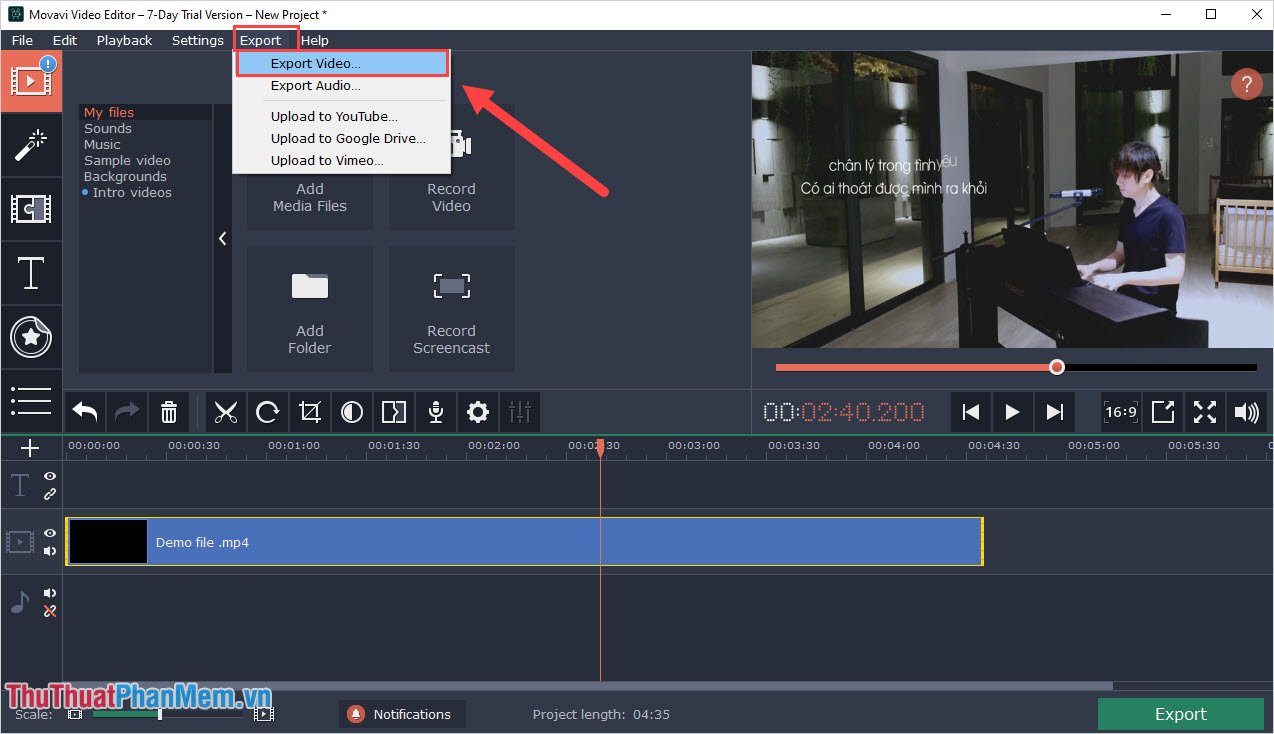
Step 4: Finally, select Export and select Export Video to export the deleted video.
FAQ
What should I know about Delete Audio in Video?
Focus on the key features, requirements, limitations, and practical use cases explained in this guide.
How do I get the best results with Delete Audio in Video?
Follow the recommended steps, use current software or information, confirm compatibility, and review settings before major changes.
Are there any risks or limitations?
Potential limitations depend on compatibility, data quality, cost, privacy, support, and how the product or method is used.
Related Articles
 How to Separate Audio, Separate Audio from Videos in VLC and YouTube7 minutes read
 How to Delete Audio When Posting Videos to Instagram3 minutes read
 Instructions on How to Delete Audio in Video Online4 minutes read
 How to Extract Audio from Video on iOS4 minutes read
 5 Easy Ways to Extract Audio from Video5 minutes read
 6 Tools to Convert Audio to Video Online7 minutes read
Reader Comments 0
Sign in with email or Google to join the discussion.