How to crop a bitmap image in CorelDRAW
In the article below, TipsMake will guide you on how to crop bitmap images on older versions of CorelDRAW. On newer versions of the application, you follow similar steps.
Table of Contents
Refer to the article below from TipsMake to learn how to crop bitmap images in CorelDRAW . Additionally, you can refer to other articles on TipsMake to learn more about removing borders in CorelDraw.

Instructions on how to crop a bitmap image in Coreldraw
Download the latest version of CorelDraw here:
=> See more instructions on installing and using Corel here.
How to crop a bitmap image in CorelDRAW
Unlike bitmap editing applications, digital images in CorelDRAW are essentially just bitmap-based objects placed within a vector clipping path.
This means that the clipping path contains the image, and the boundaries of this vector path define the overall shape of the bitmap. By controlling the path, you can easily crop the bitmap image within it.
1. Method 1: Use the Shape Tool to change the position of the buttons.
Step 1 : To begin, ensure you have a bitmap. Bitmaps can be converted from vector objects using the Convert to Bitmap command or added from an external source using the Import command (Ctrl + I). Next, click to select the bitmap.
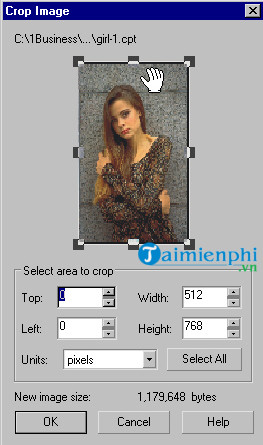
Step 2: If you choose to import a bitmap, you must first crop the bitmap by selecting Crop from the menu in the Import dialog box, as shown below.

Step 3: Next, click OK . A Crop Image dialog box will appear on the screen. Here, enter the values in the Top, Left, Width , and Height fields , then click OK . This allows you to add a cropped bitmap copy to the page.
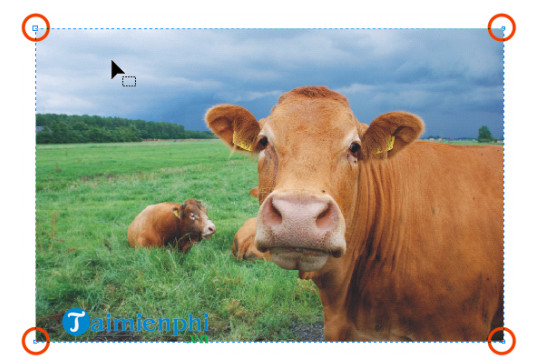
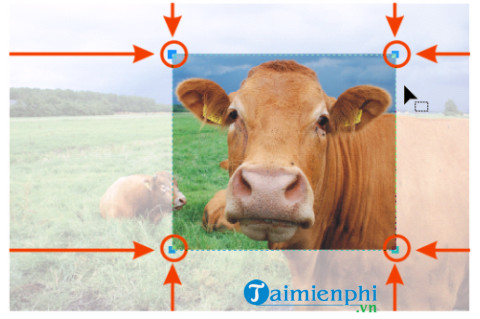
Step 4: If the image you want to crop is already in the document, simply select the Shape Tool (F10) and click to select the bitmap.
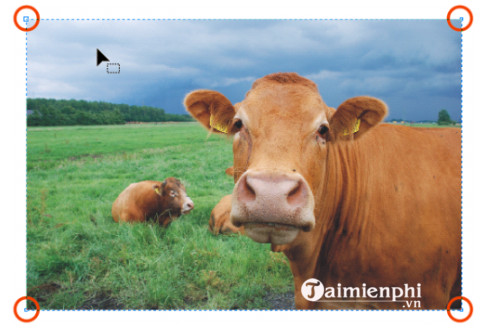
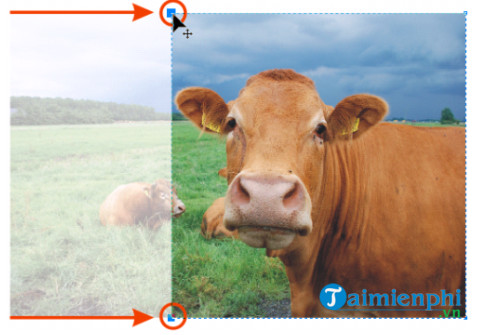
Note: There are 4 buttons displayed at the 4 corners of the image. Drag these points to crop the bitmap.
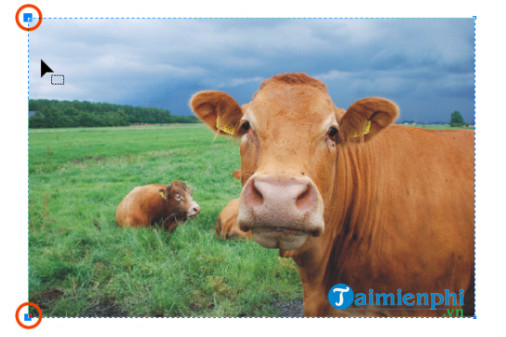
Step 5: Next, use the Shape Tool cursor to click on one of these buttons and drag. When you release the mouse button, part of the image will be hidden.

Step 6: To display the hidden image, simply click and drag the button back to its original position.
2. Method 2: Cropping a bitmap image in CorelDRAW by dragging
Step 1: Using the Shape Tool , click to select the bitmap. Determine the area where you want to crop the image, then press and hold the Shift key and click on each node, or click and drag the nodes.
Step 2: After selecting the nodes, press and hold the Ctrl key while dragging the two nodes on the bitmap. Pressing and holding the Ctrl key restricts movement while dragging the image.
Step 3 : Repeat the same steps for the sections you want to cut.
Finally, another way to crop a bitmap image in CorelDRAW is to use the Crop Bitmap command , or click on Bitmaps => Crop Bitmap , or click the Crop Bitmap button on the Property Bar.
While using Corel, if you want to work faster, you can refer to and use Corel keyboard shortcuts for better and more convenient operation.
The article above, provided by TipsMake, has guided you on how to crop bitmap images in CorelDRAW. Additionally, if you have any further questions or need clarification, please leave your comments in the section below the article.
Was this article helpful?
Your feedback helps us improve.
Related Articles
 How to Crop an Image Using GIMP6 minutes read
 How to Convert a Bitmap Image Into a File Format Supported by wikiHow2 minutes read
 How to crop an image into a circle in Photoshop3 minutes read
 How to crop an image into a circle on Canva3 minutes read
 How to crop pictures in OneNote app?3 minutes read
 Instructions on how to cut photos as you like in Photoshop3 minutes read
Reader Comments 0
Sign in with email or Google to join the discussion.