Table of Contents
This updated guide explains how to Create Different Workspaces on Opera through clear steps, practical examples, and important checks that help prevent common errors.
Instructions for Using Workspace on Opera
Step 1:
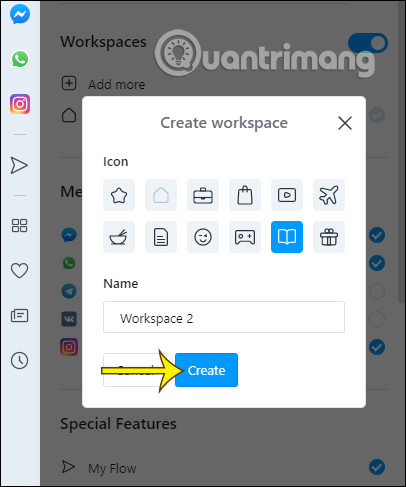
After upgrading Opera to the latest version, you are opening Workspace 1. To create another Workspace, click the 3-dot icon below the menu bar and select Add more .

Then select the icon for the 2nd workspace and name it and click Create to create.
Step 2:
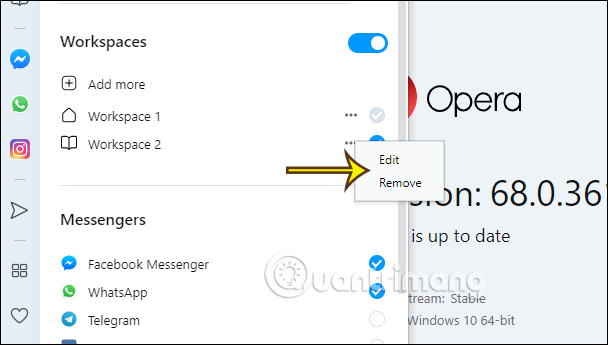
We perform the above operation to create different workspaces. The space created, then press the 3 dots to edit or delete if desired.
Step 3:
Then you open the tab to work or play as usual. To switch to the different workspaces you have created then click the Workspace icon you created earlier in the left menu bar to access.

Step 4:
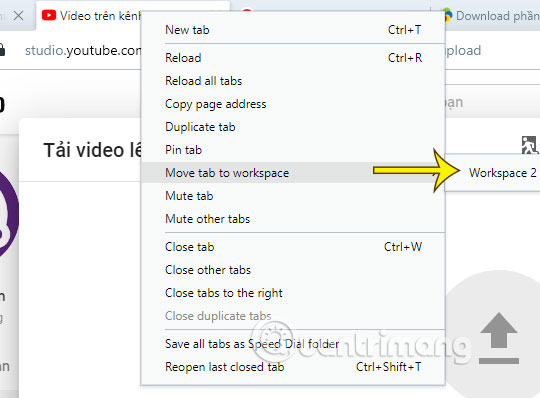
If you want to move a tab to another Workspace , right-click the tab you want to move> Move tab to workspace and select the desired workspace.
Step 5:
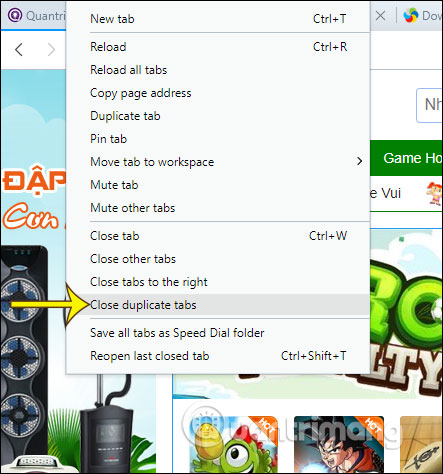
To identify whether there is a duplicate tab in the workspace , we just need to click a tab, if the tab shows a blue strip, then this tab has been duplicated.
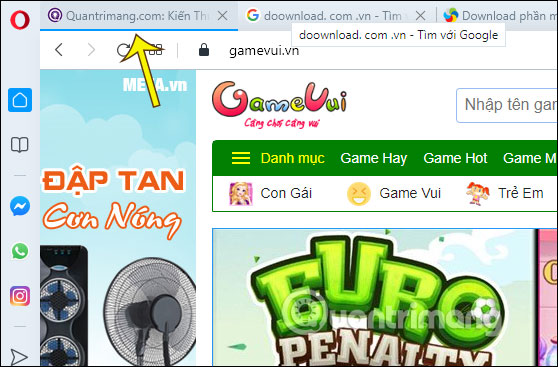
To close duplicate tabs , right-click the original tab and select Close duplicate tabs . Then the duplicate tab is automatically closed.
FAQ
What is the easiest way to Create Different Workspaces on Opera?
Start with the requirements in this guide, then follow each step in order. Check the result after every major change so problems are easier to identify.
Can beginners follow these instructions?
Yes. The process is organized into practical steps, and you can repeat any step before moving forward.
What should I check if the method does not work?
Confirm your software or device version, permissions, settings, file format, and internet connection when the task depends on online services.
Related Articles
 Learn About Opera Page: of Opera Browser5 minutes read
 What Is Opera One Web Browser? What Can It Do?5 minutes read
 Improve Productivity with Microsoft Edge Workspaces: How-To Guide6 minutes read
 Reviews on Opera VPN: Simple, Fast and Free9 minutes read
 The Brand New Way to Use Opera One4 minutes read
 Why Workspaces Is the Best Powertoys Feature You Haven't Used on Your Windows?6 minutes read
Reader Comments 0
Sign in with email or Google to join the discussion.