How to create and edit ISO files with UltraISO
To create ISO files , we have many options from popular software to emerging software. This file format is so famous and in today's article, let's join TipsMake to create ISO files and edit ISO files with UltraISO. The best ISO file creation software that you should use today.
Create and edit ISO files with UltraISO
Not only can you create an ISO file, but even if you want to edit that ISO file, you can completely do it on UltraISO without worrying about security issues. Right now we will go into this article with how to create ISO files with UltraISO.
How to create ISO files with UltraISO
Step 1: To be able to create ISO files with UltraISO we need to download UltraISO software here.
Step 2: Then open the UltraISO software and leave it there, we start creating the ISO file here.
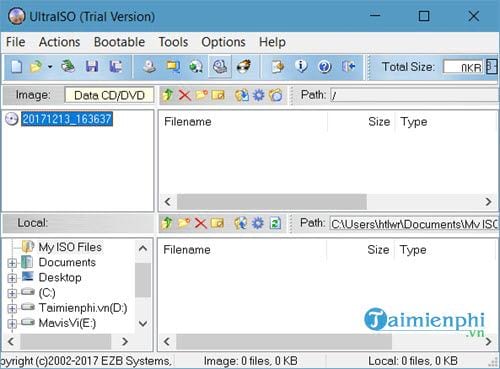
Suppose we have a folder containing files of a game, now we will use UltraISO to create an ISO file with this folder.

Step 3: On UltraISO's interface, select Actions > Add Directory to create the ISO file.

Step 4: Select the folder containing all the files you want to create an ISO file for.

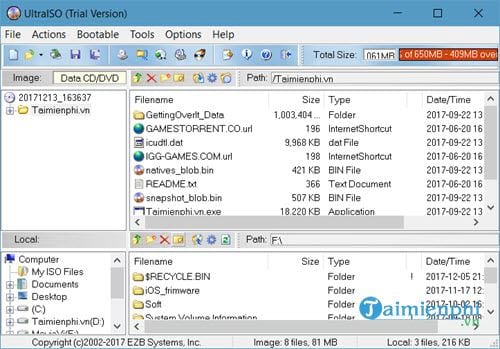
Step 5: You will immediately see the items appear in UltraISO.
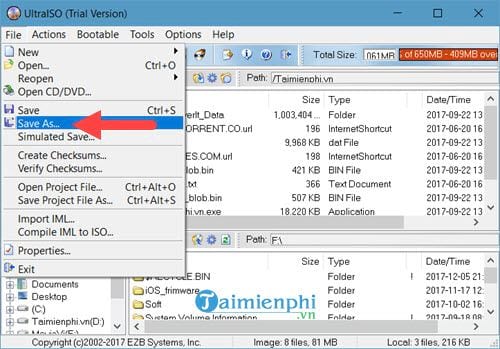
Step 6: Next, go to File > select Save As to proceed with creating the ISO file.
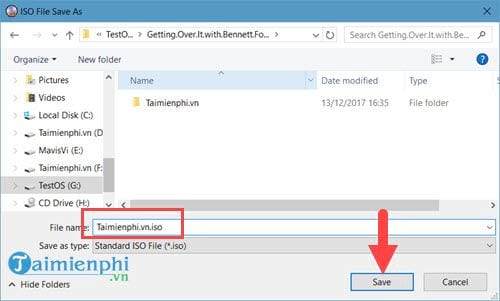
Here you can save the file under any name you want, as long as it is in ISO format.
The process takes place quickly or slowly depending on the size of the file you create.
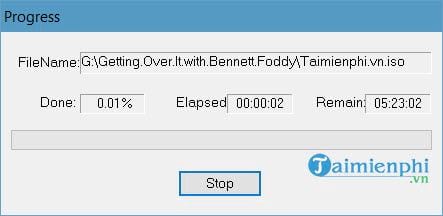
And the final result when you create a complete ISO file.
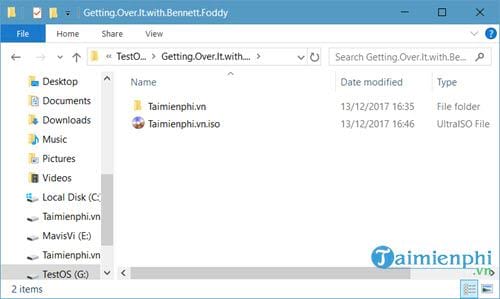
So we have finished creating ISO files with UltraISO.
Instructions for editing ISO files with UltraISO
Step 1: In case we have created the ISO file but forgot a few files, recreating it will take a lot of time or it is a file you downloaded from another place. Don't worry, open UltraISO and select File > Open .
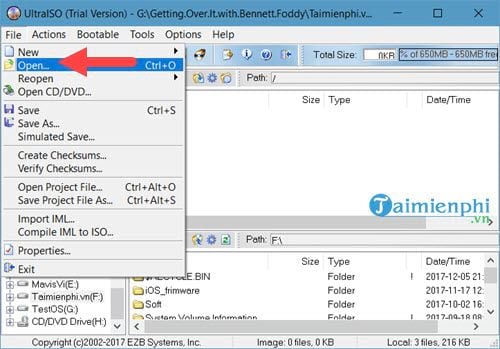
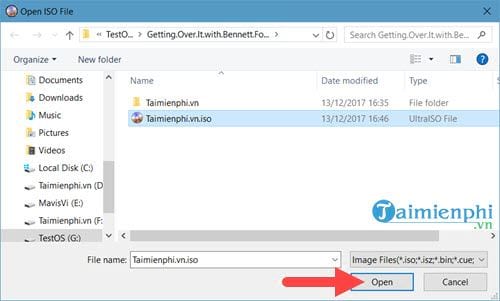
Step 2: Next, open the ISO file you need to edit.
Step 3: Then go to Actions > select Add files .
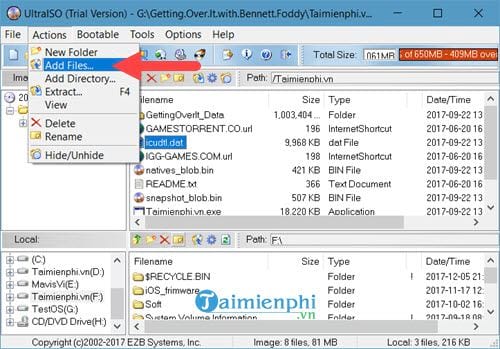
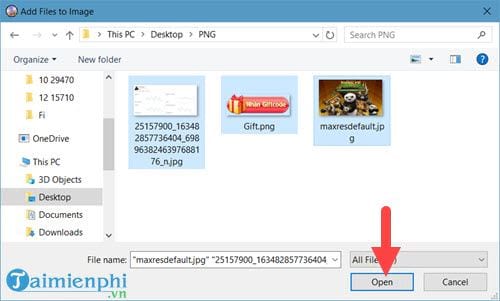
Step 4: Select the files you want to add to the ISO file.
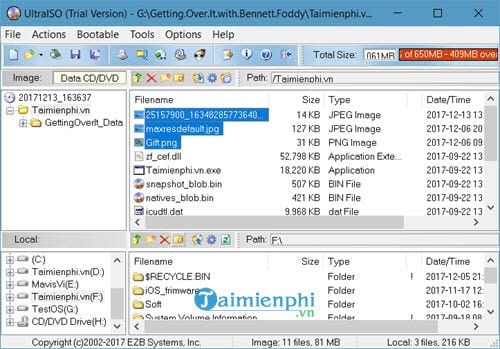
You can check to see if those new files are already in the ISO file.
Step 5: At this step, we do the same as creating an ISO file, which is to choose File > Save as .
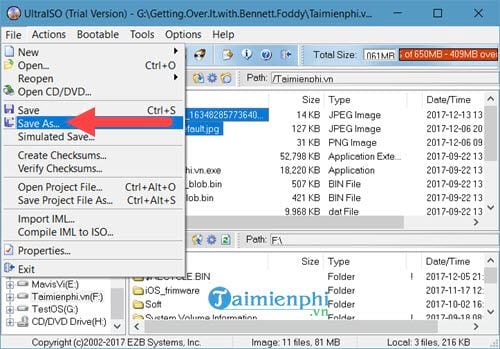
Select the file to save, it can be an old or new file, but if you choose an old file you will save more time.
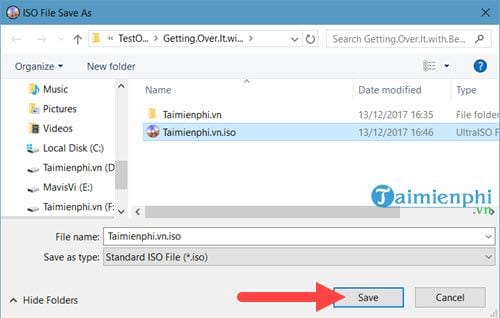
With existing old files, the time to create an ISO file will be much faster.
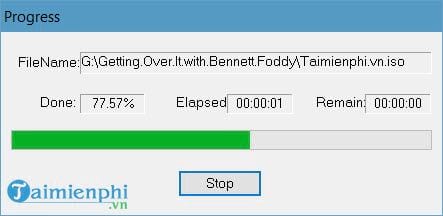
Above are instructions on how to create and edit ISO files with UltraISO. Thereby you can see that creating ISO files or editing is very easy, right? Instead of having to use professional software and many complex features, UltraISO is not a bad choice, right?
You may not know that with some CUE/BIN formats, you can easily convert them to ISO files. Moreover, they are all rare formats, so if you own this file format, you can see instructions on how to do it. Convert CUE/BIN to ISO with our instructions below.