Table of Contents
Rufus can create a Windows 10 installer for either modern UEFI systems or older legacy BIOS systems. Choose settings that match the destination PC; a single “universal” configuration is not guaranteed to boot on every firmware implementation.
Most Windows 10 editions reached end of support on October 14, 2025. The installer remains useful for licensed recovery, compatibility testing, and systems covered by an applicable servicing program, but a general-use PC should move to a supported operating system.
What you need
- An empty USB drive with at least 8GB capacity, or larger than the ISO. Rufus erases the selected device.
- A legitimate Windows 10 ISO from the official Microsoft download page.
- The current release of Rufus from its official site.
- The destination PC's firmware mode and disk layout.
Disconnect other removable drives and back up the USB before starting. Also copy important files from the destination PC; bootable media creation does not erase the PC, but installation can.
UEFI, legacy BIOS, GPT, and MBR
| Destination | Rufus partition scheme | Target system |
|---|---|---|
| Modern UEFI PC | GPT | UEFI (non CSM) |
| Older legacy BIOS PC | MBR | BIOS (or UEFI-CSM) |
These are starting points, not a reason to convert an existing disk blindly. The installer boot mode and destination disk style must be compatible. Check the PC manufacturer's documentation and the current disk configuration before deleting, converting, or formatting partitions.
Create the Windows 10 USB with Rufus
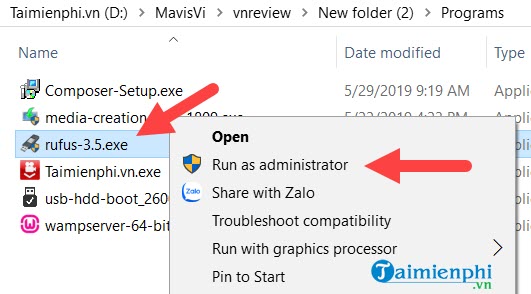
- Run Rufus. Open the downloaded executable and approve the administrator prompt.
- Select the USB device. Confirm its model and capacity in the Device list. Never rely only on the drive letter.
- Choose the ISO. Click Select, browse to the legitimate Windows 10 ISO, and open it.
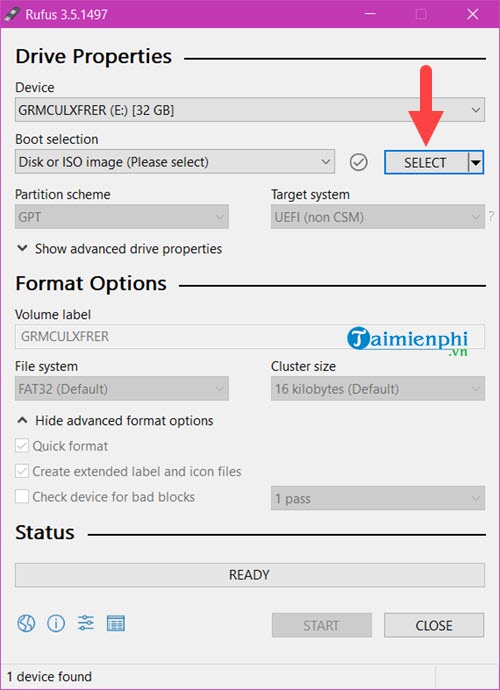
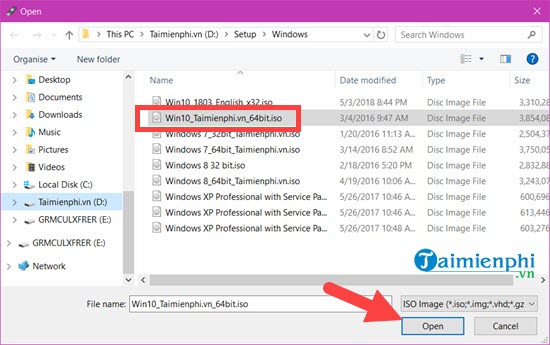
- Set the partition scheme. Choose GPT for a UEFI-only destination or MBR for a legacy BIOS/CSM destination. Rufus updates the Target system field accordingly.
- Review the file system. Leave Rufus's recommended value unless the PC or ISO requires a specific choice. FAT32 has broad native UEFI compatibility but cannot store an individual file larger than 4GB; Rufus may use NTFS and its UEFI support mechanism when necessary.
- Add a useful volume label. A label such as
WIN10_RECOVERYmakes the drive easier to identify.
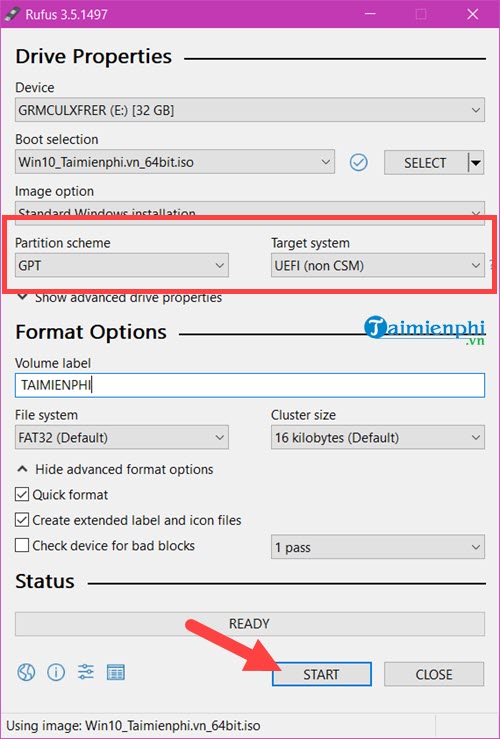
- Start writing. Click Start and read any Windows-installation options Rufus presents. Keep the defaults unless you understand why they need to change.
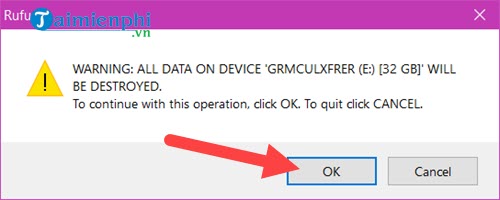
- Confirm the erase warning. Recheck the exact USB model and capacity, then continue only if its files have been backed up.
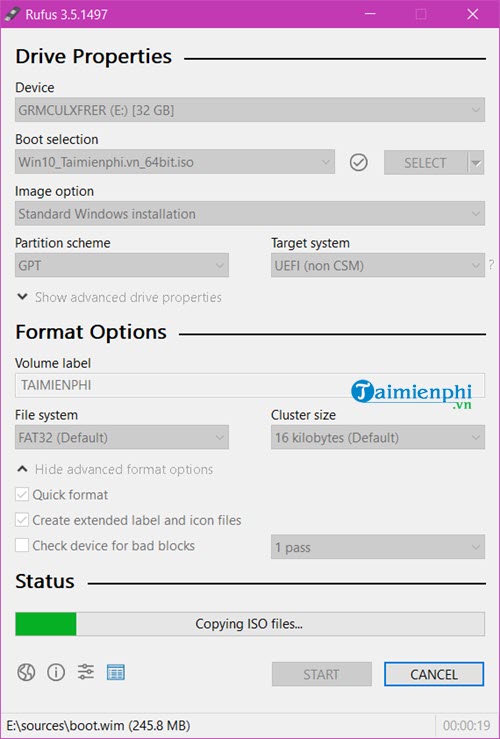
- Wait for completion. Do not unplug the drive or let the PC sleep while Rufus is writing and verifying the image.
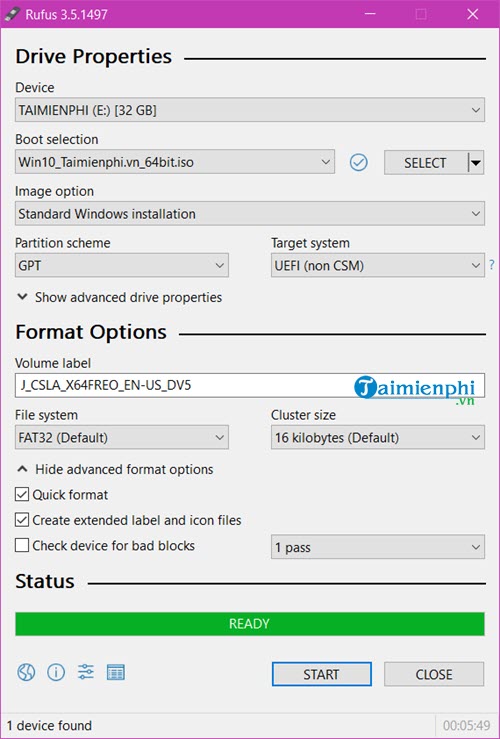
- Finish when Rufus returns to Ready. Close Rufus and eject the USB safely.
Test and boot the USB
Use TipsMake's guide to check whether the USB boots before relying on it for recovery.
- Connect the USB to the powered-off destination PC.
- Open the one-time boot menu using the manufacturer-documented key.
- For a GPT/UEFI drive, choose the UEFI-labeled USB entry. For an MBR/legacy drive, choose the legacy or non-UEFI entry.
- Stop at the first Windows Setup screen if you are only testing. Do not select or format an internal disk.
Can one USB support both UEFI and legacy BIOS?
Sometimes an MBR-based installer can boot on a mix of legacy and UEFI systems, but compatibility depends on the ISO, file system, Secure Boot configuration, and firmware. Do not describe an MBR/BIOS-or-UEFI-CSM drive as guaranteed pure-UEFI media.
If you regularly support many different PCs, use separate clearly labeled UEFI and legacy USB drives, or consider a maintained multiboot tool. Our bootable USB software comparison covers alternatives.
Troubleshooting
The USB does not appear in the boot menu
- Try another USB port and avoid a hub.
- Confirm that the firmware mode matches the Rufus configuration.
- Verify that the ISO supports the target architecture and boot mode.
- Review the PC maker's Secure Boot guidance. Do not disable security features as a routine first step.
Windows cannot install to the selected disk
The installer may have been booted in a mode that conflicts with the disk's GPT/MBR layout. Back up the disk and confirm the intended boot mode before making partition changes. Deleting or converting partitions can erase every file.
The internal drive is missing
Windows Setup may need the correct storage-controller driver. Download it from the PC or motherboard manufacturer. Randomly changing RAID, AHCI, or VMD settings can make an existing installation unbootable.
Rufus reports write or verification errors
Reconnect the USB, close programs using it, and retry. If errors recur, replace the USB with a known-good device. Do not trust installation media that completed with warnings.
Related Articles
 How to Quickly Create a UEFI Bootable USB Using Rufus3 minutes read
 4 Tools to Create USB Boot Install Windows 105 minutes read
 Create UEFI Standard USB Boot with DLC Boot6 minutes read
 Guide to Quickly Creating a Bootable USB Drive with Hiren's BootCD11 minutes read
 How to Create Windows 10 Installation USB Using Rufus, Boot3 minutes read
 How to Check the Computer That Supports Efi // Uefi or Legacy4 minutes read
Reader Comments 0
Sign in with email or Google to join the discussion.