How to change the default shell in Windows Terminal
You may not know it, but there is a piece of code in the settings file of Windows Terminal that decides which shell to open first (the default shell). Thus, by customizing this code, you can change the default shell attached to Windows Terminal, including Command Prompt, Ubuntu (Linux) or Azure Cloud Shell.
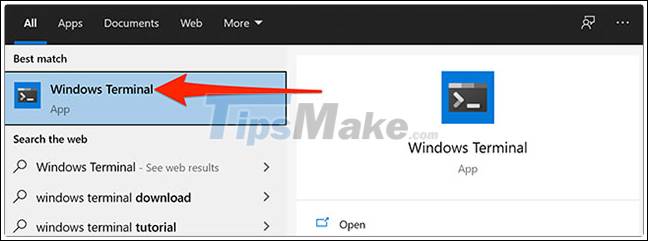
To get started, open the 'Start' menu, search for 'Windows Terminal' and click on the corresponding application in the results.

Next, click the down arrow icon at the top of the Windows Terminal window, then select 'Settings'.

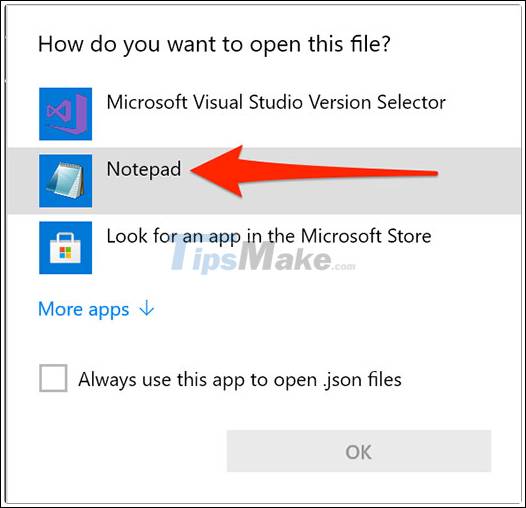
Windows will ask you with which application you want to open the settings file. You can choose any code (or plain text) editor from the list, but we recommend using Notepad for simplicity. Please click 'Notepad' in the list and press 'OK'.

When the settings file opens in Notepad, scroll to the shell section that you want to set as default. There is a heading at the top of each section that tells what each particular shell is used for.
For example, the section of PowerShell says 'Make changes here to the powershell.exe profile'. Similarly, the section of the Command Prompt says 'Make changes here to the cmd.exe profile'. The part of Ubuntu has the keyword 'Ubuntu' to the right of the 'name'.
Now copy the text next to 'guid' in the shell you want to select. You don't need to copy both the quotes. Just copy the text inside the quotes, as shown below:

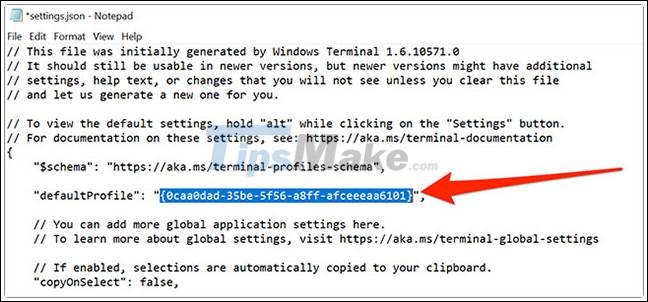
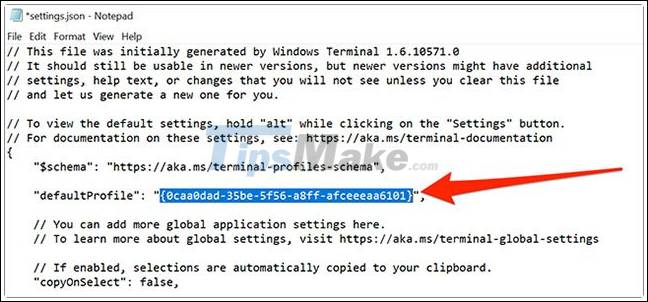
Next, you scroll to the top of the settings file and find the 'defaultProfile' text field. Delete the text next to this field and paste the text you copied above here by pressing Ctrl + V.

Now, click File > Save in Notepad to save the changes.

The shell you selected now becomes the default shell in Windows Terminal.
You should read it
- ★ How to Change Default Folder in Windows Terminal
- ★ How to customize Windows Terminal application
- ★ Windows Terminal is about to have a retro version with a 'classic' interface.
- ★ How to make Windows Terminal the default Terminal application and its benefits
- ★ Microsoft released Windows Terminal with many interesting advantages