Fixing iTunes error 45075, unable to install iTunes on your computer.
You installed iTunes and encountered error message 45075, but don't know how to fix this iTunes 45075 error. Don't worry, because the 3 methods shared by Taimienphi below will help you solve the problem quickly and easily.
During the iTunes installation process, many users encounter errors that prevent them from installing the tool to connect their iPhone/iPad to their computer. Among these, the iTunes 45075 error is quite common, and many users feel confused about how to resolve it.
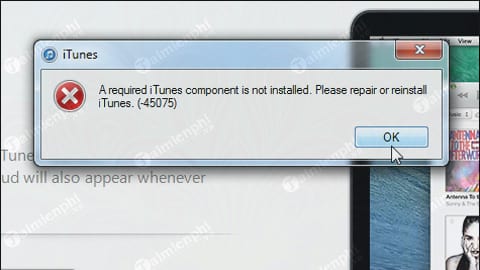
The answer here is that iTunes error 45075 usually occurs when you are trying to download iTunes to your PC or upgrade iTunes from an older version. Honestly, among all iTunes errors, iTunes error 45075 is probably one of the most common. Therefore, in this article, Taimienphi will share with you how to fix iTunes error 45075 so you can connect your device to your computer in time for work and study.
Fix iTunes error 45075
Method 1: Reinstall iTunes
Whenever you encounter an iTunes-related error, not just error 45075, reinstalling iTunes should be your first step, even if you're not very familiar with it. Download the latest version of iTunes here: Download iTunes
Step 1: After downloading the latest iTunes installer to your computer, access the folder containing this file and extract it using WinRar or any other extraction program.
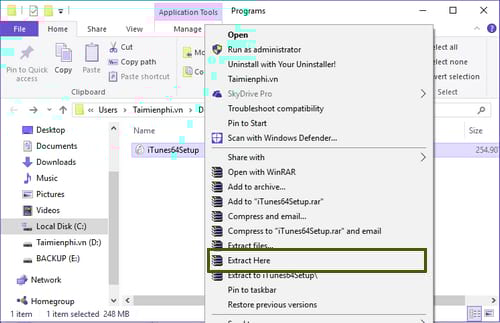
Right-click and select Extract here
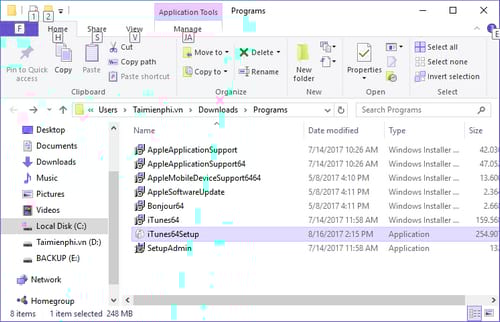
Step 2: After extracting the files, proceed to install the software in the following order:
1. Boujour
2. AppleApplicationSupport
3. AppleApplicationSupport 64
4. AppleMobile DeviceSupport
5. AppleSoftwareUpdate
Step 3: Restart your computer and check iTunes again.
Method 2: Uninstall the software of the related components.
One of the reasons for the iTunes 45075 error is often due to components within iTunes itself. During the upgrade process, older components of the installer can significantly affect the installation. Therefore, to remove these old components and successfully install iTunes, please go to the Control Panel and uninstall the relevant software components in the following order.
1. iTunes
2. Apple Software Update
3. Apple Mobile Device Support
4. Bonjour
5. Apple Application Support (32-bit)
6. Apple Application Support (64-bit)
Note: The method for accessing the Control Panel varies slightly depending on the operating system. Therefore, if you are unsure how to access the Control Panel, please refer to our previous guide on how to quickly access the Control Panel on Windows XP, 7, 8, and 10.
If the iTunes error 45075 persists, try downloading the latest version of iTunes again, extracting the installation files using WinRAR, and then try running the program in the following order.
1. iTunes
2. Boujour
3. AppleApplicationSupport
4. AppleApplicationSupport 64
5. AppleMobile DeviceSupport
6. AppleSoftwareUpdate
Method 3. Fix iTunes error 45075 by checking Windows Firewall.
Some computers may have security applications that block the iTunes installation process. If the above methods don't work, follow the steps below to check your firewall.
Step 1: Open the Run window by pressing the Windows + R key combination and typing the command firewall.cpl, then press Enter or select OK .

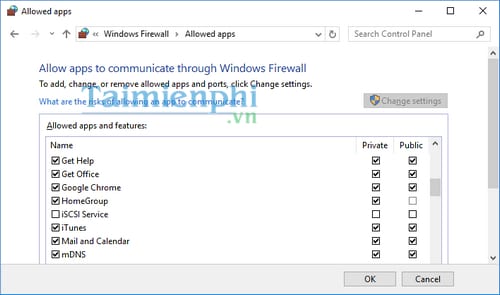
Step 2: When the Windows Firewall window appears, click on the option " Allow an app or feature through Windows Firewall" .

Step 3: Click on Change Settings , then check that iTunes is selected for all Private and Public network types , except for Bonjour , which is only selected for Private networks .
Step 4: Finally, close the Firewall and iTunes should be able to install.
Above are all the ways to fix iTunes error 45075 during the installation and update of the intermediary tool connecting iPhone/iPad to your computer. Hopefully, with the methods above, you can completely fix this error and use iTunes as quickly as possible. In addition, during the use of iTunes, users may encounter numerous other related errors, the most common being the error where iTunes doesn't recognize the iPhone on Windows 10. If you are experiencing this error, please refer to our previous article on how to fix the iTunes not recognizing iPhone error. Good luck!
Was this article helpful?
Your feedback helps us improve.
Related Articles
 Fix iTunes error: 'An iPhone Has Been Detected But It Could Not Be Identified'3 minutes read
 What is iTunes 3259 error? How to fix error 3259?3 minutes read
 Instructions for installing, updating and using iTunes on Windows 107 minutes read
 Fixing the issue of not seeing the Tones ringtone option in iTunes when creating iPhone ringtones.4 minutes read
 Fix iTunes error -45054 quickly while downloading files or folders5 minutes read
 How to install iTunes on Windows 11 32-bit and 64-bit computers11 minutes read
Reader Comments 0
Sign in with email or Google to join the discussion.