Create iPhone ringtones, message tones, and call tones using iTunes.
Creating iPhone ringtones, message tones, and call tones using iTunes is much easier, allowing you to create your favorite ringtones. If you don't know how to use iTunes to create ringtones, please refer to the following article.
Table of Contents
Creating your own custom ringtones for your iPhone using iTunes is something many people are interested in, especially when they're increasingly bored with the default ringtones Apple provides. So how do you create ringtones using iTunes? Follow this guide from Taimienphi to create your own unique ringtones!

Create iPhone ringtones
How to create ringtones and message tones for iPhone
1. Create iPhone ringtones using iTunes 12.7
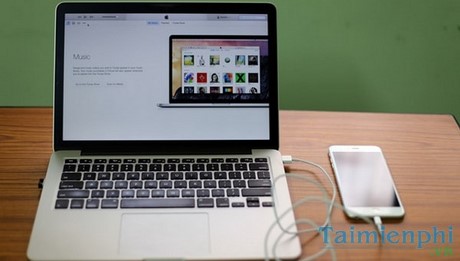
Step 1: Connect your iPhone to your computer via USB cable.
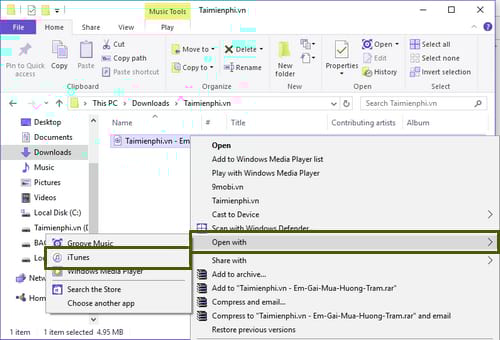
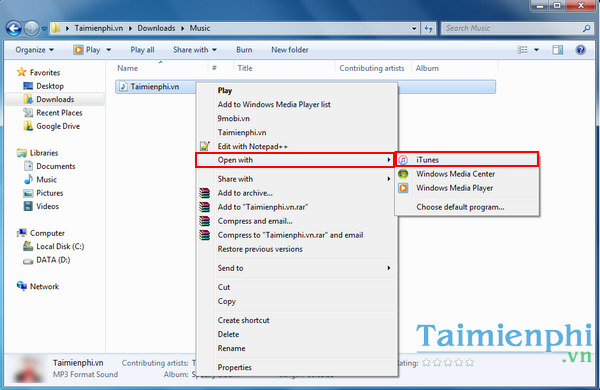
Step 2: Open the folder containing the song you want to use as a ringtone. Right-click on the song and select Open with > iTunes.
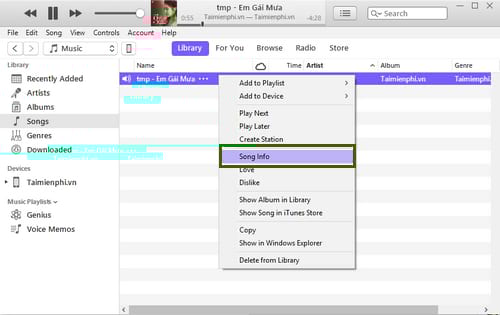
Step 3: The iTunes interface will appear. Here, select "Song" in the left column, then right-click on the song you want to set as your iPhone ringtone and select "Song Info" .
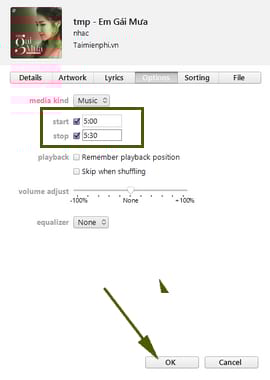
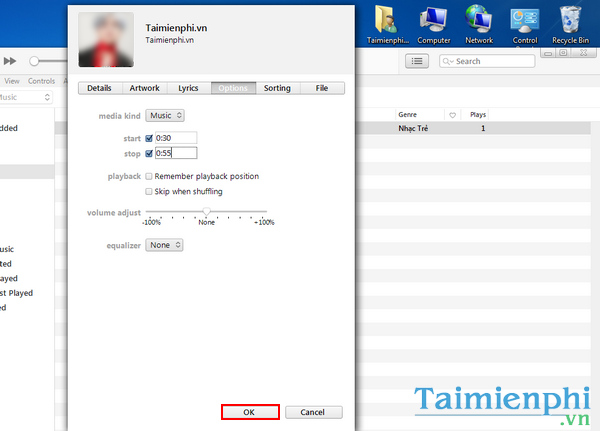
Step 4: The song information window will appear. Switch to the Options tab and select the start and end times in the Start and Stop sections to trim the ringtone segment of that song. It's best to listen to the song beforehand to know which seconds to trim. Then, click OK .
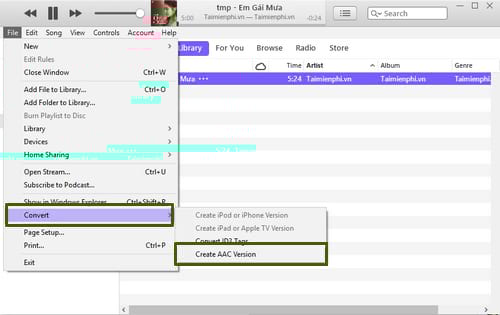
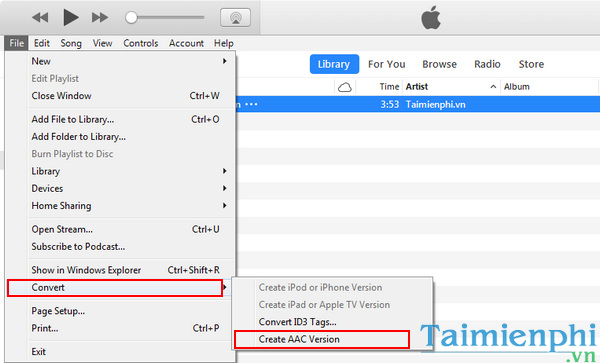
Step 5: Next, on the iTunes interface, click on File in the menu bar in the upper left corner of iTunes, select Convert > Create AAC Version .
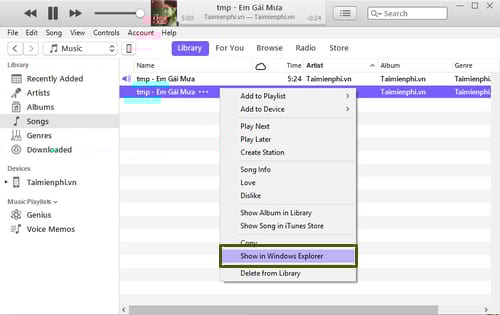
Step 6: iTunes will now convert the song you just selected into a new song right below the original song, corresponding to the time you just created. Right-click on the new song and select " Show in Windows Explorer".
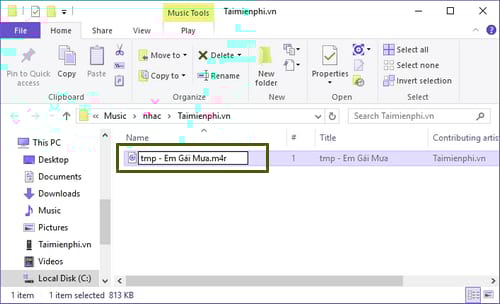
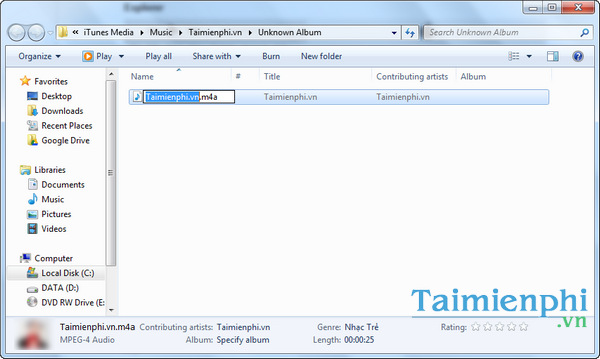
Step 7: The folder containing the newly created song will open. However, this file is in m4a format, while the format required for iPhone ringtones is m4r. Therefore, you need to change the file extension from m4a to m4r to be compatible.

To rename the file, simply right-click on it, select Rename , and change m4a to m4r .
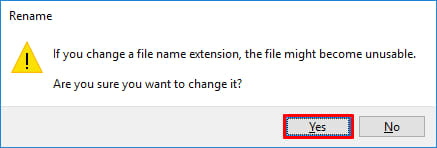
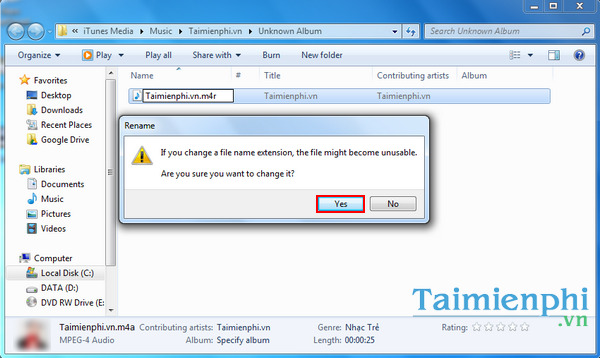
A message will appear asking if you really want to change your name. Press Yes to agree to the change.
If you don't know how to change file extensions, you can refer to the guide on how to display file extensions in Windows to be able to change the file format extension.
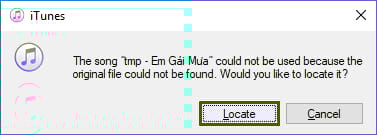
Step 8: Back in iTunes, right-click on the music file you just created and select Show in Windows Explorer.
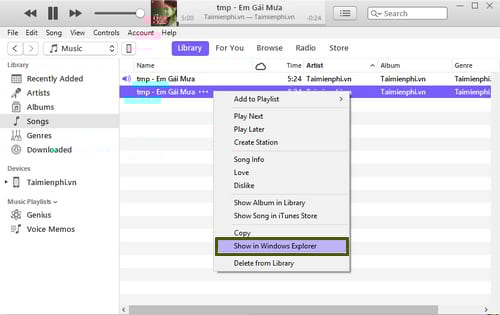
Step 9: Click on Locate in the small dialog box that appears.
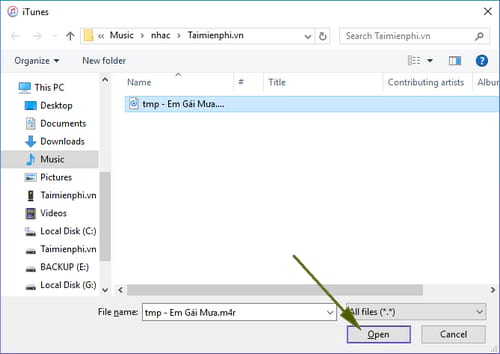
Step 10: Navigate to the folder containing the music file you just renamed and select Open .
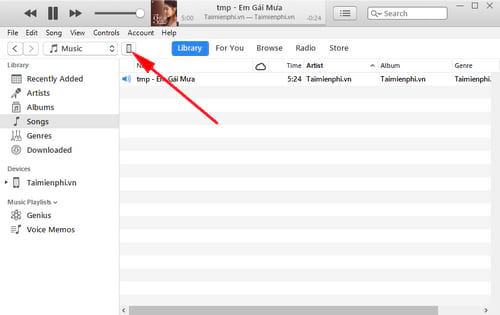
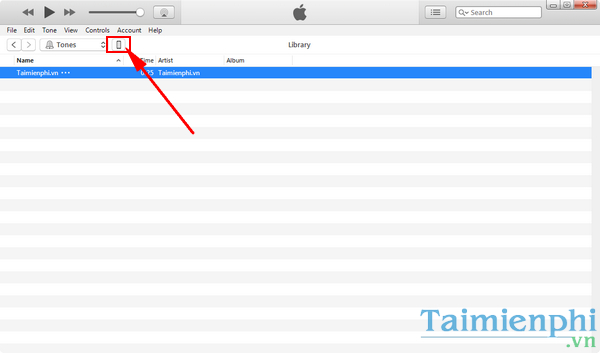
Step 11: Return to iTunes and click on your device icon as shown below.
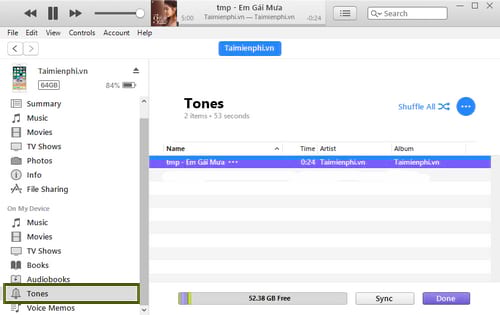
Step 12: Open the folder containing the renamed music file, then drag and drop the song into the " On My Device" section as shown below.
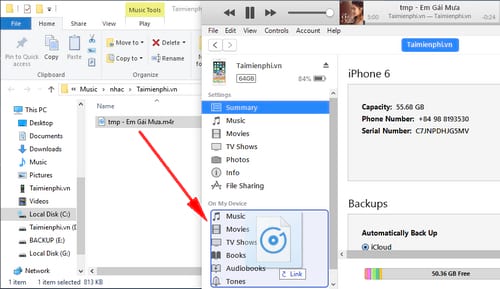
Click on the Tones option in On My Device, and you will see the ringtone displayed there.
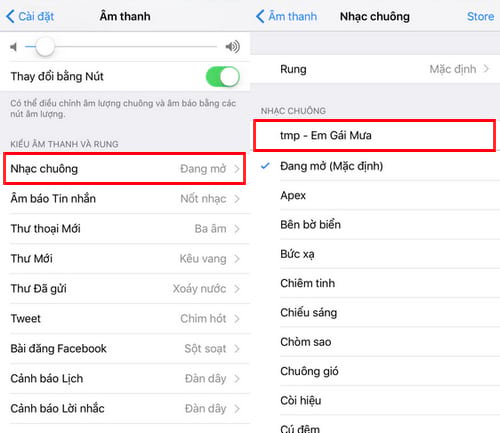
After you have finished copying the files, you can proceed to set your iPhone ringtone as follows:
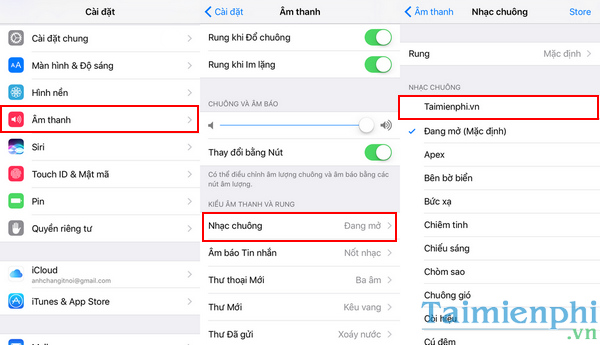
Open your phone, go to Settings > Sound > Ring tones , and tap on the name of the new ringtone to set it as your ringtone.
2. Create iPhone ringtones using an older version of iTunes.
Step 1: Launch iTunes and connect your iPhone to your computer. If your computer doesn't have iTunes installed, download and install the latest version of iTunes.
Step 2: Download a song you want to use as a ringtone, right-click on the song and select Open with > iTunes.
Step 3: In iTunes, select "Song" in the left-hand column, then right-click on the song and select "Get Info" .

Step 4: In the next window that appears, click on the Options tab , then select the start and end times in the Start and Stop sections to trim the ringtone from that song. It's best to listen to the song first to know which seconds to trim from. Then, click the OK button .
Step 5: iTunes will then return to the song list screen from before. Click on File in the menu bar in the upper left corner of iTunes > select Convert > Create AAC Version .
Step 6: iTunes will now convert the song you just selected into a new song right below the original song, corresponding to the time you just created. Right-click on the new song and select " Show in Windows Explorer".

Step 7: The folder containing the newly created song will open. However, this file is in m4a format , while the format required for iPhone ringtones is m4r . Therefore, you need to change the file extension from m4a to m4r to be compatible.
To rename the file, simply right-click on it, select Rename, and change m4a to m4r . A message will appear asking if you really want to rename it. Click Yes to confirm the change.
Refer to the guide on how to display file extensions in Windows so you can change the file extension.
Step 8: Drag the renamed file into iTunes to add it to your Tones library by selecting Music > Tones > and then selecting the phone icon as shown below.
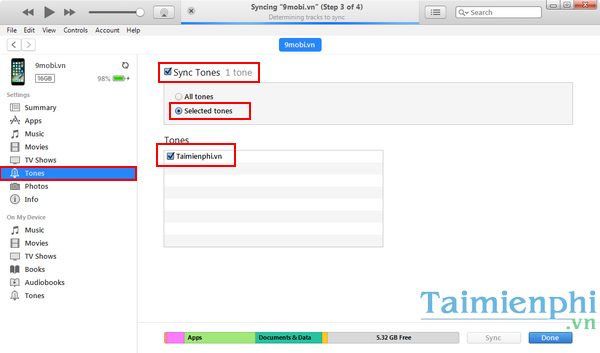
Step 9: Next, select Tones from the menu on the left side of the screen. Then, in the right column, check Sync Tones , then check Selected Tones , and in the Tones section , select the ringtone you want to synchronize. Finally, click Apply to synchronize the ringtone.
Step 10: That completes the process of copying music to your iPhone. Now open your phone, go to Settings > Sound > Ring tones > select the ringtone you just created.
So, with the detailed instructions that Taimienphi has provided above on how to set iPhone ringtones using iTunes, you can now create your own unique ringtones. What could be more satisfying than having unique ringtones on your iPhone that you created yourself? If you are using an iPhone 6 and haven't yet used all of its features, please check out our article on how to use the iPhone 6 to learn more about how to use it and tips for better use of the iPhone 6 and 6 Plus.
To ensure accuracy, your iPhone needs to be genuine and not counterfeit. You can check the iPhone IMEI using the instructions below to verify its authenticity.
Was this article helpful?
Your feedback helps us improve.
Related Articles
 How to fix the error does not appear item Tones ringtone on iTunes4 minutes read
 How to fix m4r file error creating iPhone ringtone with iTunes3 minutes read
 Create super fast iPhone ringtones with iTunes on macOS3 minutes read
 How to create iPhone ringtones with iTunes4 minutes read
 Set a message ringtone, call for each person on iPhone4 minutes read
 Fixing the issue of not seeing the Tones ringtone option in iTunes when creating iPhone ringtones.4 minutes read
Reader Comments 0
Sign in with email or Google to join the discussion.