Table of Contents
Gemini Canvas can generate code for an interactive web lesson, including a simple 3D-style or genuinely 3D simulation. The best results come from defining the learning objective, required stages, interactions, and factual source material before asking for code.
The example below uses a butterfly life-cycle lesson. It is a visualization rather than a scientific experiment: students explore a model, but they are not testing a hypothesis or collecting real observations.
1. Write a clear lesson specification
Begin by asking Gemini to help define the content and interaction. A useful prompt is:
You are helping design an interactive web lesson for students aged 10–12.
Topic: butterfly life cycle.
Create a specification with:
- egg, larva, pupa, and adult stages in the correct order;
- one short, factual explanation per stage;
- Previous and Next controls;
- a clickable 3D model that can rotate and zoom;
- keyboard-accessible controls and reduced-motion support;
- a short four-question review.
List any biology claims that a teacher should verify before coding.
2. Verify the lesson content
Review the proposed stages and explanations before generating the interface. Compare biological facts with a trusted textbook, museum, university, or government source. Remove claims that are too broad for all butterfly species and specify the audience and reading level.
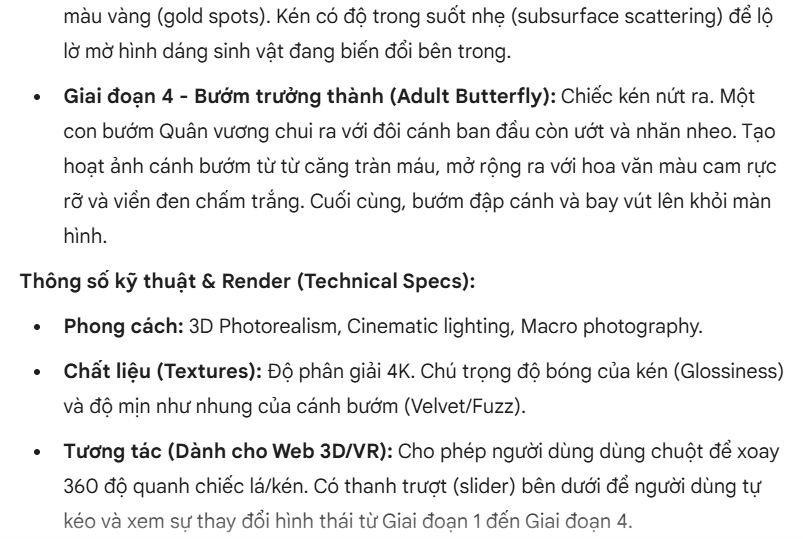
3. Generate the simulation in Canvas
Open Canvas in Gemini and ask it to implement the approved specification as a self-contained web app. If your account offers several models, choose one that supports Canvas and code generation; the exact label may differ from the screenshots.
Build the approved lesson in Canvas.
Use HTML, CSS, and JavaScript.
Keep all content in this project and do not load unknown third-party scripts.
Show a visible loading or error message if a 3D asset fails.
Do not invent image or model URLs. Use simple code-generated shapes when no asset is supplied.
Gemini may create a 2D interface with depth effects unless you explicitly request a 3D library or model. Decide whether true 3D adds educational value; a clear 2D diagram is often faster and more accessible.
4. Test every interaction
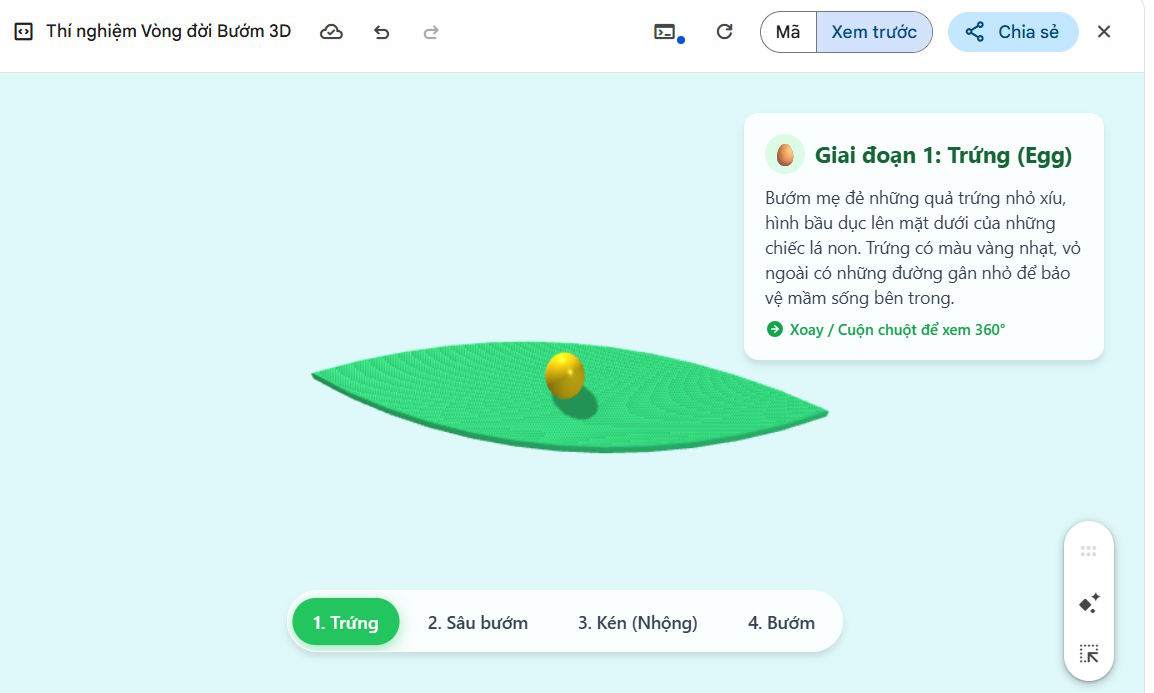
Run the preview and check the stage order, labels, buttons, rotation, zoom, and quiz. Test on the same devices and browsers students will use.
- Verify that keyboard users can reach every control.
- Ensure text remains readable at 200% zoom.
- Provide text alternatives for visual information.
- Check that motion can be reduced or paused.
- Confirm the lesson works on a small screen and a slow connection.
- Make sure the quiz accepts only answers justified by the lesson.
5. Request focused revisions
Describe one problem at a time and ask Gemini to show the change. For example: The Pupa button cannot be reached with the Tab key. Fix keyboard navigation without changing the visual layout, then explain the edited code.

After each edit, rerun the entire checklist. A change to controls or rendering can break another part of the app.
Before using the simulation in class
Inspect downloaded code for external network requests and tracking, confirm that all media is licensed, and avoid collecting student names or responses unless the school has approved the system. Keep a non-interactive alternative such as a labeled diagram or handout for students whose devices cannot run the simulation.
A Gemini-generated preview is a prototype. The teacher remains responsible for scientific accuracy, accessibility, privacy, and whether the activity actually supports the lesson objective.
Related Articles
 The Website Features Hundreds of Simulated Experiments for Teachers4 minutes read
 Guide to Creating Realistic Working Circuit Simulations4 minutes read
 Which Is Better for Building Simulation Software: Claude, ChatGPT, or Gemini?10 minutes read
 How to Combine Gemini with NotebookLM to Improve the Quality of Research Reports11 minutes read
 Try Lyria 3 Now to Create High-quality Music on Gemini: Explained4 minutes read
 How to Create Visual Lectures with Gemini Canvas4 minutes read
Reader Comments 0
Sign in with email or Google to join the discussion.