Configure SSH Server and SSH Client on Windows Server 2019
In the next part of the Windows Server 2019 theme, read along to learn how to configure SSH Server and SSH Client!.
Configure SSH Server on Windows Server 2019
Step 1. Run Powershell as admin and configure SSH server as follows:
PowerShell Copyright (C) Microsoft Corporation. All rights reserved. # get available name of OpenSSH PS C:UsersAdministrator> Get-WindowsCapability -Online | ? Name -like 'OpenSSH*' Name : OpenSSH.Client~~~~0.0.1.0 State : Installed Name : OpenSSH.Server~~~~0.0.1.0 State : NotPresent # Install OpenSSH Server PS C:UsersAdministrator> Add-WindowsCapability -Online -Name OpenSSH.Server~~~~0.0.1.0 Path : Online : True RestartNeeded : False # start sshd service PS C:UsersAdministrator> Start-Service -Name "sshd" # set [Automatic] for Startup PS C:UsersAdministrator> Set-Service -Name "sshd" -StartupType Automatic # verify PS C:UsersAdministrator> Get-Service -Name "sshd" | Select-Object * Name : sshd RequiredServices : {} CanPauseAndContinue : False CanShutdown : False CanStop : True DisplayName : OpenSSH SSH Server DependentServices : {} MachineName : . ServiceName : sshd ServicesDependedOn : {} ServiceHandle : SafeServiceHandle Status : Running ServiceType : Win32OwnProcess StartType : Automatic Site : Container : # if Windows Firewall is running, allow 22/TCP PS C:UsersAdministrator> New-NetFirewallRule -Name "SSH" ` -DisplayName "SSH" ` -Description "Allow SSH" ` -Profile Any ` -Direction Inbound ` -Action Allow ` -Protocol TCP ` -Program Any ` -LocalAddress Any ` -RemoteAddress Any ` -LocalPort 22 ` -RemotePort Any Name : SSH DisplayName : SSH Description : Allow SSH DisplayGroup : Group : Enabled : True Profile : Any Platform : {} Direction : Inbound Action : Allow EdgeTraversalPolicy : Block LooseSourceMapping : False LocalOnlyMapping : False Owner : PrimaryStatus : OK Status : The rule was parsed successfully from the store. (65536) EnforcementStatus : NotApplicable PolicyStoreSource : PersistentStore PolicyStoreSourceType : LocalStep 2. Open Start> Settings .

Step 3. Click on Apps .

Step 4. Click Manage optional features .

Step 5. Click Add a feature .

Step 6. Select OpenSSH Server and click the Install button .

Step 7. After the installation is completed, the OpenSSH Server will be added to the services. Launch it and change Startup to Automatic .

Step 8. If Windows Firewall is running, please enable SSH service port (22 / TCP).

Configure SSH Client on Windows Server 2019
Step 1. On Windows Server 2019, OpenSSH Client is installed by default. But if it is not already installed, install it from Start> Settings> Apps>> Manage optional features> Add a feature> OpenSSH Client .

Step 2. You can use the command client ssh as follows on PowerShell or Command Prompt:
PS > ssh (username)@(Hostname hoặc địa chỉ IP của SSH server)

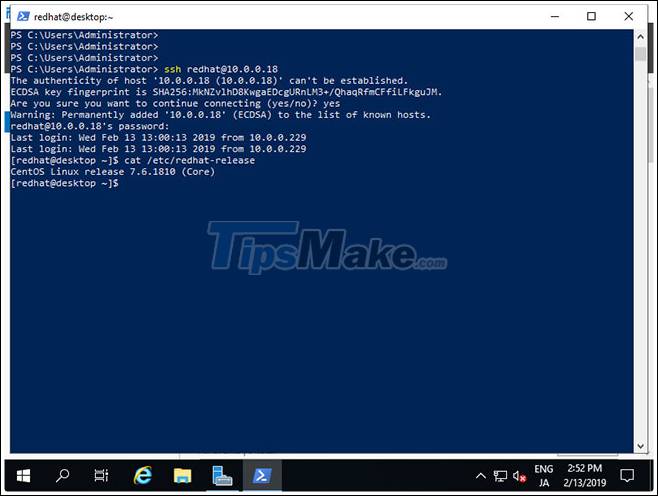
Step 3. You can also log into the Linux Host where the SSH server is running.
Step 4. You can also use scp command and sftp command to transfer SSH file.

