Advanced drag and drop techniques in Windows Vista
Ever since Microsoft put the mouse into their operating system. We can drag - drop an object from one window to another in the graphical user interface..
Ever since Microsoft put the mouse into their operating system. We can drag - drop an object from one window to another in the graphical user interface. Here we will not go into basic drag and drop techniques, but instead go directly to advanced drag and drop techniques. This helps improve the efficiency of using your mouse.
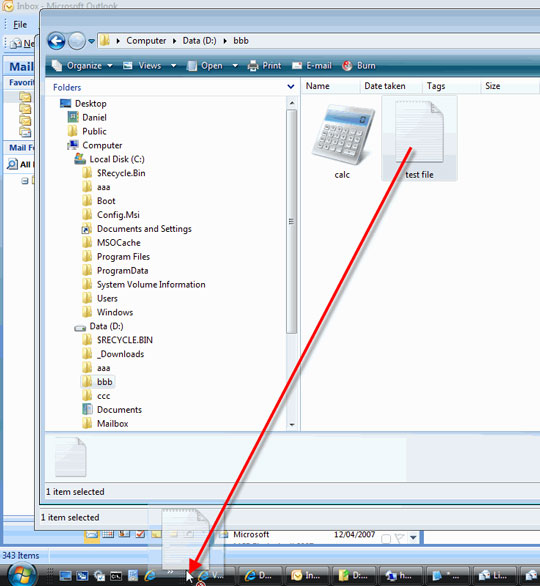
When many users actually have more documents, as well as having to respond to more emails, most of us have the opportunity to drag and drop a file or folder from a USB such as their My Documents. It is important for us to be able to determine what happens when you drag and drop an item from one place to another in the graphical user interface (GUI).
Drag and drop functions are used differently in different situations. Depending on the drag and drop scenario, and unless you know the result of the drag and drop action. To achieve the expected results you need to change your attitude. Below is a list of the rules that Windows works when drag and drop functionality is used:
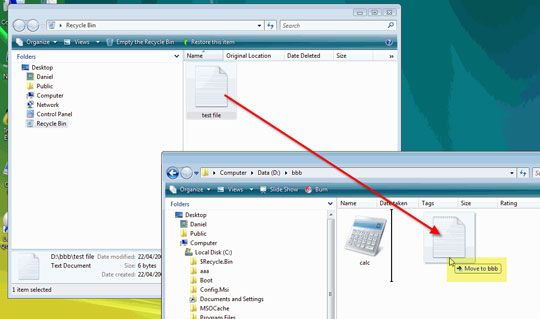
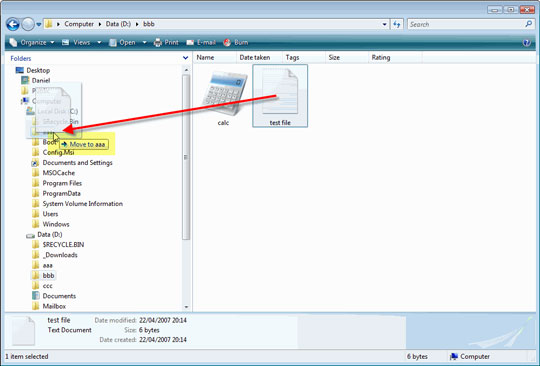
On the same partition
If you drag and drop an object from one place to another on the same partition (d: bbb to d: ccc), the object will be 'moved'.

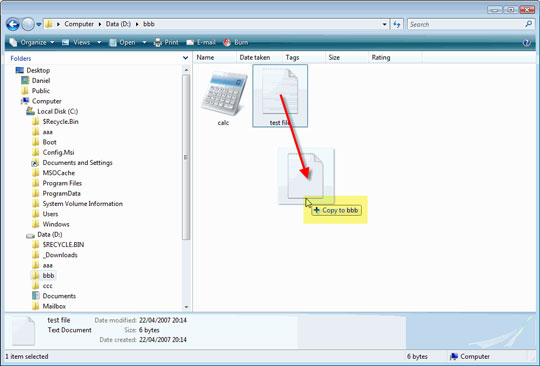
Drag and drop to another partition or a network drive
If you drag a file or an object from one partition to another or a network drive (d: bbb to c: aaa), the object will be 'copied', resulting in two identical files. on your system.

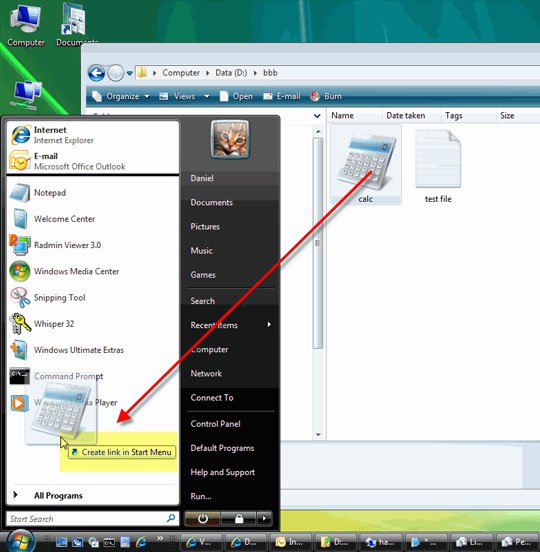
Drag and drop an application to the Start menu
If you drag an application (with an .exe extension) to a section on the Start menu bar or a subfolder on your Start menu, Windows Vista will create a shortcut for that application. Dragging other types of files (text, script code, or another shortcut) onto the Start menu will move or copy it there, according to the rules described above.
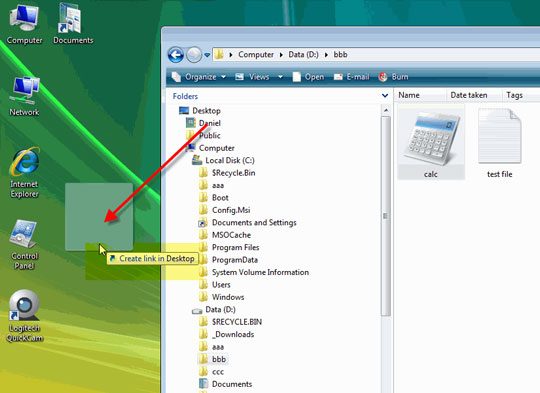
Drag and drop a system object
If you drag and drop a system object (such as My Computer or Control Panel) to any place, the object's shortcut will be created.
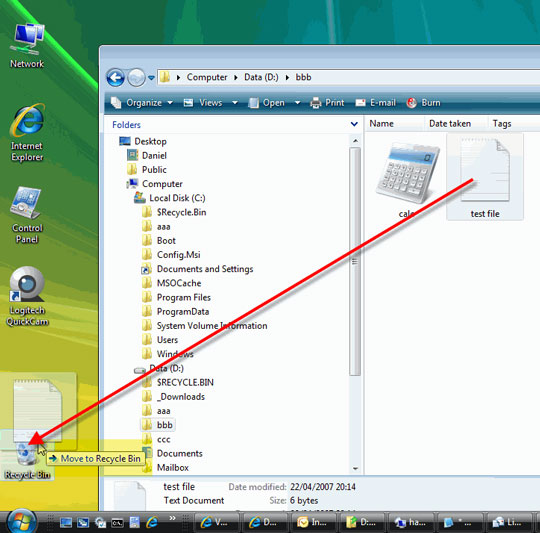
Drag and drop an object to and from Recycle Bin
If you drag an object to the Recycle Bin, it will be deleted, and it will be available in Recycle Bin. If you drag a recently deleted object out of the Recycle Bin, it will be restored.
Drag an object to Recycle Bin if it is hidden behind multiple windows
If you want to drag and drop a file to Recycle Bin, the Recyle Bin icon is hidden behind many other open windows, one of the things you can do is drag the file to an empty place in the Taskbar first. Then hold down the mouse for about 1 to 2 seconds, and then you will see all the open windows are automatically minimized so you can see the desktop and the Recycle Bin icon.
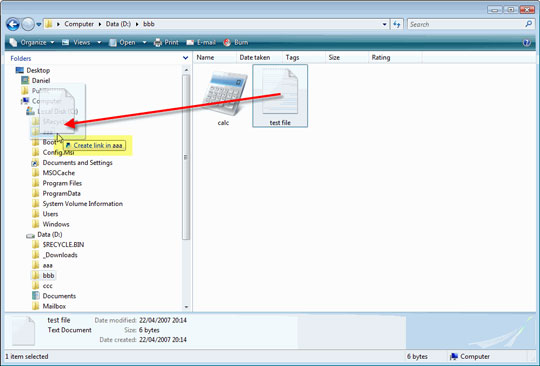
Combine drag and drop functionality with special keys
If you don't trust the above logic results of the drag and drop function, or you want to get another result, you can combine drag and drop functionality with keys like Ctrl, Shift .
To copy an object in any situation, hold down the Ctrl key while dragging. This function does not work with system objects such as Control Panel. You can also use this trick to copy an object in the same directory.
To move an object, hold down Shift while dragging:
To create a shortcut of an object, hold both the Ctrl and Shift keys while dragging.
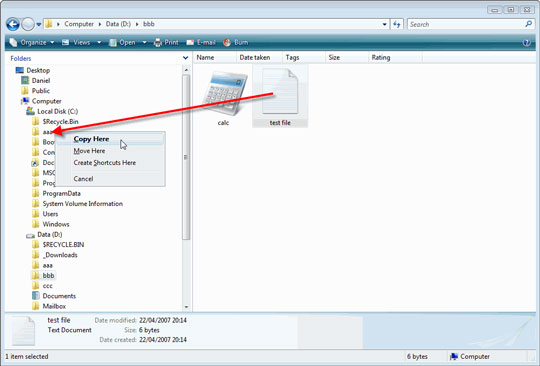
Drag and drop with the right mouse button
This function allows you to choose what is allowed to happen when dragging a file without having to press any key or remember where and what each pull function does. When you drag your file with the right mouse button, a context menu will appear when you move your mouse and file to be released.
Summary
Drag and drop functionality is part of the Windows operating system. Understanding drag and drop functionality in each situation is a user benefit. And if you forget to drag and drop in every situation, use the drag and drop function with the right mouse button.