7 Windows Security Settings You Should Change
Considering how much sensitive data your computer stores, you'll want it locked down tight. Windows does a good job of keeping this locked down out of the box, but you can increase your security with just a few key settings tweaks.
Table of Contents
Considering how much sensitive data your computer stores, you'll want it locked down tight. Windows does a good job of keeping this locked down out of the box, but you can increase your security with just a few key settings tweaks.
7. Lock your computer automatically with Dynamic Lock
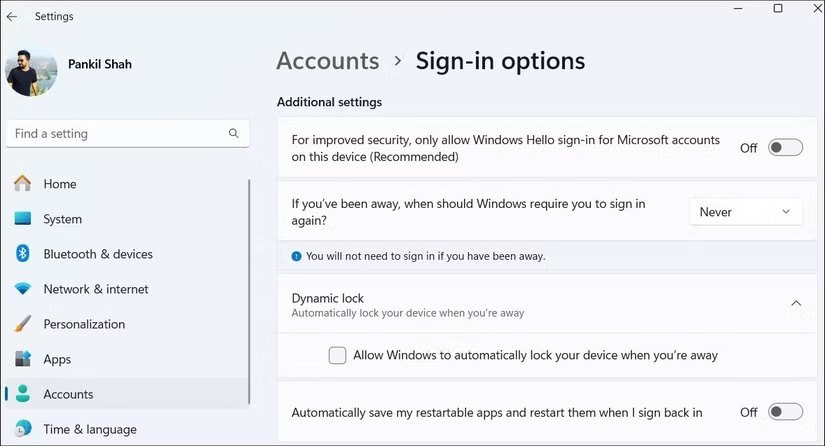
Your laptop or computer is locked with a PIN or password, but what about when you leave your desk to take a break? Sure, this may not be an issue when you're at home, but in the office or in a public place, even a brief moment of unattended time can be enough for someone to access sensitive information.
To use Dynamic Lock, start by pairing your phone with your computer if you haven't already. Once you've done that, go to Settings > Accounts > Sign-in options and scroll down to Dynamic Lock . Then, check the box next to Allow Windows to automatically lock your device when you're away , and you're done!
6. Set up facial or fingerprint recognition
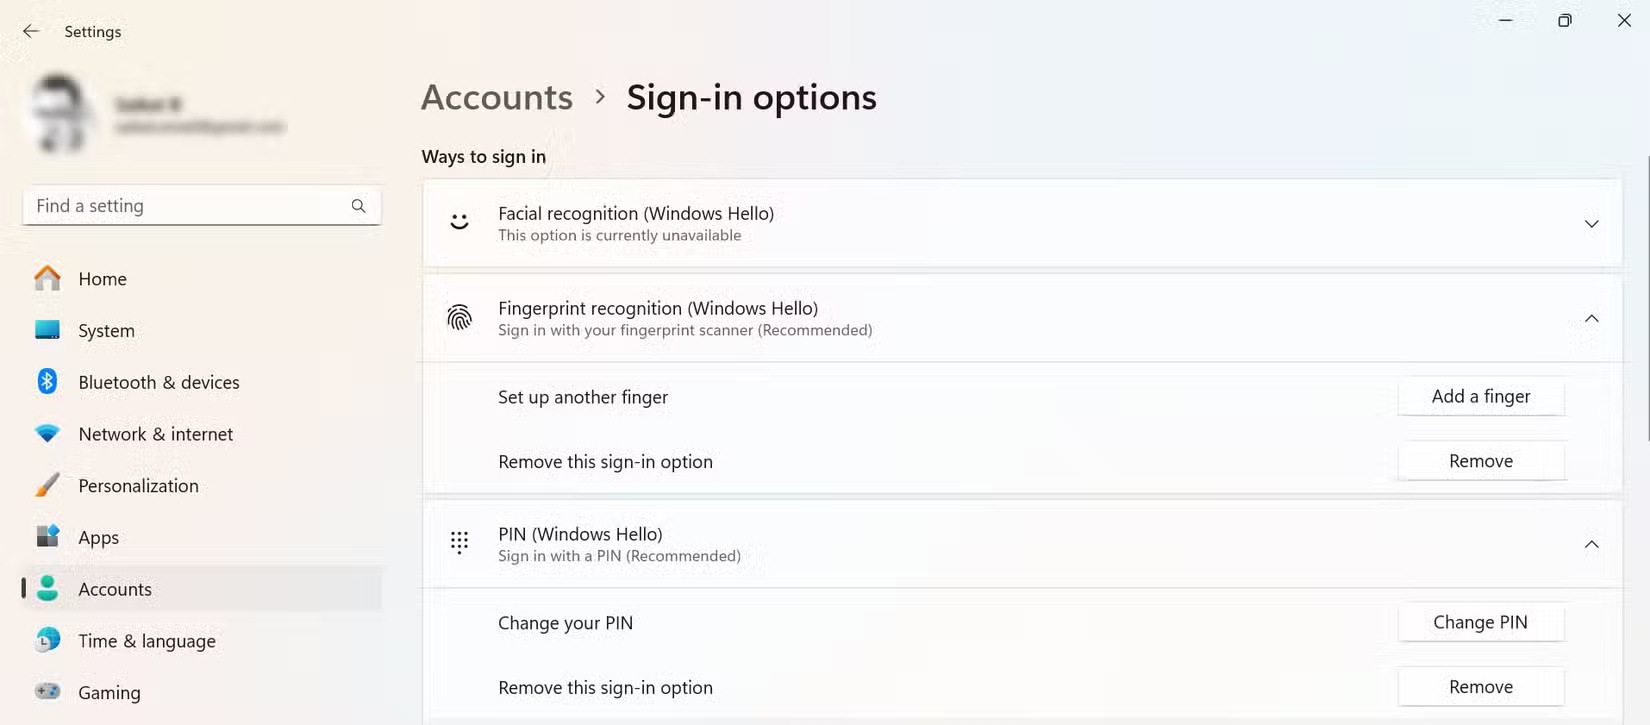
While Dynamic Lock helps ensure your Windows PC locks when you step away, it won't help if you use an easy-to-guess PIN like "1234" or "0000." If your laptop supports it, you're better off setting up facial or fingerprint recognition with Windows Hello .
To enable Windows Hello, go to Settings > Accounts > Sign-in options and select Facial recognition (Windows Hello) or Fingerprint recognition , depending on your hardware. Then, follow the on-screen prompts to register your fingerprint or face.
5. Enhanced anti-phishing protection
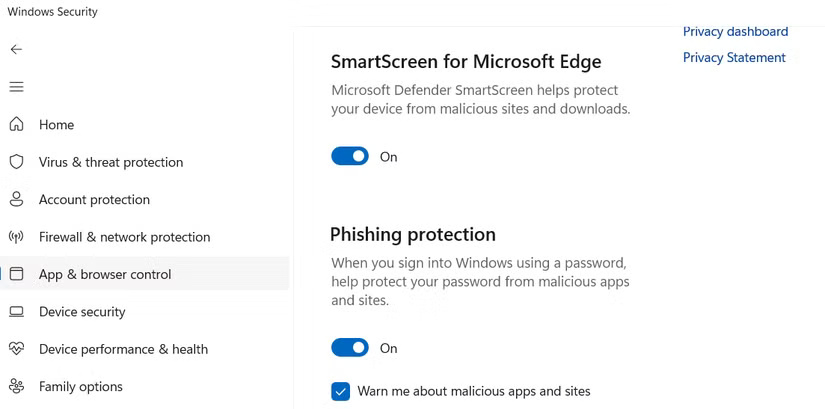
Phishing is one of the easiest ways for attackers to gain access to your accounts—and often your entire system. These attacks often come via sneaky emails, fake websites, or links that look legitimate but are actually traps. Just one wrong click, installing a dubious app, or even reusing a password on the wrong website can give an attacker the keys to your account and sensitive files.
The good news is that Windows computers come with built-in anti-phishing protection tools that can help keep you safe, but not all of them are turned on by default. To turn them on, open the Windows Security app and go to App & browser control > Reputation-based protection settings .
4. Turn on Controlled Folder Access
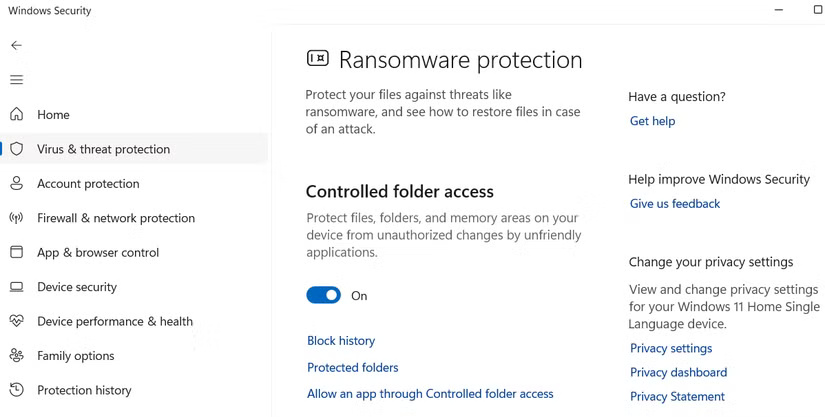
This Windows Security feature works by only allowing trusted applications to make changes to protected folders. If a suspicious or unknown application tries to access or modify them, it will be blocked. It's that simple!
To enable it, go to Windows Security > Virus & threat protection > Ransomware protection and toggle Controlled Folder Access to On . By default, it protects common folders like Documents, Pictures, and Desktop, but you can add any other folders you like. And if it blocks a program you really trust (which can happen), just add it to the exceptions list.
3. Turn on Device Encryption
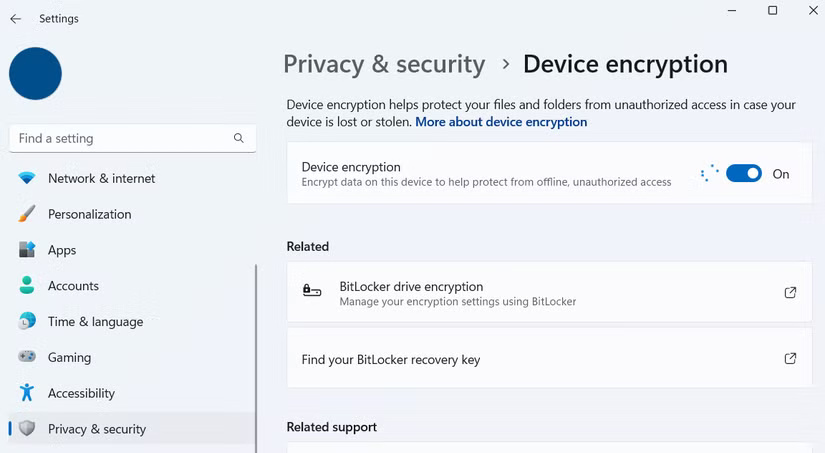
Think of Device Encryption as locking all your personal data in a digital safe. Even if someone gets their hands on your laptop, they can't just turn it on and rummage through your files.
This feature is especially useful if your computer contains sensitive information that you want to keep private. If you're using a local account, you'll need to sign in with your Microsoft account first. Then, go to Settings > Privacy & security > Device encryption to make sure it's turned on.
2. Review which applications can bypass the firewall
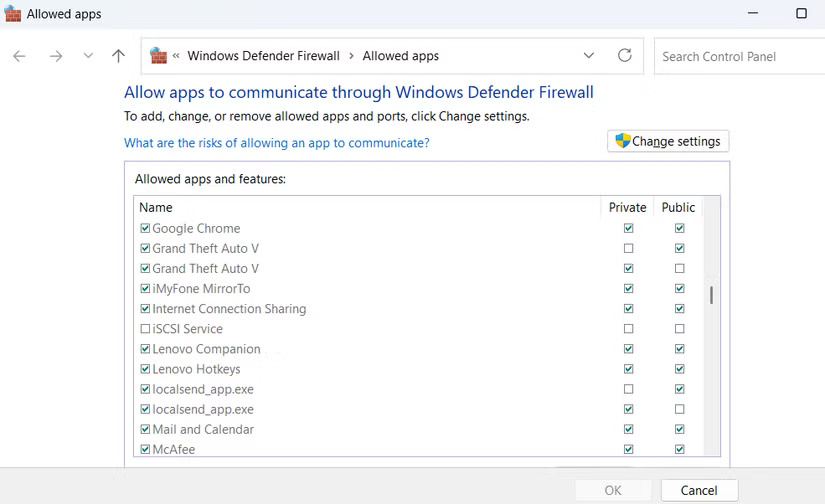
You should double-check your firewall settings to see exactly which apps are allowed through it. On Windows, go to Control Panel > System and Security > Windows Defender Firewall > Allow an app or feature through Windows Defender Firewall . You'll see a list of programs and whether they're allowed to communicate over a private or public network.
1. Make sure "Find My Device" is turned on
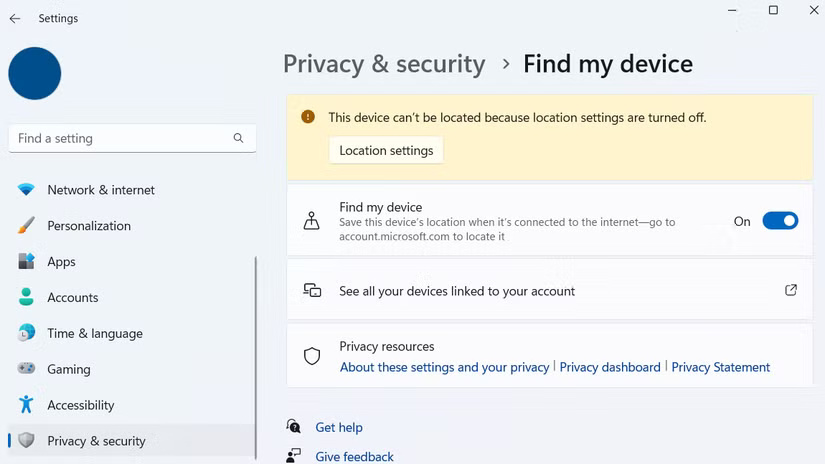
Find My Device is enabled by default, but if you've tweaked your Windows privacy settings and turned off location services, it may not work. To check if everything is working properly, go to Settings > Privacy & security > Find my device . If you see a warning about location services being turned off, click Location settings and turn on Location services .
Once you've done that, head to Microsoft's Devices page and sign in with the Microsoft account associated with your PC. You'll see a list of all your connected Windows devices. Click the one you want to track. From there, you can check the device's last known location, remotely lock it, or even display a notification on your screen if it's lost.
Was this article helpful?
Your feedback helps us improve.
Related Articles
 4 Windows Security Settings Hackers Hope You Don't Find5 minutes read
 How to change regional settings on Windows 103 minutes read
 9 Default Windows Settings to Change Now9 minutes read
 Change the following 7 iOS settings to better Safari security7 minutes read
 Customize PC Settings on Windows 8.1 as you like14 minutes read
 How to reset Windows Security settings on Windows2 minutes read
Reader Comments 0
Sign in with email or Google to join the discussion.