Table of Contents
The Minecraft-style map in Meccha Chameleon rewards clean silhouettes more than complicated painting. Its walls, terrain, and props use block shapes and broad areas of color, so a curved body outline or an exposed limb can be easier to notice than a slightly imperfect shade.
The strongest spot is not a single secret coordinate. It is a position that hides your outline from common approach angles, gives you enough time to paint, and does not trap you as soon as a Seeker looks behind the nearest block.
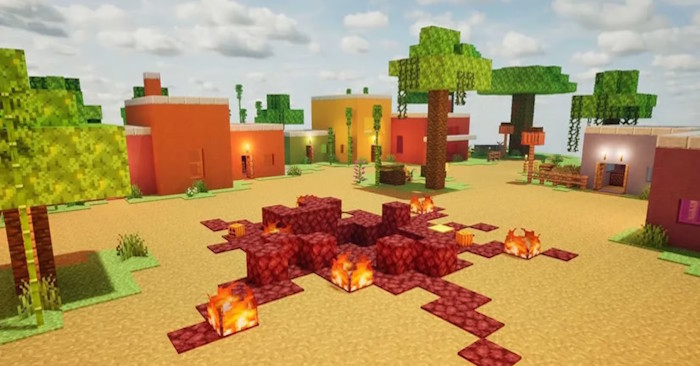
What makes the Minecraft map different
Meccha Chameleon's core hiding mechanic combines a location, a pose, and paint applied to the character. On a block-based map, those three elements have to support one another:
- Location controls how many directions expose you.
- Pose determines whether your outline matches the map's rectangular geometry.
- Paint copies the large color regions behind you and reduces contrast.
A perfect color sample cannot hide an arm that extends beyond a wall. Conversely, a compact pose in a deep corner can remain difficult to parse even when the paint is not exact. Choose the geometry first and paint second.
Strong types of hiding spot
Deep inside corners
A corner removes several viewing angles and gives your outline two nearby surfaces to merge with. Favor corners that are not directly opposite a doorway or the end of a long corridor. Crouch or use a compact pose, rotate until the torso follows the wall, and check that the head and hands do not cross the edge.
A shallow corner beside a high-traffic route is much weaker. Seekers routinely sweep obvious corners, so look for one partly obscured by another block, prop, stair, or change in elevation.
Recesses between block clusters
Gaps inside a group of blocks create layers of visual obstruction. Move far enough into the recess that the outer blocks interrupt the Seeker's line of sight, but leave a route to move if the position is checked.
Before committing, test the pose from both sides. A gap that looks deep from the front may expose the entire character from a diagonal approach.
Ledges above normal eye level
Elevated edges work because many players scan the ground and the center of the screen first. Choose a ledge with a background surface directly behind the character; standing against open sky produces a clear silhouette. Avoid climbing in view of the Seeker, and settle into the pose before the search phase begins.
Height is not automatically safe. A lone figure on an uncluttered roof is easier to detect than one positioned under an overhang, beside a block column, or within a repeating wall pattern.
Transitions between materials
A boundary between stone, wood, soil, or foliage can break up the character if the pose and paint reproduce the same boundary. Align the transition across the body instead of covering the whole character with an average color.
This is harder to paint but less predictable than a single-color wall. Use broad, simple regions; excessive small strokes can create visual noise that does not exist in the background.
Behind partial cover, not directly behind one object
A single obvious block invites the Seeker to look behind it. Partial cover is stronger when it combines with distance, a corner, or another obstruction. Seekers should have to change both position and camera angle to reveal the whole character.
How to paint for the block palette
Start with the largest background color visible behind the torso. Then add only the main secondary region that crosses the body. Paint the head and limbs separately if their backgrounds differ.
- Sample color from the surface directly behind the character, not from a similar material elsewhere; lighting can change the apparent shade.
- Keep edges straight where the map texture is straight.
- Use stone colors only against stone, wood colors only against wood, and greens only where foliage actually fills the background.
- Recheck the outline after painting. Rotating the pose can move a painted region away from the background it was meant to match.
- Avoid bright accents unless they reproduce a real highlight or block on the surface.
Step back mentally from the detail and ask what a moving Seeker will notice in a brief glance. Large contrast and an unnatural outline matter more than tiny color differences.
Positioning mistakes that reveal Hiders
- Choosing color before location: a good palette cannot rescue a spot visible from several directions.
- Leaving a curved outline against a square wall: compact the pose and align the body with a block edge.
- Hiding against open space: sky, doorways, and distant scenery make a silhouette easy to read.
- Using the most obvious high point: experienced Seekers check rooflines and ledges early.
- Moving during a close scan: motion is often more visible than a paint mismatch.
- Copying another Hider's exact spot: two shapes or movement cues draw more attention and can block escape routes.
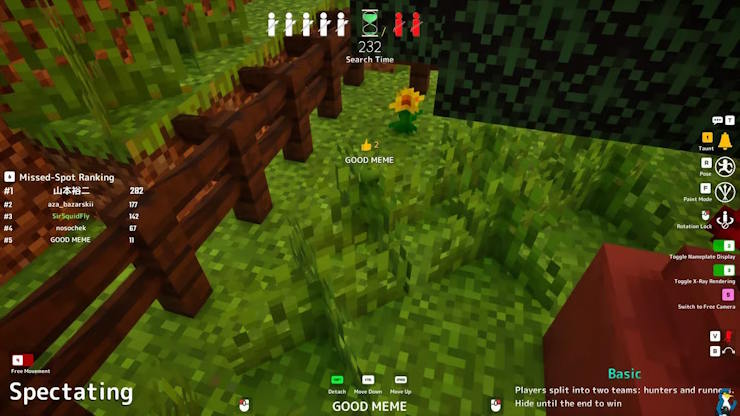
A quick spot-check before the round
- Stand in the intended position and choose the smallest natural-looking pose.
- Rotate the camera to inspect the left, right, and rear approach angles.
- Move away from any edge that makes the head, hands, or feet protrude.
- Paint the largest background region, then add one or two necessary details.
- Confirm that the position has cover behind it and is not framed by a doorway.
- Decide in advance whether to remain still or which direction offers a realistic escape.
How Seekers can clear the Minecraft map
The same geometry that helps Hiders also makes searches systematic. Sweep by height and angle rather than running randomly:
- scan ledges and rooflines before entering a cluttered area;
- approach corners diagonally so more of the recess becomes visible at once;
- look for curved outlines, asymmetry, and colors that do not follow block boundaries;
- change elevation to expose positions hidden from ground level;
- check layered block clusters from both sides; and
- watch for movement after passing a likely hiding area.
Do not spend the whole round testing every minor texture difference. Prioritize places with strong cover and enough character-sized space, then return to suspicious details from a second angle.
Adapt when the map or lobby changes
Custom-map layouts and player habits can change, so memorize the qualities of a strong position rather than one screenshot. A spot loses value when it becomes widely known or when a route funnels every Seeker past it. Rotate between a deep corner, a layered recess, an elevated position with a solid background, and a material transition. The location, pose, and paint should all tell the same visual story.
Related Articles
 The Best Hiding Places in Meccha Chameleon4 minutes read
 MECCHA CHAMELEON: PC Control and Shortcut Guide6 minutes read
 MECCHA CHAMELEON Beginner's Guide: How to Win14 minutes read
 Meccha Chameleon Hide-and-Seek Game Tips for Beginners - Meccha Chameleon Tips7 minutes read
 Meccha Chameleon Seeker Guide: How to Find Hiders8 minutes read
 MECCHA CHAMELEON: A guide to color combinations and paint4 minutes read
Reader Comments 0
Sign in with email or Google to join the discussion.