Restore details from the dark areas of the image
'Rescue' a picture that has lost too much detail because the shadow will become very easy with just a few simple steps.
'Rescue' a picture that has lost too much detail because the shadow will become very easy with just a few simple steps.
Surely you will be annoyed when a photo is perfectly aligned but when it is opened it is lost too much detail because the shadow is too dark, obscuring many details is sometimes very important. However, instead of being uncomfortable and straightforward, you can calm down and restore those details. Completely trouble-free implementation, but the effect will surely surprise you.

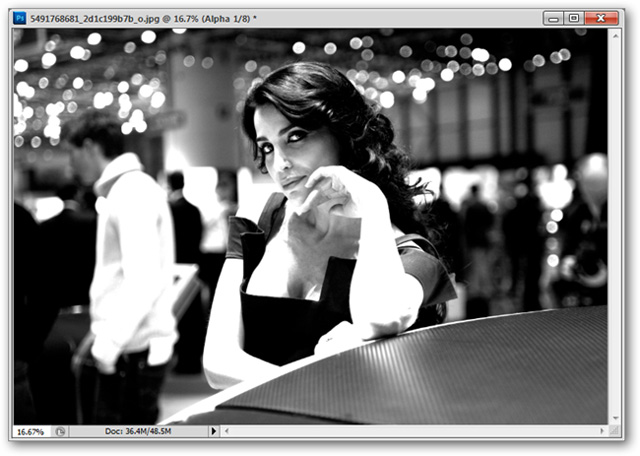
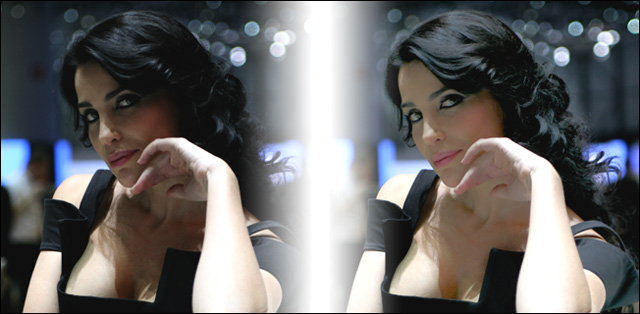
First of all, you need to be aware that this method only applies when your photos have shadows that take too much detail. As in the case of the example image, the other parts of this photo are very good, only the shadow makes the model's face darken a lot, so we simply edit the shadow to get re details of face.

Open the image, press Ctrl + A to select the entire image, then press Ctrl + C to copy the image.

Go to the Channels tab, create a new channel by pressing the ' Create new channel ' button below the tab.

If the Alpha channel you just created is black, just double click on the channel, choose Selected Areas as shown, otherwise, if the channel has just created white, keep it the same.

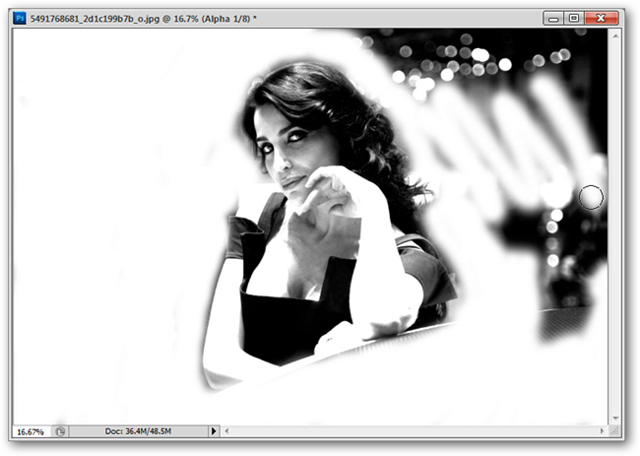
Press Ctrl + V to paste the photo you just copied into the Alpha channel.
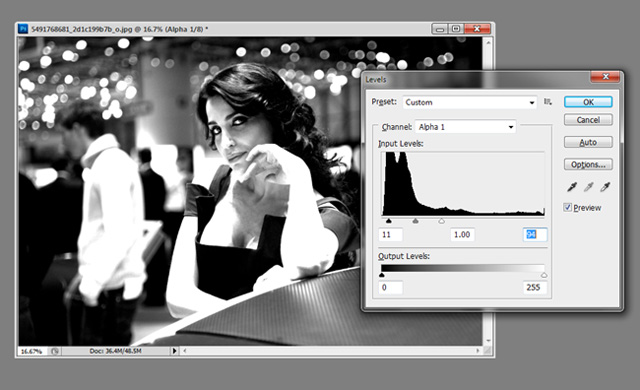
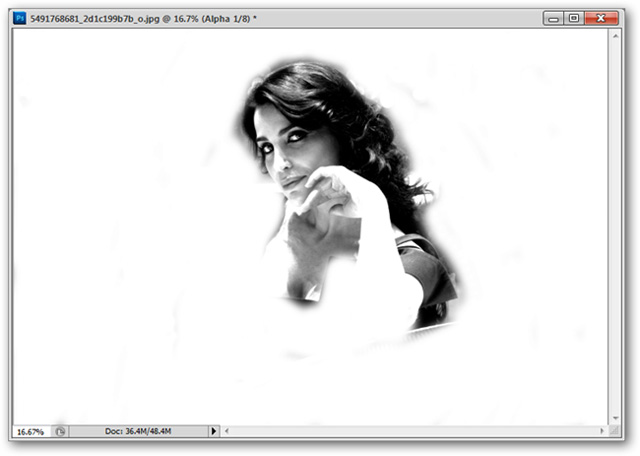
Press Ctrl + L to open the Level panel, the task you need to do is drag the white cursor to the left as much as possible, of course at a suitable level. Each different photo will need a different parameter, you can see the level of influence of the Level table on the example image to find out the most appropriate parameters for you. When you're satisfied, click OK .
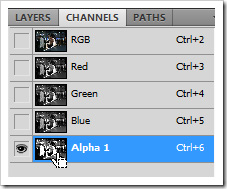
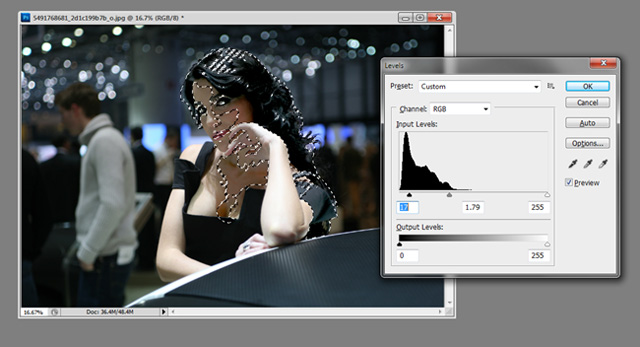
Hold Ctrl and left-click on the Alpha channel to make a selection, then press the RGB channel to exit the adjustment mode on the Alpha channel.
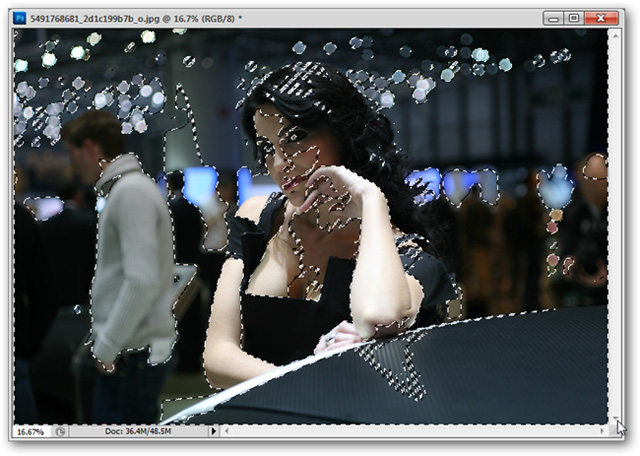

Press Ctrl + L to open the Level panel and adjust the cursor again. Pay attention to the changes in the areas of the previous image that are obscured by the shadow, until you feel satisfied, just click OK .
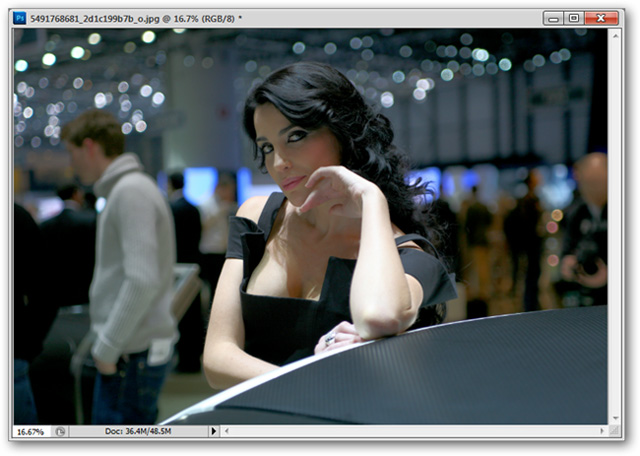
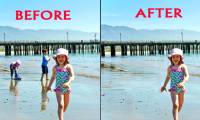
Here you have completed the retrieval of details for how dark, effective areas you can easily see when compared to the original image. However, if you do not want this editing to affect the dark areas of your surroundings, follow these steps.
Going back to the original Alpha channel created, you can use Eraser (E) to erase the parts of the image you don't want to be affected.
Ctrl + Click on the Alpha channel to create a selection, then select the RGB channel.
Note that at this point your selection only focuses on the subject areas of the image, not as the first one. You only need to use the Level table like the first one to edit the shadow again. And this is the result.

With a few changes in the way of doing it, only the dark areas of your chosen subject are changed, while the dark areas of the surroundings are completely preserved.
Was this article helpful?
Your feedback helps us improve.
Related Articles
 How to quickly edit backlighting in Photoshop2 minutes read
 What is Dark Web? Who uses it? The potential dangers of Dark Web and warnings20 minutes read
 How to use DISM to copy and restore images FFU6 minutes read
 Good tips make it easy to remove unwanted details from your photos4 minutes read
 How to backup and restore Windows 10 from System Image5 minutes read
 Should you use a VPN on the Dark Web?9 minutes read
Reader Comments 0
Sign in with email or Google to join the discussion.