Table of Contents
Learn how to share your workout activities on iPhone with clear steps, practical tips, and troubleshooting guidance for a reliable result.
How to share your workout activities on iPhone
Step 1
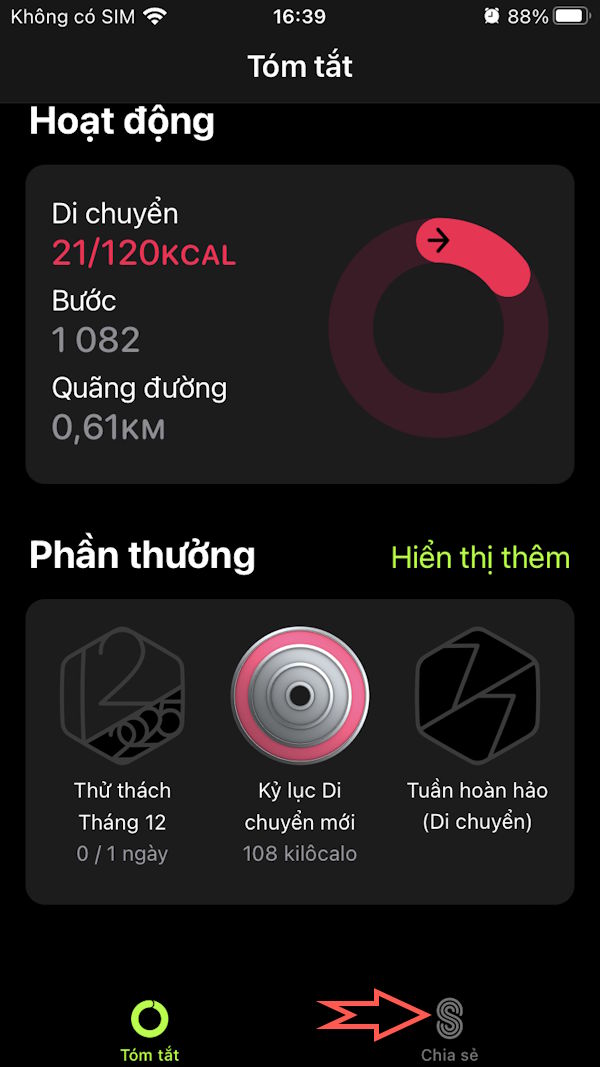
Access the Fitness app on your iPhone, then tap Share at the bottom. Tap the person icon in the upper right corner to share your fitness activity data.

Step 2
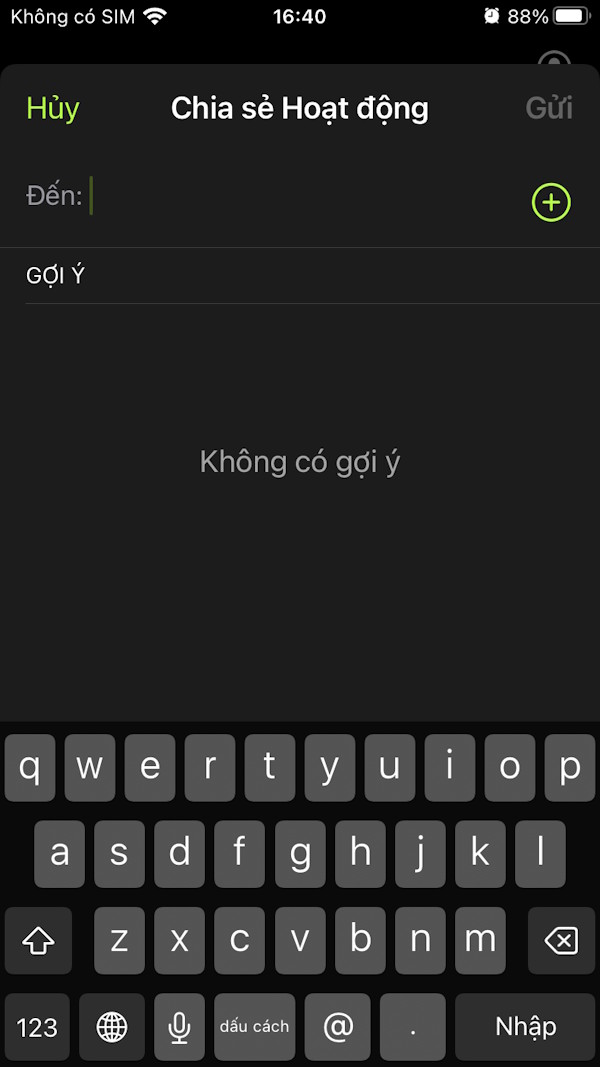
On the Fitness activity sharing settings interface, tap the plus sign to add people to share data with. Here, enter the name and phone number of the person you want to share your Fitness activity data with. After entering the name, tap Send to send the invitation to the other person.

Step 3
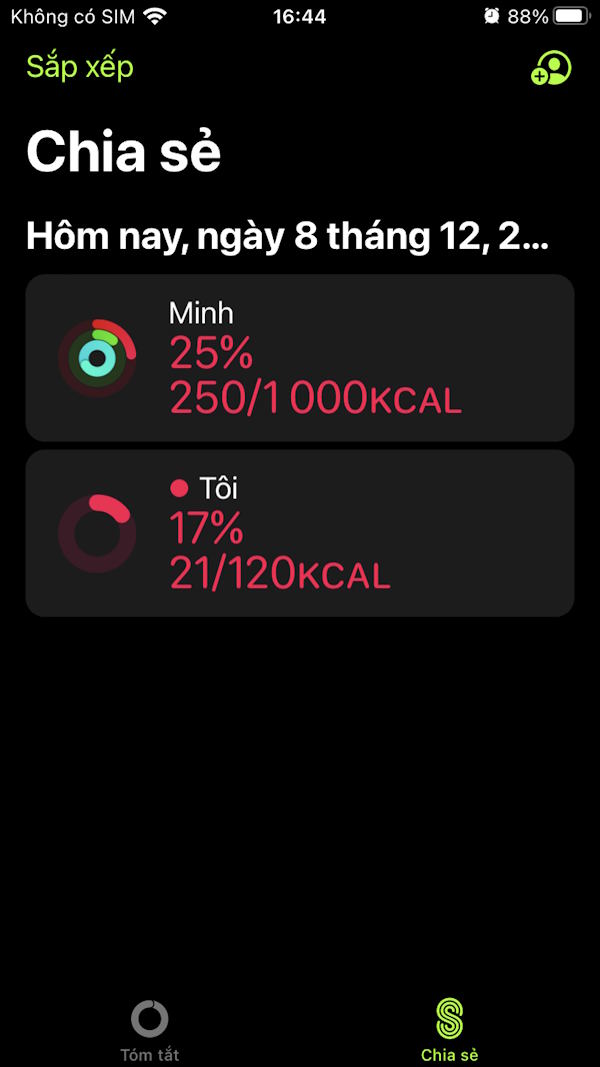
Once the other party accepts, you will immediately see the shared data and the name of the party exchanging fitness activity data, as shown in the image.

Step 4
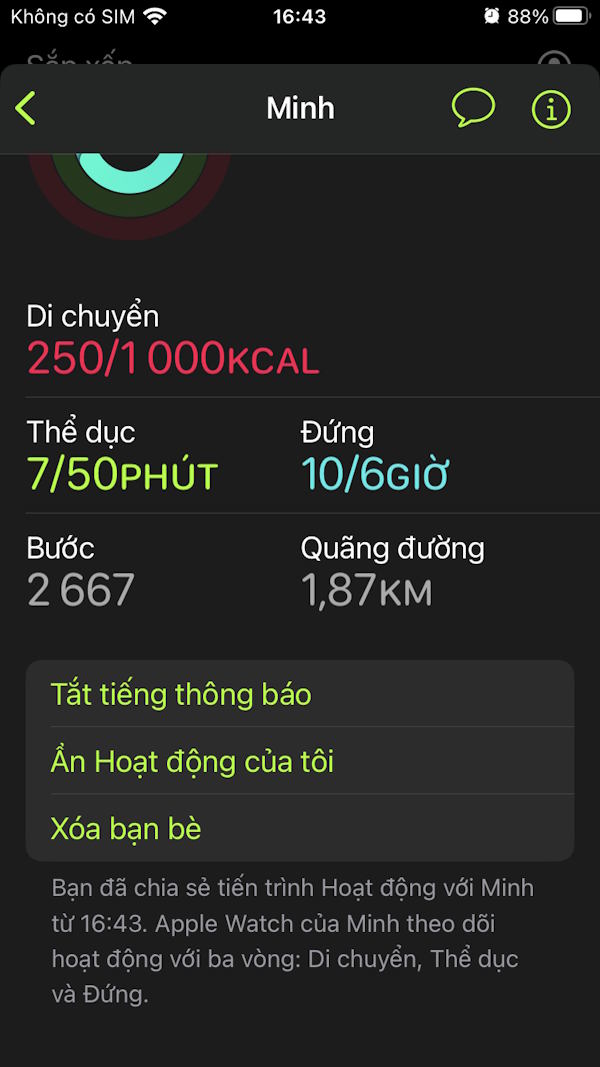
Click on the other person's name and you'll see their fitness activities. Go back to the Share interface and you'll see a list of fitness activities for everyone whose data we've shared.
Step 5
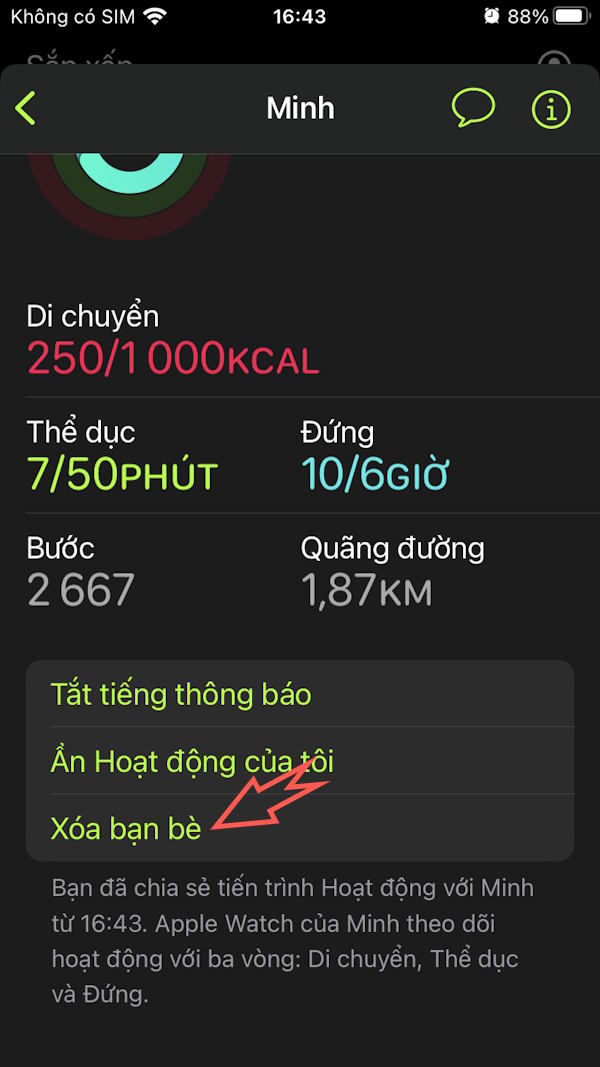
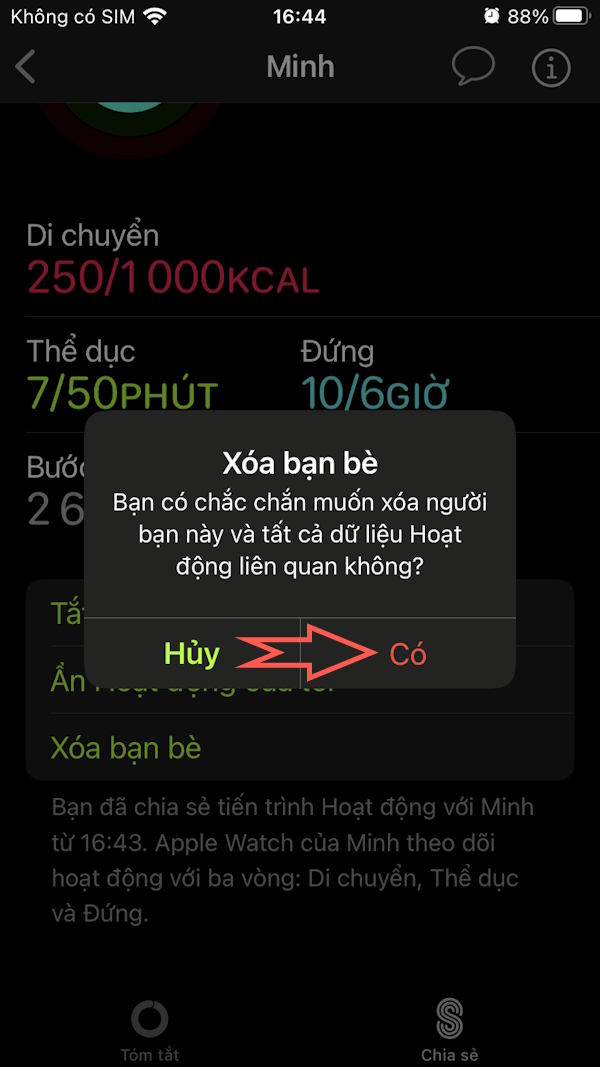
To stop sharing your fitness activities on your iPhone with someone, tap their name and then tap Remove Friend . Finally , tap Yes to remove them from your activity sharing list.
Final Thoughts
Use this guide as a practical checklist for how to share your workout activities on iphone. Work through the steps in order, verify each result, and adjust the options to match your needs.
FAQ
What do you need before following this How to Share Your Workout Activities on iPhone guide?
Review the required tools, accounts, settings, or materials mentioned in the article. Learn how to share your workout activities on iPhone with clear steps, practical tips, and troubleshooting guidance for a reliable result.
What are the main steps for how to share your workout activities on iphone?
Follow the sections in order, especially How to share your workout activities on iPhone, Step 1, Step 2. Complete each step before continuing and verify the result as you go.
What should you do if the process does not work as expected?
Recheck the prerequisites, update the relevant app or service, review the settings, and repeat the step that caused the issue. Use any troubleshooting notes included in the guide.
Related Articles
 8 Benefits of Workout Training for the Brain3 minutes read
 What to Eat to Make Workout Sessions More Effective4 minutes read
 How to Share Calendars on iPhone: Step-by-Step Guide3 minutes read
 10 Best at Home Workout Equipments That Will Keep You Fit10 minutes read
 How to Calibrate Your Apple Watch to Improve Workout Tracking4 minutes read
 Instructions for Using Extension Share (Sharing) on iPhone and iPad5 minutes read
Reader Comments 0
Sign in with email or Google to join the discussion.