Table of Contents
This guide provides a practical overview of instructions for installing japanese keyboard for Windows with clear explanations and useful details. It focuses on the information users are most likely to need.
Today, Japanese also becomes one of the popular languages chosen by many people. However, one problem is that you cannot type and use Japanese on your computer, unless you have special support tools.
And Google Japanese Input is one of the solutions that will help you can install and use Japanese keyboard right on Windows 7/8/10 computer. After successfully installing Google Japanese Input, a Japanese virtual keyboard appears on the device. And we can freely type any content we want, use it for different purposes such as typing text content, sending letters, chatting with friends in Japanese. In particular, the Google Japanese Input installation process is very simple and fast.
Method 1: Install Japanese keyboard on Windows 8 / 8.1 and Windows 10
For Windows 8 and above, follow these steps to install Japanese keyboard and type Japanese on computer.
Click ENG or VIE In the lower right corner of the screen (next to the time and date notice)> Select Language preferences

Choose Add language > find Japanese

Click Japanese> Add
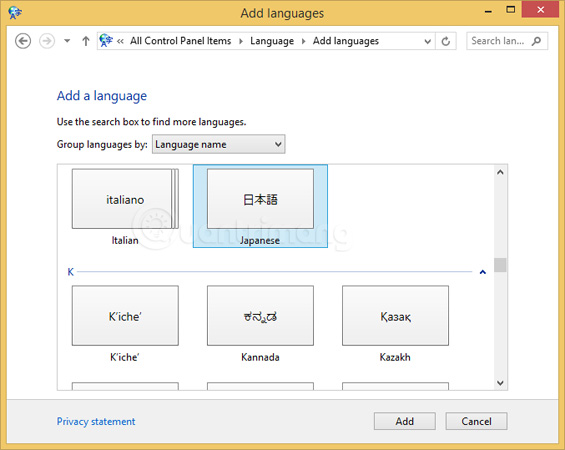
Then, click ENG or VIE> Select Japanese

When there appears an A symbol next to the Japanese icon, you need to click the text box to type text on the web, chat frame or text editor file to enable the option to change settings. Then right-click the letter A, in the menu, select the Japanese input method you want.
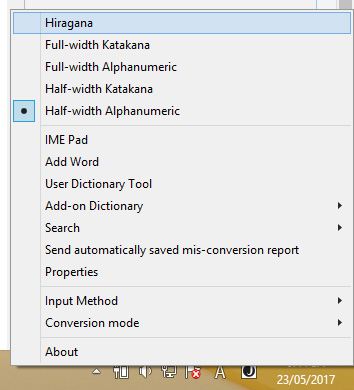
After selecting Hiragana, the letter A will change to the red circled symbol below:
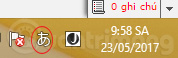
And here is the result:

Please turn off Unikey or switch it to English mode to type in Japanese without error.
Method 2: Install Japanese keyboard with Google Japanese Input
Step 1:
First of all, download The Google Japanese Input tool Using the link below to install the Japanese keyboard for your computer.
- Google Japanese Input
Step 2:
At the main interface of Google Japanese Input, we will check the box Accept and Install .
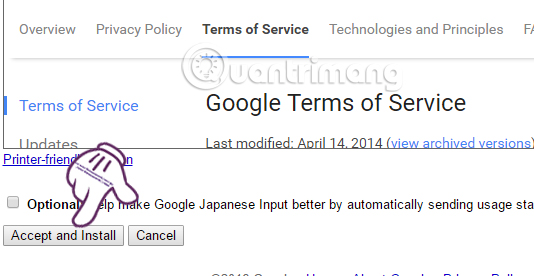
Step 3:
Next we wait for the process to successfully download and install the Google Japanese Input tool on the computer.

Step 4:
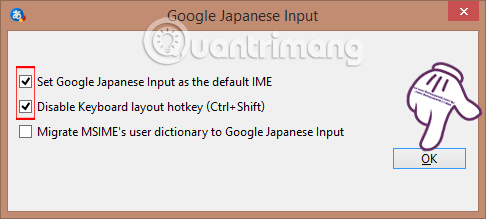
Then, the interface of the new Google Japanese Input window appears. Here, users will then set up the tool. when needed to use Google Japanese Input as The default input language of your computer , click the first item Set Google Japanese Input as the default IME, Then click OK To save.
Step 5:
In The Taskbar On your computer, click The blue circle icon To check if you have Switched to Japanese language input mode On your computer.

Step 6:
Next, we will click The letter A Next to the circle, then Select the Japanese alphabet To use, such as the Hiragana alphabet.
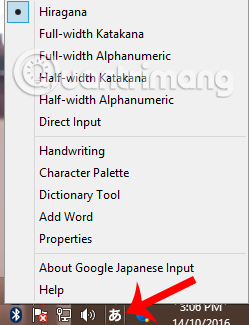
So we can enter Japanese on the computer already. To return to the old Vietnamese input mode, click the circle icon and select VI or EN.
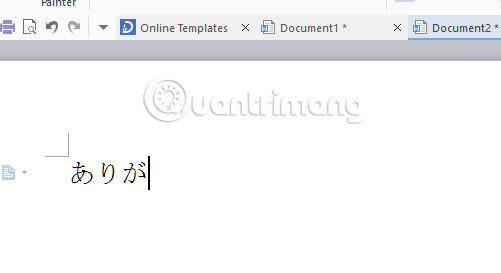
The above is a guide to install Japanese typing tool with Google Japanese Input on Windows computer. If you are in need of learning Japanese on your computer, don't skip this article.
Refer to the following articles:
- Fix the error Unikey can't type Vietnamese
- Fix errors not typing Vietnamese on Chrome
- How to convert font code with Unikey
I wish you all success!
FAQ
What is the main benefit of instructions for installing japanese keyboard for Windows?
The main benefit is a clearer understanding of the topic and a practical way to apply the information covered in this guide.
What should I check before using instructions for installing japanese keyboard for Windows?
Confirm compatibility, review the required settings, protect important data, and use the latest supported version whenever possible.
What should I do if the result is different?
Repeat the steps carefully, verify permissions and version differences, and consult the product's official support documentation for changes not shown in the article.
Related Articles
 How to Fix a Non-Functional Keyboard After Installing or Updating Windows?4 minutes read
 How to for Connecting a USB Keyboard to an Android Phone?7 minutes read
 How to Cleaning Laptop Keyboard Without Turning Off the Computer (Safe && Effective)8 minutes read
 How to Turn on Windows 11 Keyboard Backlight2 minutes read
 Detailed Instructions for Installing Korean Keyboard on Windows3 minutes read
 What Are Screensavers: How to Installing Screensavers on Windows6 minutes read
Reader Comments 0
Sign in with email or Google to join the discussion.