Table of Contents
Learn how to index your codebase in Cursor so that AI can understand your entire project, using @codebase and optimizing indexing effectively.
This guide walks you through the most detailed 7-step process for indexing your codebase in Cursor, helping you master the power of the command @codebase, optimize scanning speed for large projects, and fix common indexing errors at their root. Let's explore it together with the instructions below.
Quick summary of the instruction process
To index your codebase in Cursor, follow these 7 steps:
- Open Cursor and log in to your account.
- Go to File → Open Folder
- Select the project folder to index.
- Click Select Folder to load the project into Cursor.
- Wait for the Cursor to automatically scan and index all files.
- Open the AI Chat panel and ask questions about the codebase to test it.
- If the AI provides accurate feedback on the code in the project, indexing is complete.
The entire process takes anywhere from a few seconds to a few minutes, depending on the project size.
Prepare before you begin
- Cursor is installed and logged in: Download the latest version at cursor. com. Log in using your Cursor or GitHub account.
- The project folder is ready on your machine: Cursor index is from the local folder, not from the URL or cloud storage. If the project is on GitHub, clone it to your machine first (
git clone [URL]). - Free hard drive space: For large projects, Cursor stores index data locally. This is usually negligible, but for a monorepo with tens of thousands of files, several hundred MB may be needed.
- Know which files to exclude: Folders
node_modules,.venv,dist,build, and large data files should not be included in the index – they only slow down the process without helping the AI. See the Indexing Optimization section for configuration instructions.
Detailed instructions on how to index your codebase in Cursor
Step 1: Open Cursor and log in to your account
Launch the Cursor app. If you're not already logged in, tap Sign in in the bottom left corner and complete the verification process. You need to log in so Cursor can save your indexing status and personalization settings.
Step 2: Go to File and select Open Folder
Click the File menu in the toolbar at the top, then select Open Folder from the dropdown list. Or you can do this directly on the home screen as shown below.

Alternatively, you can perform the operation faster by pressing the key combination Cmd+O (macOS) or Ctrl+K, Ctrl+O (Windows/Linux) to open the folder selection dialog box immediately.
In the folder selection dialog box, navigate to the location of your project. Select the project root folder —that is, the folder containing the package.json, requirements.txt, Cargo.toml, or any configuration files that are the "root" of the project.
Note: Do not open a subdirectory of the project. The Cursor needs to see the entire root structure to accurately index the relationships between modules. As long as the path in the address bar of the dialog box points to the correct project root directory, it is fine.
Step 3: Click Select Folder to upload the project
After navigating to the correct folder, press the Select button (or Open , depending on your operating system) to confirm your selection and load the project into Cursor.
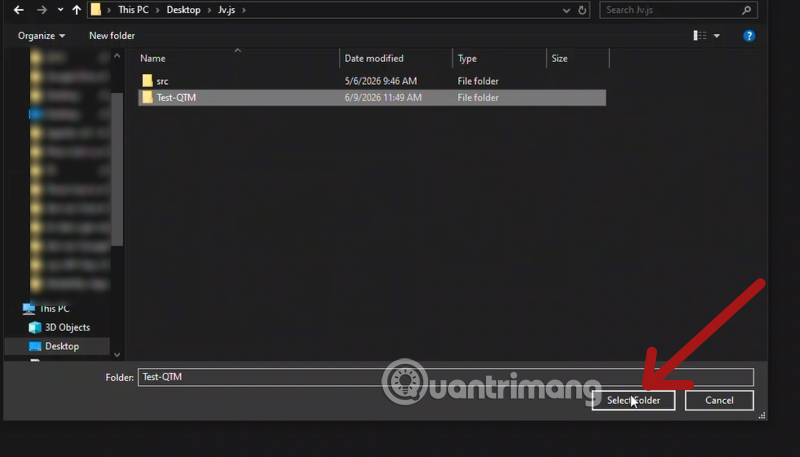
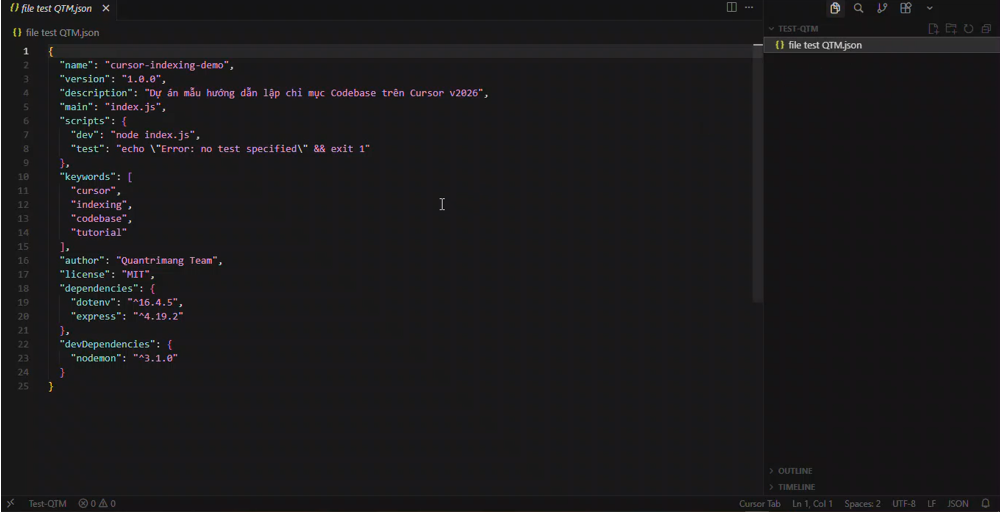
Cursor will close the dialog box and open the editor interface, with the project's directory tree displayed in the left sidebar.
Check: The left sidebar displays a folder tree with the project name at the top.
Step 4: Wait for the Cursor to automatically index
As soon as you open the folder, Cursor automatically starts scanning and indexing all the files in the project. You don't need to do anything further at this step - just wait.
Estimated waiting time:
- Small projects (< 100 files): almost instantaneous
- Medium-sized projects (several hundred to several thousand files): 30 seconds to 2 minutes
- Large projects (tens of thousands of files): 5-15 minutes the first time; subsequent times are faster because Cursor only updates the changed files.
You can check the indexing status in the status bar at the bottom - usually indicated by a spinning circle icon or the text "Indexing." when processing is underway.
Step 5: OpenAI Chat and ask test questions
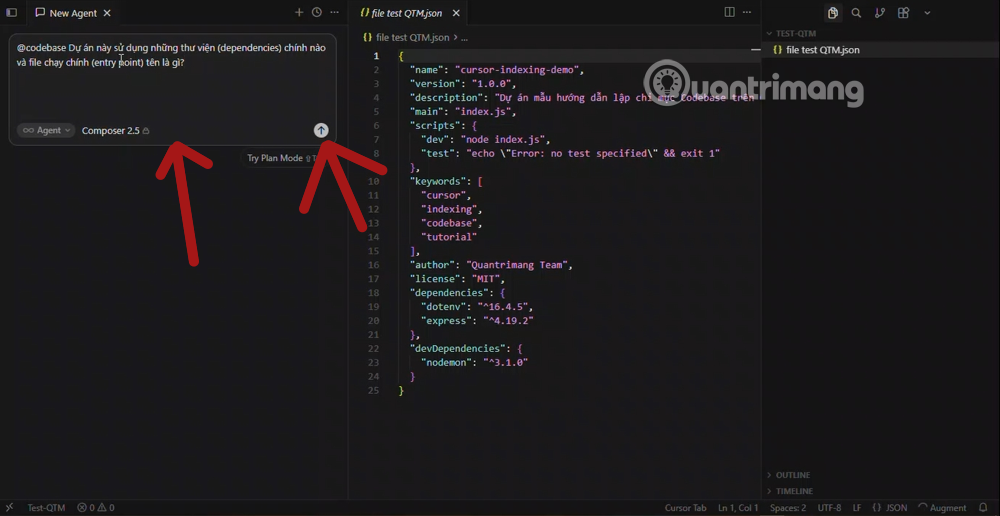
Press Cmd+L (macOS) or Ctrl+L (Windows/Linux) to open the AI Chat panel. In the input field, type @codebaseto tell Cursor that you want to ask about the entire codebase, then ask a specific question about the project.
Here are some good examples of test questions:
Effectiveness check: The AI correctly identifies the file name, function name, or project structure information—not provides generic answers.
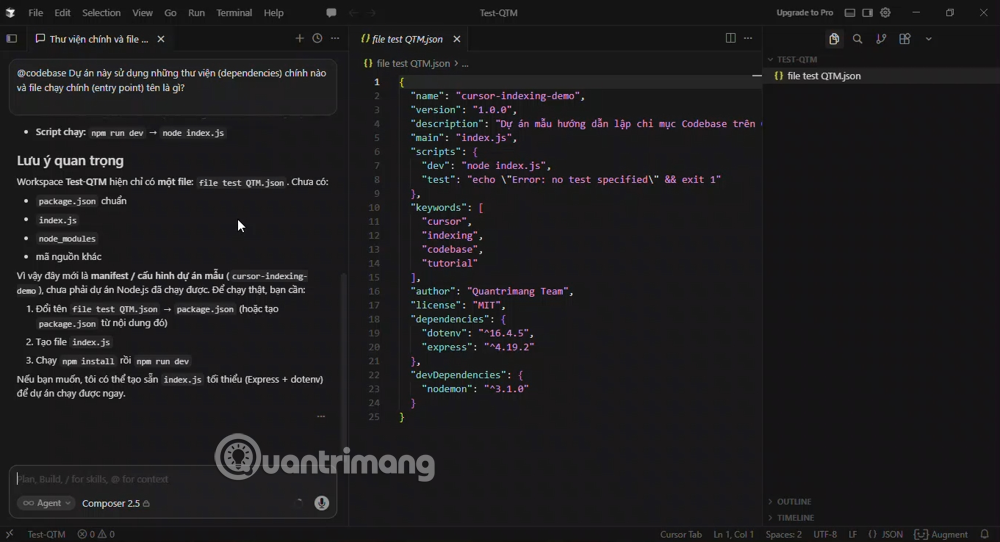
Step 6: Confirm that the codebase is ready
If the AI Chat in the previous step responds correctly and can point to the right file or line of code in your project, codebase indexing is complete. From this point on, all of Cursor's AI features—from code completion, to Chat, to Agent Mode—work within the full context of your project.
Check if indexing is working correctly
Besides testing via Chat as described above, you can confirm the indexing status in Settings → General → Codebase indexing . Here, Cursor displays the number of indexed files and the indexing status (completed or in progress).
If the number of indexed files is significantly lower than the actual total number of files in the project, it's likely Cursor is experiencing issues with some files - see the Common Errors section below.
What is codebase indexing and why is it important?
When you open an individual file in Cursor and ask the AI about that code, the AI only "sees" what's displayed on the screen. But the actual code doesn't exist in isolation: a function might call another module, a component might depend on a common configuration, and a service might connect to multiple different repositories.
Indexing is the process by which Cursor scans all the files in your project, breaks down the code into meaningful units (functions, classes, modules), converts them into vector embeddings for semantic search, and builds a map of the relationships between the components in the codebase. Once indexing is complete, the AI in Cursor is no longer just "reading the open file"—it understands the entire project .
According to internal Cursor research published in early 2026, semantic search, supported by codebase indexing, increases the accuracy of AI responses by 12.5% and increases the retention rate of suggested AI code in the actual codebase. This is not an optional feature – it is fundamental to the proper functioning of all other Cursor AI features.
Optimizing indexing for large projects
For large projects or monorepos, full indexing can be slow, and some directories may be of no value to AI. The solution is to create a file .cursorignore in the project's root directory with the following syntax .gitignore:
node_modules/ .venv/ dist/ build/ .next/ coverage/ *.log *.lockThe file .cursorignoretells Cursor which folders and files to ignore during indexing. For projects with node_modulestens of thousands of files, adding that folder .cursorignorecan reduce indexing time from minutes to seconds.
Additionally, starting with version 2026, Cursor supports .cursor/rules/ a directory containing rule files that help the AI understand the project's conventions (naming conventions, preferred technologies, code patterns). This is an advanced step that helps Cursor not only know where the code is located but also understand how the code is organized according to your team's conventions.
Common errors and how to fix them
- Indexing takes forever to finish: This is usually due to too many unnecessary files (such as
node_modules). Create a file.cursorignoreand exclude large folders, then restart Cursor and try again. - @codebase didn't answer correctly about the project: Indexing might not be complete, or you're asking about a file that hasn't been indexed yet. Check the status in Settings, wait for indexing to finish completely, and try again.
- Cursor doesn't recognize the newly added file: Cursor updates the index incrementally (only scans for changes), but sometimes it takes a few seconds. If the new file is still not recognized after a few minutes, try pressing Command Palette → "Cursor: Resync Index".
Frequently Asked Questions (FAQ)
Does Cursor store index data on their server?
- Yes, by default, Cursor saves code embeddings to the server to support cloud functionality. If you're working with sensitive code, you can enable Privacy Mode in Settings – in which case Cursor handles indexing entirely locally.
Do I have to wait for the indexing to restart every time I open the project?
- Cursor stores a cached index on your computer, so subsequent openings only update the changed files, which is much faster than the first time.
Can Cursor index a repository on GitHub without cloning it?
- No. Cursor needs the file on your local machine to index it. Please clone the repository to your computer before opening it in Cursor.
Will the index file be deleted when the Cursor is updated?
- Normally not. Cursor retains its cache index across updates. However, if you encounter problems after an update, try manually clearing the cache index in Cursor's configuration folder.
Was this article helpful?
Your feedback helps us improve.
Related Articles
 Tips for Effectively Importing Context into Cursor7 minutes read
 How to Use Cursors to Review Code Effectively6 minutes read
 Is Cursor Worth It? AI Coding Editor Review for 202614 minutes read
 Index (INDEX) in SQL5 minutes read
 How to Write the Above Index, Below Index in Excel15 minutes read
 How to Use Cursor Rules File (. Mdc)11 minutes read
Reader Comments 0
Sign in with email or Google to join the discussion.