Table of Contents
This updated guide explains how to Use Zappy to Take Screenshots of Your Mac and Write through clear steps, practical examples, and important checks that help prevent common errors.
Instructions for Taking Screenshots macOS with Zappy
Step 1:
We download the Zappy application under the link below as a zip file, then extract and install the application on macOS
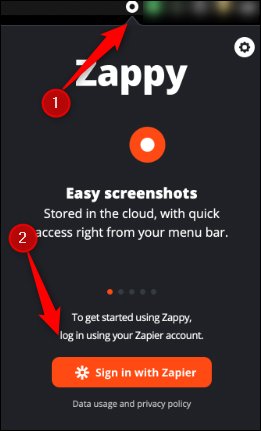
https://zapier.com/zappyAfter installation is complete display the icon in the top menu bar , click the icon and then click Log in or Sign in to create an account .
Step 2:
After you've created your account and logged in, click the gear icon at the top right and select Settings in the displayed list.

Display application setup interface. Here the user can select a shortcut to take a screenshot, the default is Command + Shift + 1.

Step 3:
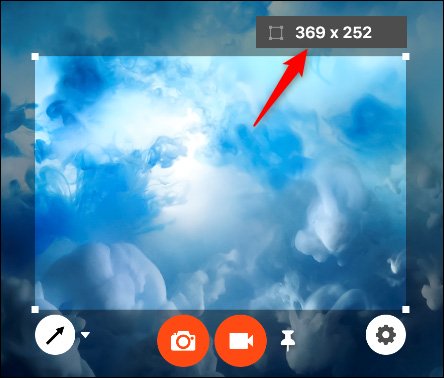
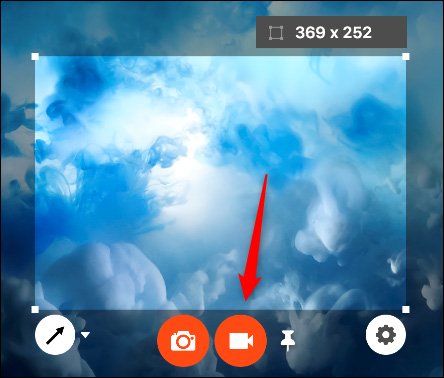
Next, use the keyboard shortcut of your choice to take screenshots on macOS . Display the frame so we can drag it to the area where we want to take the screenshot. The size of the screenshot will show up above so we know. You can adjust the edges to resize the photo area.
Step 4:
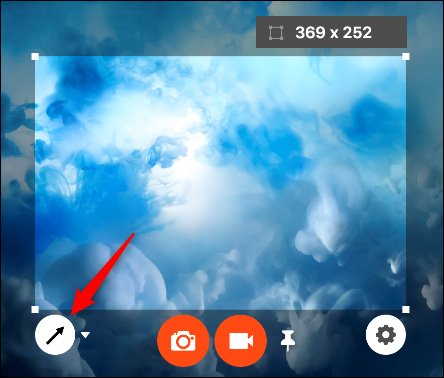
To write a note or draw a picture in the photo, click the arrow icon to draw an arrow in the bottom corner of the photo frame.
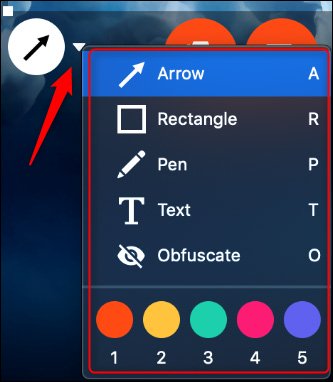
If you may need to add drawing tools or use other shapes, click the triangle icon next to the arrow icon. Now display the menu with options like the image below.
Step 5:
Once you've selected the area and write a caption, press the camera icon to take a picture . If you may need to record a video, click the camera icon.
Step 7:
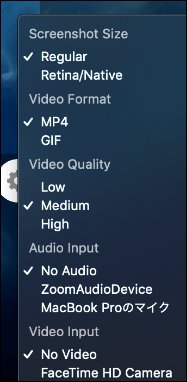
Click the gear icon to adjust the quality of photos and video formats.
FAQ
What is the easiest way to Use Zappy to Take Screenshots of Your Mac and Write?
Start with the requirements in this guide, then follow each step in order. Check the result after every major change so problems are easier to identify.
Can beginners follow these instructions?
Yes. The process is organized into practical steps, and you can repeat any step before moving forward.
What should I check if the method does not work?
Confirm your software or device version, permissions, settings, file format, and internet connection when the task depends on online services.
Related Articles
 5 Ways to Take Screenshots on Macbook10 minutes read
 How to Write Notes on Facebook: Note Facebook5 minutes read
 How to Make Notes on the Edge Chromium Website3 minutes read
 Instructions for Notes with Winrar: Winrar Notes2 minutes read
 The Best Apps That Support Writing and Writing Notes on Android4 minutes read
 How to Write Notes in Google Search: Practical Guide4 minutes read
Reader Comments 0
Sign in with email or Google to join the discussion.