How to use the TEXTSPLIT function in Microsoft Excel
Want to split text in Excel ? With the TEXTSPLIT function , you can split text into multiple columns easily.

Microsoft Excel is a powerful tool for refining and analyzing data, from simple to complex. But sometimes, you may encounter situations where the data is not correct.
It could be a problem with a long CSV import, or you need to separate the names to reorder them. Fortunately, Excel provides an efficient way to accomplish such tasks, thanks to the TEXTSPLIT function .
What is the TEXTSPLIT function in Microsoft Excel?
The TEXTSPLIT function allows you to separate text into different cells based on specific parse marks. You can split text across rows, columns, or both rows and columns, and set division criteria.
Some functionality can be achieved with Excel's Convert Text to Columns Wizard, but TEXTSPLIT provides these features and more inline as a function, which can make creating complex arrays more efficient, or for professional users who are used to Excel Functions.
Syntax of the TEXTSPLIT function in Excel
=TEXTSPLIT(text,col_delimiter,[row_delimiter],[ignore_empty], [match_mode], [pad_with])This function consists of 6 arguments and parameters. The text argument specifies the data to be parsed. This can be a reference to a specific cell or group of cells, or to specific text you specify in that argument.
Col_delimiter defines a specific character or text to act as the delimiter—when the function encounters this character, it splits the text at that point into a new column. The row_delimiter parameter works similarly, except that if a character is specified here, it will instead be used to split the text into new rows.
The delimiter can be a common character such as a period, comma or space, or a symbol, letter, number, even a multi-character text string or group of words. At least one of the delimiter arguments must be specified to the function for it to work properly.
Note that multiple separate row or column delimiters can be described in this function. In such a case, the delimiter set needs to be grouped inside a set of curly braces (the { } keys), such as in the example below:
=TEXTSPLIT("Sample text",{"e","t"})While it's not recommended to try or need it, in cases where a value is in both col_delimiter and row_delimiter the same, col_delimiter takes precedence.
The ignore_empty argument specifies whether to ignore delimiters that will create empty cells. For example, if there are three commas next to each other in the data for the "text" parameter, TEXTSPLIT will create two blank cells by default. Setting ignore_empty to FALSE will maintain this behavior, or you can set it to TRUE to tell the function to ignore any delimiters that produce empty cells.
The match_mode parameter clarifies whether the function's separator match is case-sensitive. This is relevant if you need to use letters for the delimiter. For example, you can tell Excel to split cells on every uppercase letter "T", but ignore any lowercase letter "t". Setting this argument to "0" maintains the default behavior of making all delimiters case-sensitive. Changing it to "1" makes the delimiter case insensitive.
The pad_with argument specifies the text to replace with data to fill in the empty cells, especially in arrays that may have extra space after taking into account all relevant delimiters. By default it returns the error " #N/A ", so you can change one to another if you think a problem will arise in your data.
How to use the TEXTSPLIT function in Excel
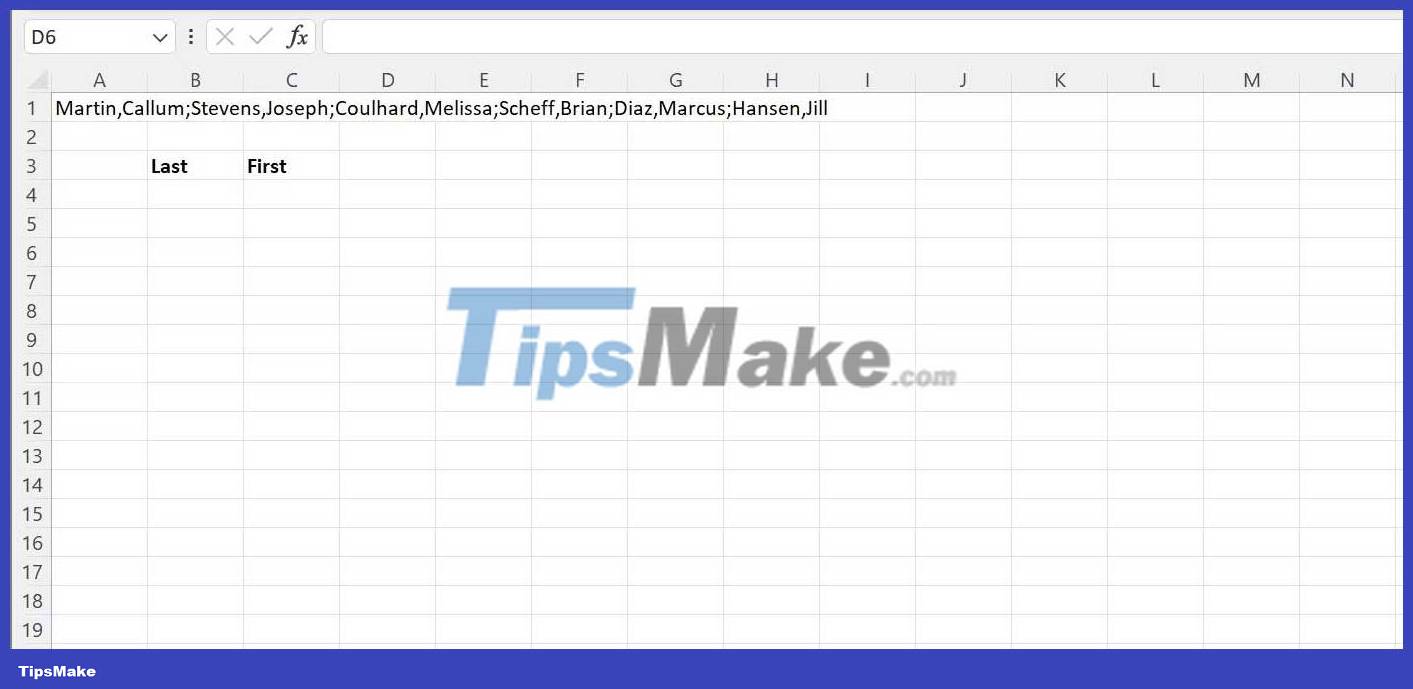
Suppose in this example you are given a list of names in a clear order, but you need to reorganize them to make them easier to read and use.

As you can see, the intention here is to separate the names into Last and First columns. Select cell B4 , and in the cell or formula bar above cell, enter the formula listed below. Then press Enter .
=TEXTSPLIT(A1,",")Now you have the expected result.

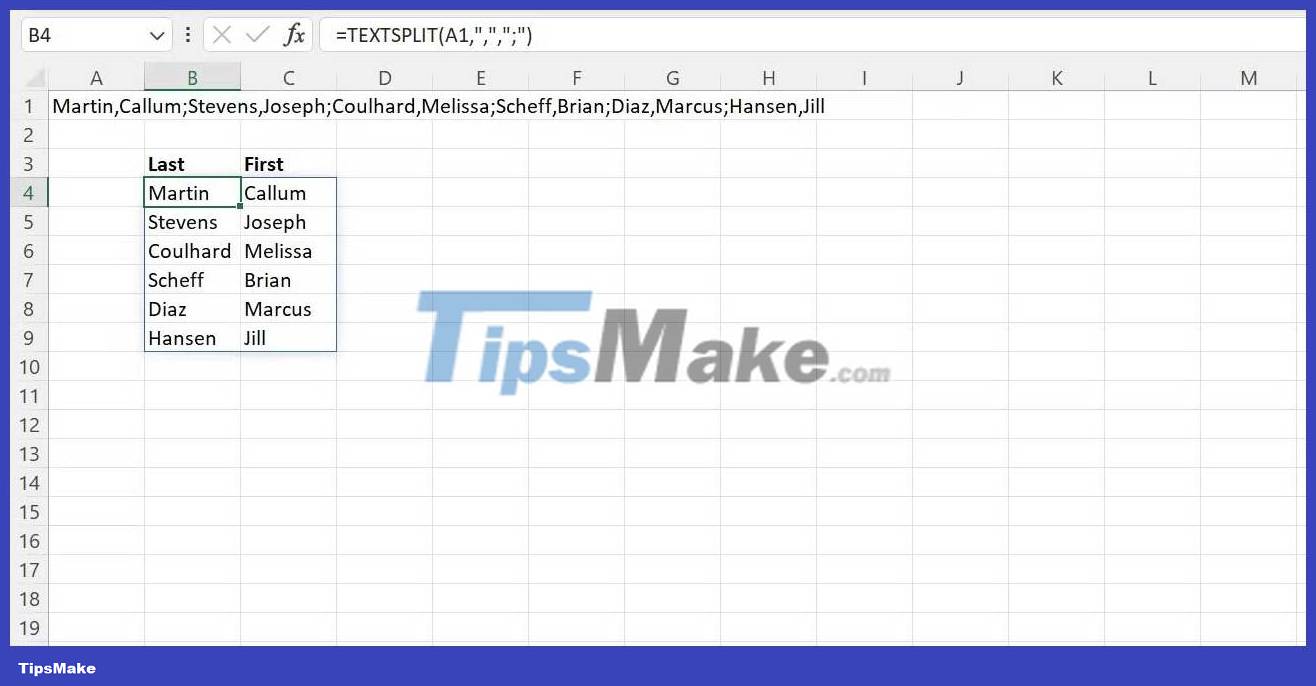
The name is now split into a new column where the previous comma was. However, the data is overflowing on one row, it looks messy. You can easily fix this problem by adding another delimiter to separate the data into different rows.
Select cell B4 again, in this cell or the formula bar above, enter the formula listed below. Then press Enter.
=TEXTSPLIT(A1,",",";") 
Above is how to use the basic TEXTSPLIT function for beginners . Hope the article is useful to you.
 How to use the WRAPROWS function in Excel
 How to use the WRAPCOLS function in Excel
 How to use formula suggestions in Excel on the web
 How to fix Autofill errors in Excel
 Things to know about Fearless Concurrency in Rust
 Schema validation in Node.js using Joi