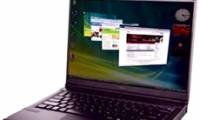
How to use the maximum screen scan frequency in Windows 10
You buy a high-frequency monitor, but your computer only gets 50% of the screen's specifications. Because of this, the monitor I just bought was removed. Don't worry, this article will guide you to change your screen scan frequency quickly.
Table of Contents
Instructions on how to change the computer screen scan frequency
Step 1: Select the Windows + i key combination to open the Setting item on your device. Then, you choose to go to System.

Step 2: You choose to select Multiple display or Display to customize the screen and select Advanced display settings.

Step 3: Continue to find the line Display adapter properties for Display 1.

Step 4: After you choose on the line above, a new window will appear, choose next to Monitor> Screen refresh rate and choose the desired screen scanning frequency. Finally, click Apply and select OK to save.

So you can take full advantage of the screen that you already own. Hope the article is useful to you. Thank you for viewing the article.
Was this article helpful?
Your feedback helps us improve.
Related Articles
 How to change the Maximum processor frequency setting in Windows 103 minutes read
 Tips to make the most of the image refresh rate on your computer screen3 minutes read
 Laptop has maximum screen width2 minutes read
 How to scan documents in Windows5 minutes read
 Why is it harder to photograph CRT TV screens than LED screens?5 minutes read
 How to use Windows Defender to scan programs that do not want PUP?4 minutes read
Reader Comments 0
Sign in with email or Google to join the discussion.