How to use AnyTrans for Cloud to manage cloud services
To help users easily manage the cloud storage accounts they are using, comprehensive management services for cloud services are always the first choice for users. AnyTrans for Cloud is such a service.
AnyTrans for Cloud is completely free to use, connect many cloud storage services like Google Drive, OneDrive, Dropbox, . on the same interface. In addition, the service also supports the file copying feature between cloud services, 2-step authentication, file keeping services, etc. The following article will show you how to use AnyTrans for Cloud.
- How to limit the time of sharing links on Google Drive
- Share Dropbox files via Facebook Messenger
- How to store images and videos in the cloud
Instructions for using AnyTrans for Cloud
- 1. Managing cloud services
- 2. Search cloud storage file
- 3. Share data
- 4. Synchronize files between storage services
- 5. Log in 2 steps
- 6. Delete cloud service
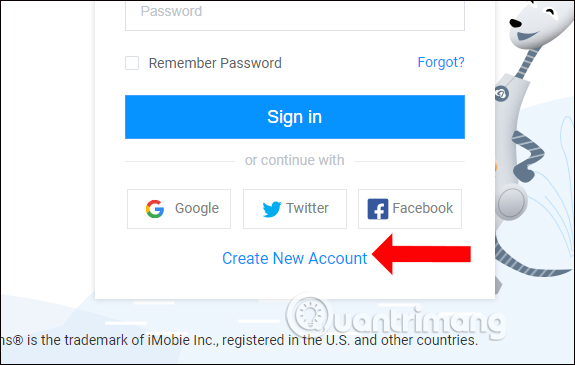
AnyTrans for Cloud users follow the link below and click Create Account to register account information.
- https://cloud.imobie.com

Fill in the required information and click Sign up and activate your account via email.

1. Managing cloud services
Step 1:
At this interface, click on the plus icon at the top left corner, or click New button to select Add Cloud to connect to the cloud service to manage.

This is the main interface of AnyTrans for Cloud. Here you will see there are many hosting services that websites are connecting, like Google Drive, Dropbox, OneDrive, Box, iCloud Drive, pCloud, Facebook, Instagram, .

Step 2:
At the Connect Your Cloud Drive list, click Connect at the hosting service you want to use. Then log in if you want to use another account, and click Allow to agree to the conditions.

The connected services will be displayed in the menu bar to the left of the interface.

Step 3:
When you click on the hosting service you will see all the data you have uploaded. Here we can upload files, download files to the computer, copy, share, delete files, etc. similar to when you manage files directly on storage services.
PDF, text, image formats, etc., can view content immediately without downloading.

2. Search cloud storage file
If you store files on the cloud service without knowing exactly what service, you can use AnyTrans for Cloud to search.
In the main interface of the service, in the search box click on the arrow to select All clouds . Next enter the keyword containing the name of the file or directory to search.

As a result, users will see which files to search for in the service, with the service icon in the file. You can filter files by format by clicking All to search more accurately.

3. Share data
In addition to data storage, AnyTrans for Cloud also features file sharing, self-destruct folders or permanent deadlines. The self-destruct file will be included in the paid version and you will be given a 30-day free trial.
Step 1:
Click on the file you want to share and then click on the share icon .

Display interface with file sharing link. This link will be permanent and unlimited, but will disappear when you delete the file or quit sharing.
To create a self-destruct link click Advanced Settings .

Step 2:
Switch to the new interface with the file properties change at Type, the number of file downloads at Downloads. Valid Time to select sharing end time. Click Save to save the settings.

Step 3:
To cancel sharing files click on the share icon in the left menu bar. Display shared files, click on the 3 dots icon and select Revoke share .

4. Synchronize files between storage services
AnyTrans for Cloud supports data synchronization between 2 storage services without downloading the file and then uploading.
Step 1:
Sync individual files, click the Sync to cloud icon below the file.

Sync multiple files, multiple folders , click on the files, folders you want to synchronize, and then click the Sync to cloud icon on the left of the trash icon button in the same interface.

If you want to copy all the data , open that storage service and click on the Sync to cloud icon at the top right corner, then tick all the data and then select the service you want to sync. Click Next below to continue.

Step 2:
Show how to synchronize with 3 options including:
- Premium channel: Sync instantly, can synchronize schedule. This is a feature for the Premium version for 30 day trial use.
- Offline channel: Sync waiting, feature for free version.
- Online channel: Synchronize your files via online computer. This feature is for Windows and Mac versions.
Next to the Sync Mode section there will be options for synchronous mode.
- One-way sync: Ignore duplicate files and folders when syncing.
- One-way cumulative sync: Duplicate files, folders or named Source will be renamed when synchronized.
- One-way backup sync: The service copies all files and folders when syncing.
If you want to receive notifications when the sync process finishes, click Send notification to me when the sync task finished . You can rename the sync folder at My Sync Task on the same interface.
Finally press the Start button to sync.

Step 3:
In the sync interface you will see the sync files waiting in the Sync List and completed in the Completed Sync. Click the trash icon to delete the file if you do not want to sync.

5. Log in 2 steps
Step 1:
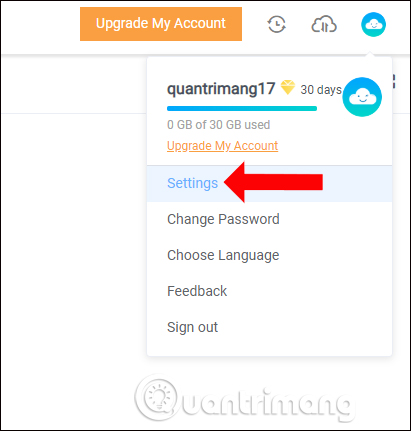
This feature will help secure the data more. To activate the feature press the AnyTrans for Cloud icon above the right corner and select Settings .

Step 2:
Switch to the new Account Security interface and click Two-factor Authentication .

Then click Turn on Two-factor Authentication to activate.

Use two-step authentication code applications like Google Authenticator, Microsoft Authenticator to conduct QR code scanning.

6. Delete cloud service
Click the My Cloud button to return to the page interface, click on the plus sign to access Connect Your Cloud Drive. Scrolling down will see the cloud services you are connecting. If you want to cancel the connection click the trash can icon .

Like MultCloud, AnyTrans for Cloud service will manage all the stored data on storage services. In addition, AnyTrans for Cloud also owns 2-step login feature and data synchronization between 2 storage services.
See more:
- How to use Cozy Drive multi-platform data storage
- pCloud Drive - New online storage application
- Synchronize the folder on your computer with Google Drive, Skydrive and Dropbox
I wish you all success!