How to Reset the Keyboard
Reset Bluetooth keyboard (on Windows) in Settings
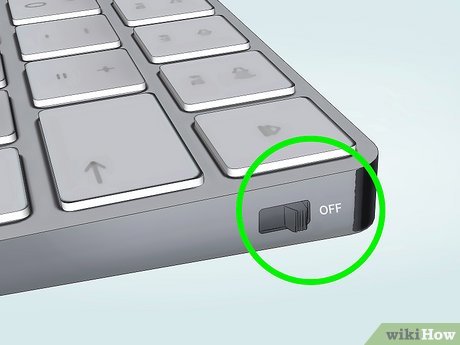
Turn off the Bluetooth keyboard. The location of the power button will vary depending on the keyboard, but you'll usually find it on the bottom or side of the keyboard.
You should use this method when you have trouble maintaining the connection between your Bluetooth keyboard and your Windows computer.
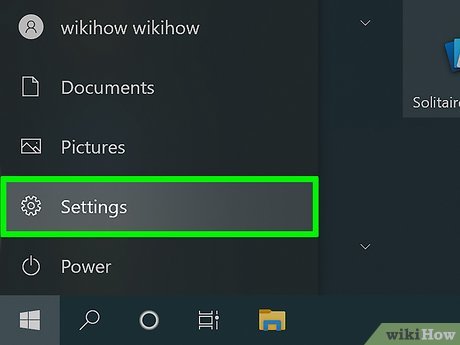
Open Windows Settings. You'll see a gear icon in the lower left corner of the Start menu.
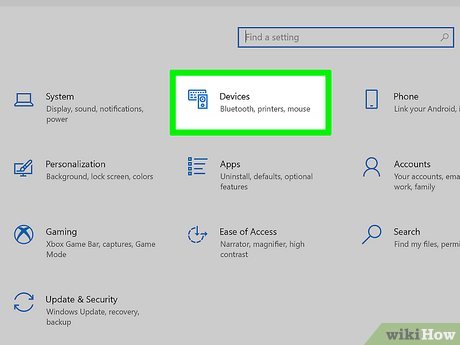
Click Devices . It's the keyboard and smartphone icon.

Click the Bluetooth and other devices tab. This option is on the left side of the window.
If you've turned off Bluetooth, click the "Bluetooth" slider at the top to turn it on.

Click the keyboard in the device list. This option is under "Mouse, keyboard, & pen". The "Remove device" button immediately expands.

Click the Remove device button . A confirmation window immediately appears.
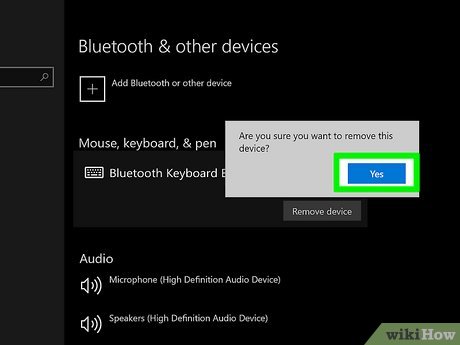
Click the Yes button to confirm. This disconnects the keyboard from the computer.
If Bluetooth has been turned off, you need to turn it back on now.
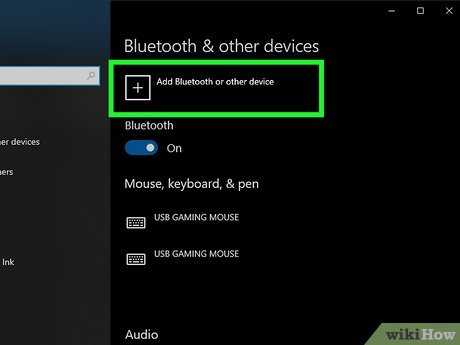
Turn on the keyboard and click + Add Bluetooth or other device . This is the option at the top of the right pane.
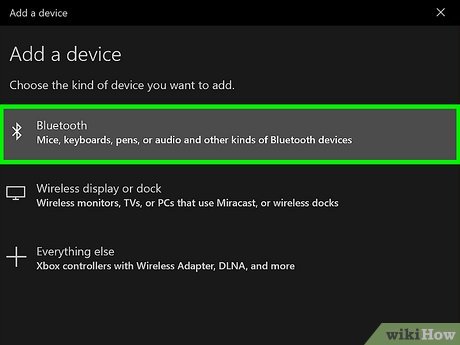
Click Bluetooth . This option is at the top of the list. The computer immediately scans for Bluetooth devices.
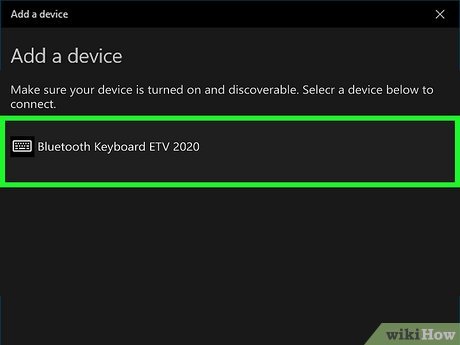
Click the keyboard when it shows up in the list. Depending on your keyboard, additional instructions will appear on the screen. In this case, follow the instructions.
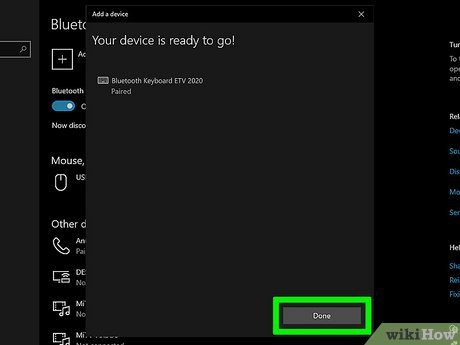
Click Done . Now the Bluetooth keyboard and Windows computer are reconnected.
Reset your Bluetooth keyboard (on Mac) in Settings
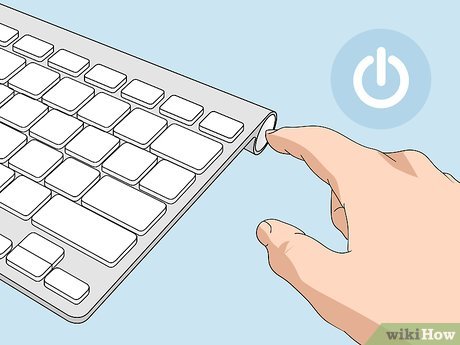
Turn off the keyboard. Press and hold the power button on the back of the new keyboard or on the right side of the old keyboard for at least 3 seconds until there is no longer a connection.
Use this method if you're having trouble maintaining a connection between your Bluetooth keyboard and your Mac.
You'll need a Lightning cable to connect the keyboard to your Mac in the following step. Please have this accessory ready.
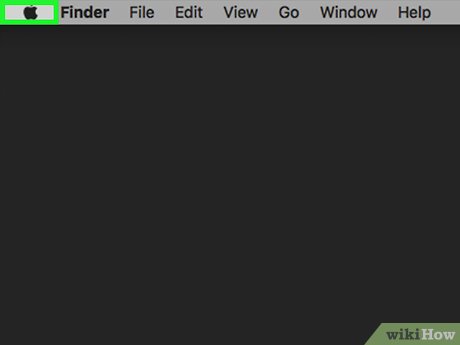
Open your Mac's Apple menu. Just click on the Apple icon in the top left corner of the screen. A menu immediately appears here.
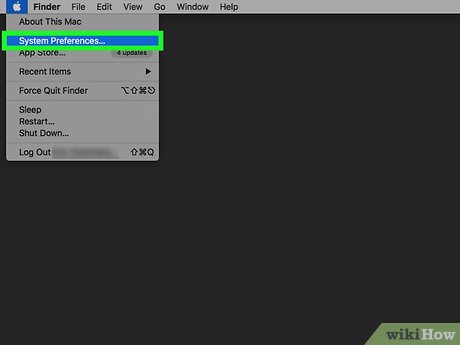
Click System Preferences . This option is at the top of the menu.
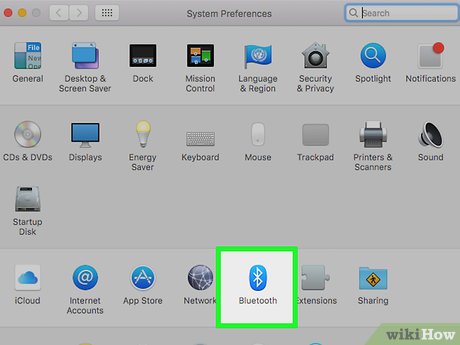
Click Bluetooth . It's an icon that looks like a bow tie.
If Bluetooth is turned off, click Turn Bluetooth On on the left side of the window before continuing.
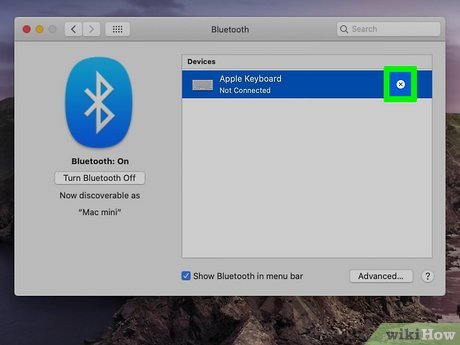
Click the X next to your keyboard name in the list. You will be asked if you want to remove the keyboard.
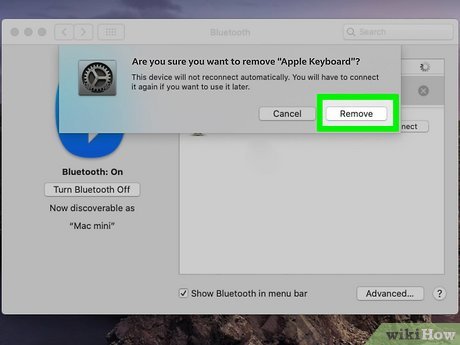
Click Remove to confirm. This removes the keyboard from your Mac.
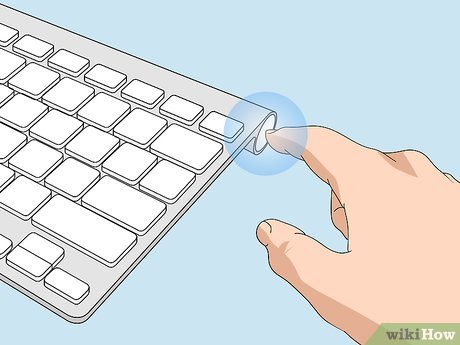
Press and hold the keyboard's power button to power it on. The keyboard connects to your Mac as soon as you turn it on.
If the keyboard doesn't show up in the list of Bluetooth devices, use a Lightning cable to connect the keyboard to your Mac. After connecting, Bluetooth is immediately turned on and automatically connects to the keyboard.
Reset keyboard language (on Windows)
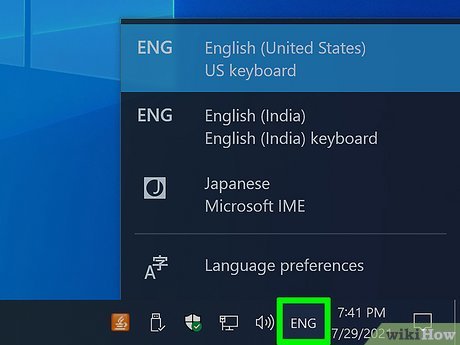
Switch the keyboard language using the Input menu icon. If you see characters from another language, it's usually because you selected the wrong input language. To switch languages quickly, click the current language in the taskbar, just to the left of the date and time information. You will see this option in the bottom right corner of the screen. Next, select the language for the keyboard.
If you don't see the Input menu icon, don't see the language you want to use, or want to change the default keyboard input language, go to the next step.
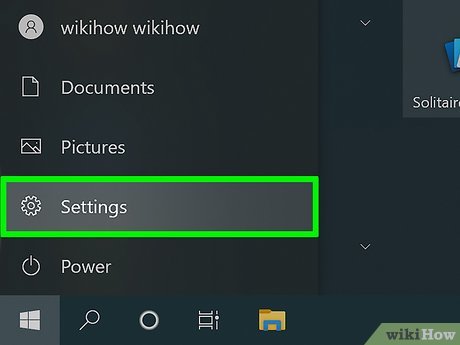
Open Settings. To do this, simply click on the Start menu and select the gear icon in the bottom left corner.
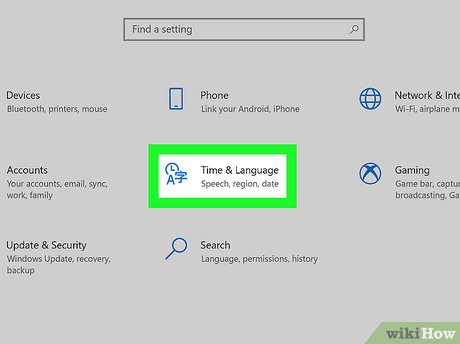
Click Time & language . It's the clock icon in the middle of the window.
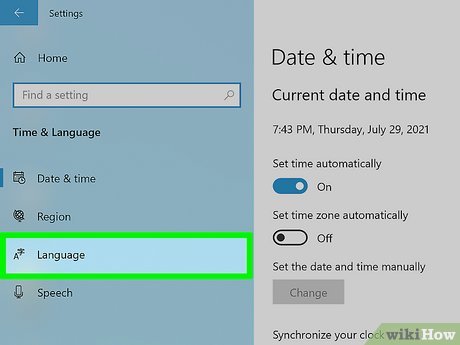
Click the Language tab in the left pane.
If you only have one language installed under "Preferred languages", you won't see the Input menu in the system tray. This icon appears only when you have multiple languages or inputs installed.
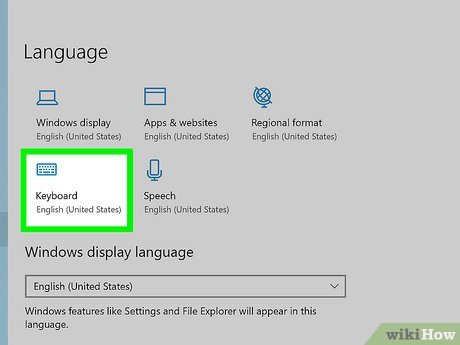
Click the Keyboard icon . This is the selection in the upper part of the right pane.
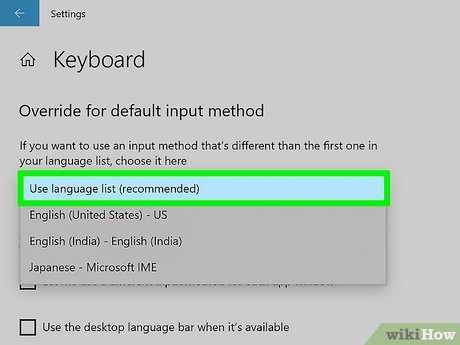
Select Use language list (recommended) in the menu. This option is at the top of the window. The Windows operating system will use the first language in your list as the default language.
Click the back button to return to the language settings.
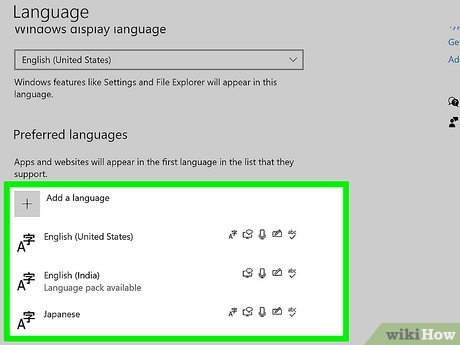
Move the selected language to the top of the list. To do this, you need to select the language and click the up arrow until it's at the top of the list. Now the Windows operating system will default to the language at the top of the list if you have multiple languages installed.
If you don't see the language you want, click the + next to "Add a language", select the language, click Next , and click Install language pack . language) to install.
You can move unwanted languages by clicking them once and selecting Remove .
If the selected language has an inappropriate layout (for example, you use a DVORAK English-US keyboard instead of QWERTY), select the language, click Options , select Add a keyboard ( Add keyboard) and choose to add your favorite layout.
Reset keyboard language (on Mac)
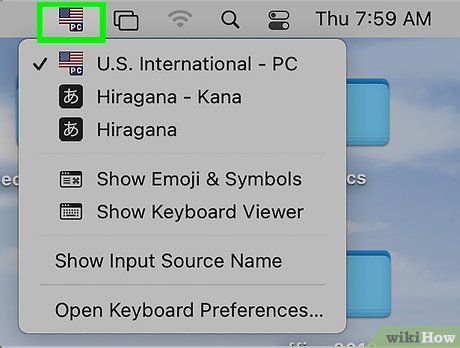
Switch the keyboard language using the Input menu icon. If you see characters of a language that are not needed when typing, the reason is because the keyboard has not selected the correct input language. To switch languages quickly, simply click the flag icon for the current language (for example, the American flag icon if you want to use the English - US keyboard) in the menu bar at the top of the screen and Select the language you want to import.
If you don't see this icon, you must activate it according to the instructions in the following step.
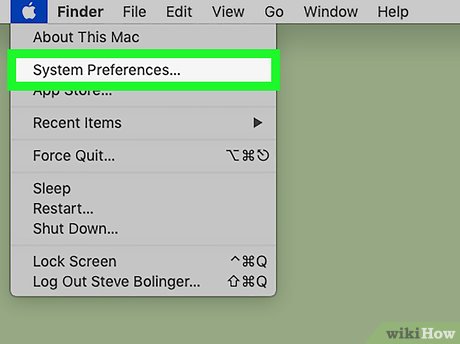
Open your Mac's System Preferences . You'll open this menu by clicking the Apple logo in the upper left corner and selecting System Preferences in the menu.
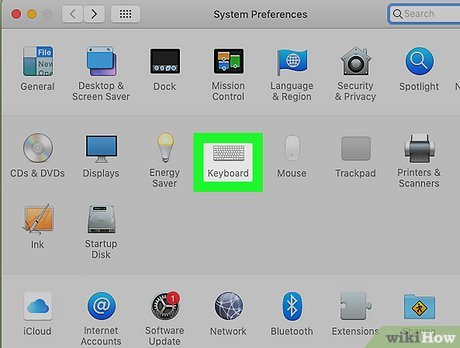
Click the Keyboard icon . The keyboard settings immediately appear on the screen.
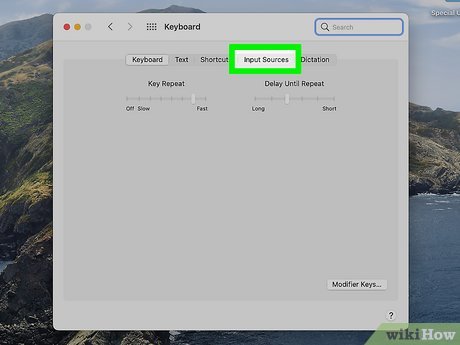
Click the Input Sources tab. It's the fourth tab at the top of the window.
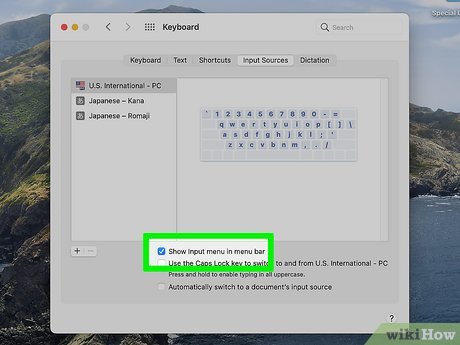
Check the box next to "Show Input menu in menu bar". This is the box at the bottom of the window. Once checked, the Input menu will display in the menu bar. You can now click this menu icon to enable the keyboard language whenever needed.
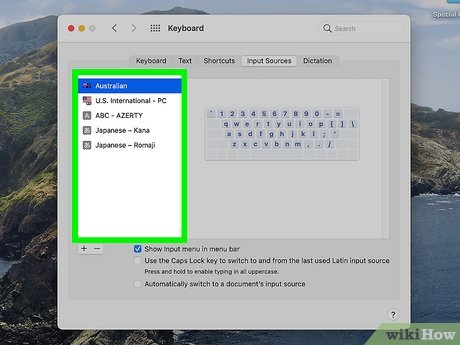
Rearrange the languages in the order you want. If you have multiple languages installed, you can rearrange their positions so that the default language appears at the top of the list. Simply click and drag your favorite language to the top of the list so it becomes the default choice.
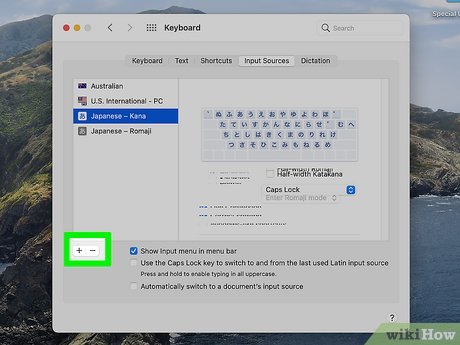
Remove languages you don't want to use (optional). If you want to remove a keyboard language on your Mac, click it and click the minus sign below the language list.
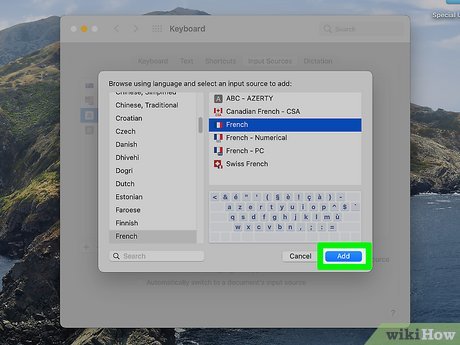
Add another language (optional). If the keyboard language you want isn't shown in the list, you can add it by clicking the + sign below the list, selecting the language, selecting the keyboard layout, and clicking Add .
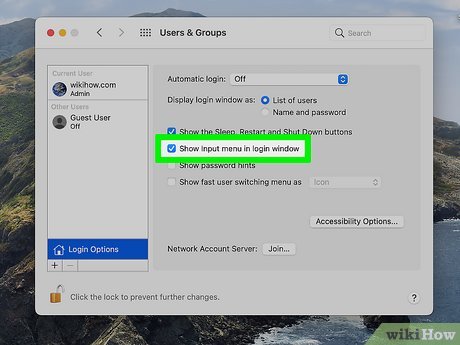
Allows users to choose keyboard layout at login (optional). If you share a Mac with users who use a different keyboard language, you can add an input menu to the sign-in screen to let all users choose a language before signing in. Proceed as follows:
Click the back button in the upper left corner of the window to return to System Preferences.
Click the Users & Groups icon .
Click the lock icon in the bottom left corner to allow changes.
Click Login Options . It's in the bottom left corner.
Check the box next to "Show Input menu in the login window".
Click the padlock icon to lock the settings and close the window.
Reinstall the keyboard driver (on Windows)
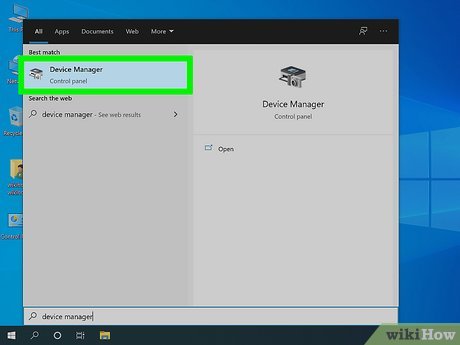
Open Device Manager. This is a program that allows you to reset the hardware on your computer. Faulty drivers are the main cause of keyboard problems on Windows computers, including erratic or unresponsive responses. This method will help you delete the current driver and replace it with a new version. Open Device Manager as follows:
If the keyboard doesn't work, just click the Start menu, type device managerin the search bar, and click Device Manager in the search results.
If you can't use the keyboard, click the Start menu, scroll down to the program list, expand the Windows System folder , select Control Panel , and click Device Manager .
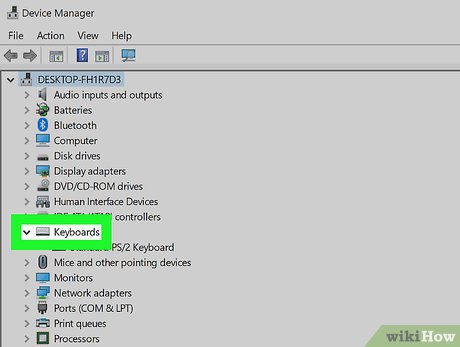
Scroll down and expand Keyboard . Click the arrow icon to the left of the Keyboard heading . The screen immediately displays a list of currently connected keyboards.
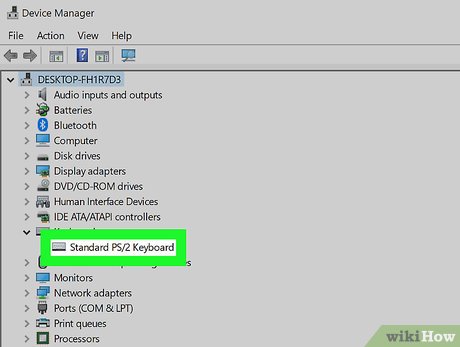
Select the keyboard you want to reset. Click the keyboard's name to select it.
The name of the keyboard is often non-specific, such as "Standard PS/2 Keyboard" or "HID Keyboard Device". If you use a laptop and have connected a secondary keyboard (via USB port or USB wireless receiver), the "Standard" keyboard is built into the laptop, and the HID is the secondary keyboard.
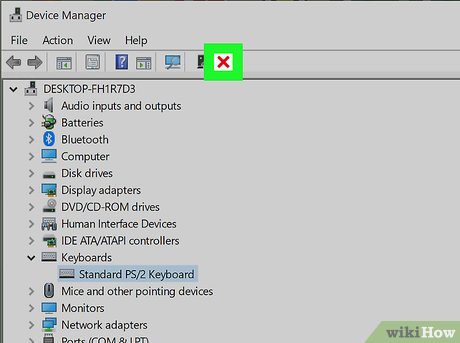
Click the "Uninstall" icon. This is the red X at the top of the window.
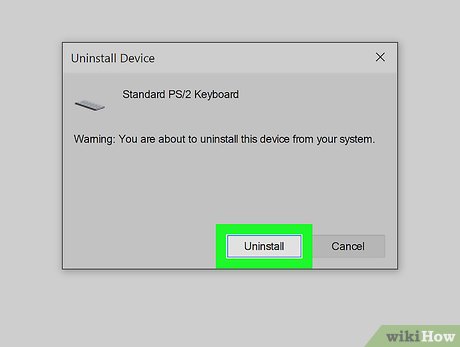
Click Uninstall to confirm. This removes the keyboard from Device Manager.
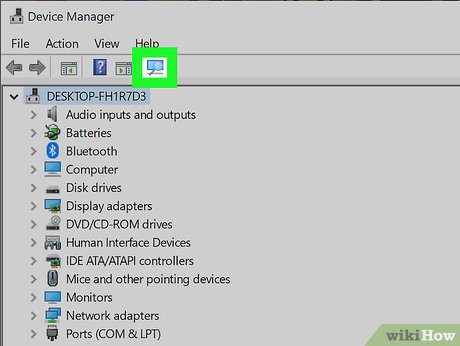
Click the "Scan for hardware changes" icon. It's the computer screen icon in the upper right corner of the Device Manager window. After you click here, your computer immediately scans for connected hardware that doesn't have a driver installed (such as a keyboard) and automatically resets the driver.
At this point, try using the keyboard. If the keyboard works normally, the problem is fixed! If not, you need to install specific drivers. You can also continue this method to try updating the driver.
If the computer cannot recognize the external keyboard, disconnect it (or power it off if it is connected via Bluetooth). When you connect or turn on the power, Windows automatically installs the driver.
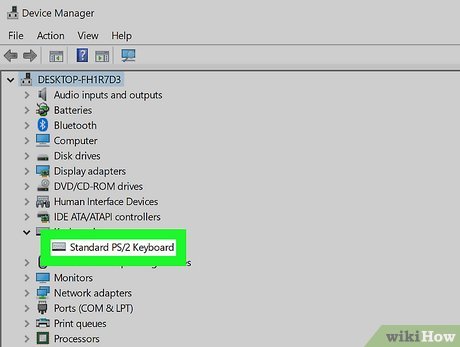
Select the keyboard again. The name of the keyboard displays in the Keyboards section. Depending on the driver used for reinstallation, the display name may be different than before.
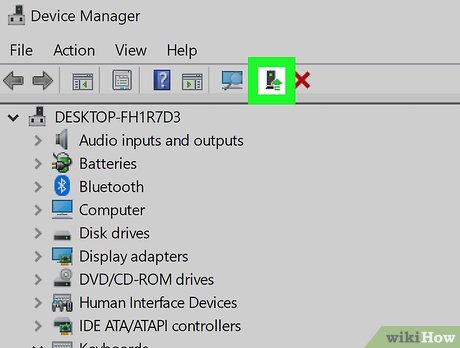
Click the "Update drivers" button. This option is at the top of the window, and looks like a black box with a green upward arrow.
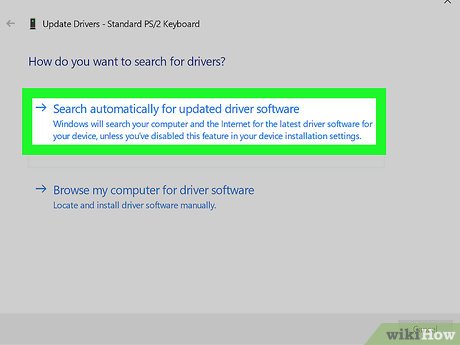
Click Search automatically for updated driver software . This option is above the currently displayed window. The computer immediately searches for the latest software update for the keyboard.
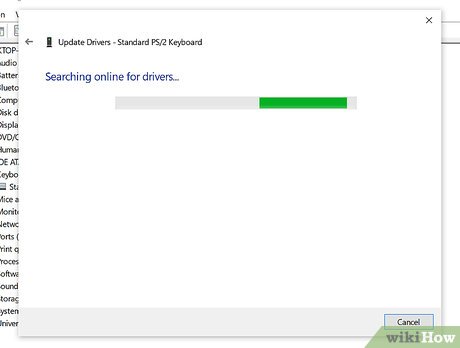
Allows installation of the latest drivers. Thus, the available drivers for the keyboard will be installed automatically.
If you don't see new drivers, just click Search for updated drivers on Windows Update. If you see an updated version, click Install now to download it - using Windows Update is the best way to get the latest drivers for your computer.
You will be asked to restart your computer after updating the driver.
Restore default keyboard settings (on Mac)
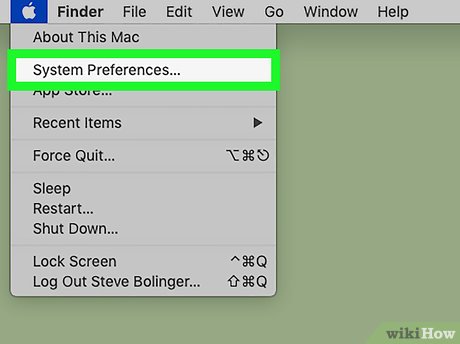
Open System Preferences on Mac . You can find this option by clicking the Apple menu in the upper left corner of the screen and selecting System Preferences on the menu.
Use this method if you've changed some keyboard settings, such as keyboard shortcuts and autocorrect, but want to return to the defaults.
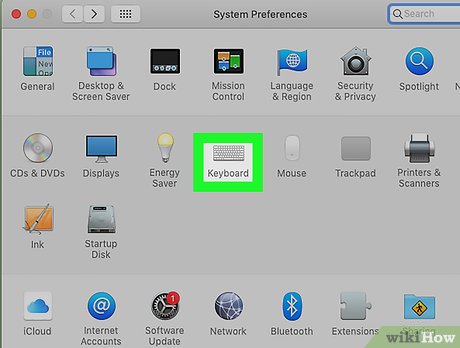
Click Keyboard . This is the keyboard icon in the System Preferences window. With this operation, the Keyboard settings immediately display the Keyboard tab by default.
If you don't see the Keyboard tab, click Keyboard near the top of the window to be taken there immediately.
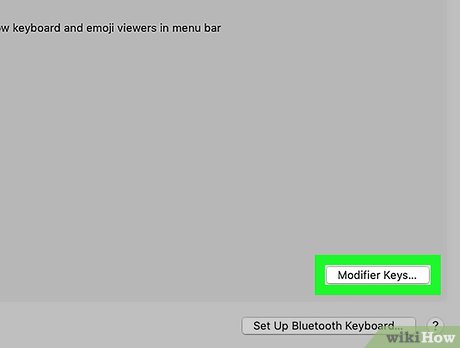
Click the Modifier Keys… button . This option is in the bottom right corner of the window.
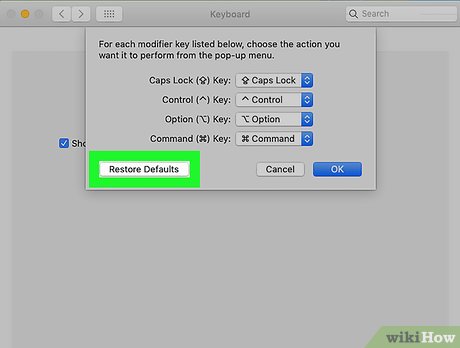
Click the Restore Defaults button and click OK . This removes any customizations related to your Mac's navigation keys (such as Command ).
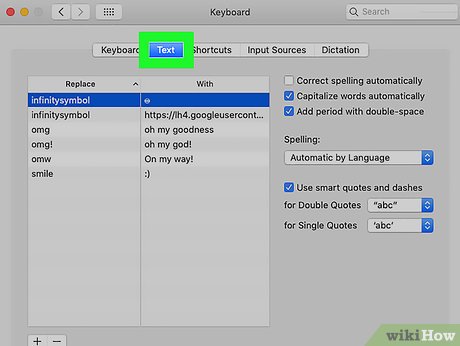
Click the Text tab . This tab is at the top of the window and to the right of the Keyboard tab .
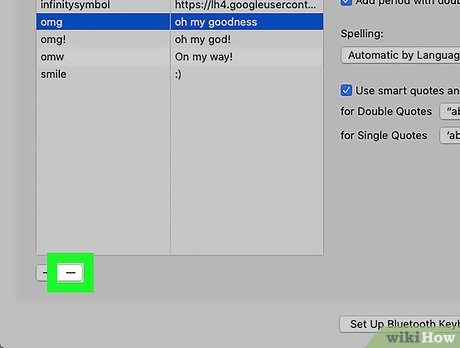
Delete any alt text that you don't want to keep. Alt text is an automatic error correction feature that the Mac performs when you type combinations of characters (for example, typing "omg" when using an English keyboard gives you the exclamation "Oh my goodness! " (Oh my god!). To remove the alt text, you need to select the content and click the minus sign below the list.
Note: You'll do this for each alt text that needs to be removed.
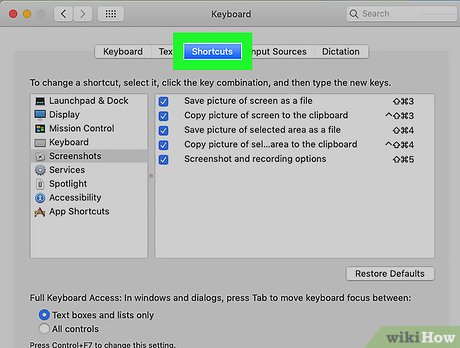
Click the Shortcuts tab . This is the tab at the top of the window. Here, you'll see keyboard shortcuts that perform several features, such as Shift + Command + 5 to take a screenshot.
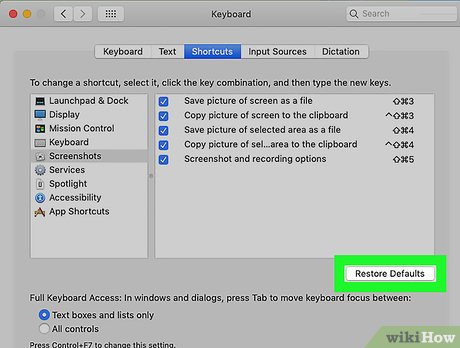
Click Restore Defaults . This option is in the bottom right corner of the window. This restores the text shortcut's default settings. Now you only see pre-set keyboard shortcuts on Mac (including screenshot shortcut).
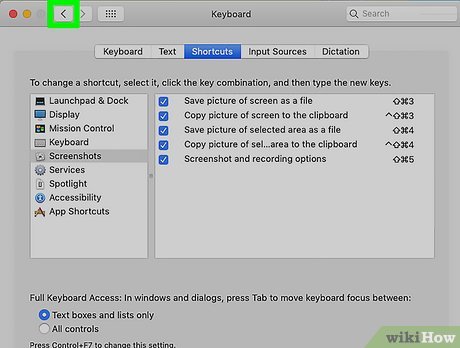
Click the back button to return to System Preferences. It's the return arrow in the top left corner of the window.
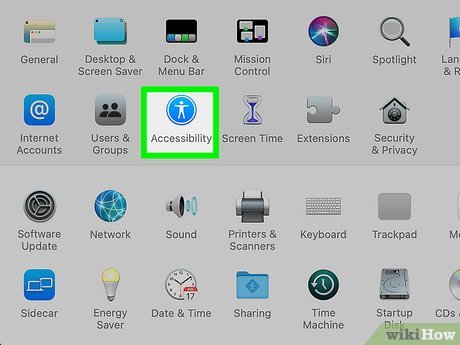
Click the Accessibility icon button . This is a blue circle with a white outline of a person inside.
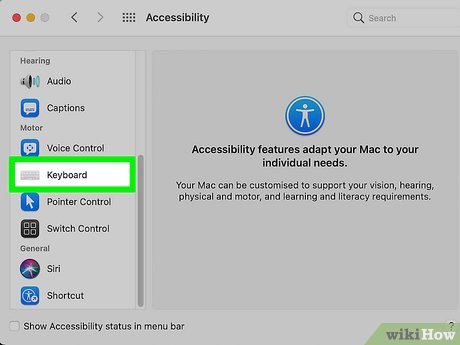
Click Keyboard in the left pane. This option is below the "Interaction" heading.
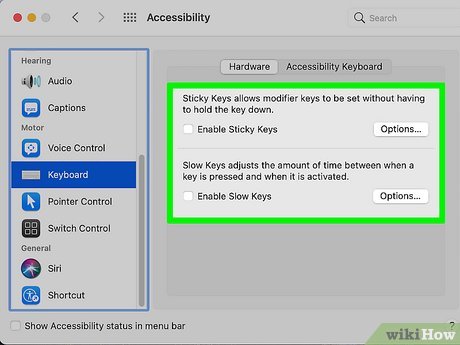
Remove the check marks from "Enable Sticky Keys" and "Enable Slow Keys". If both of these options are enabled, disabling will restore the original method of keyboard input on Mac.
This is a support feature for people who have difficulty using the keyboard.
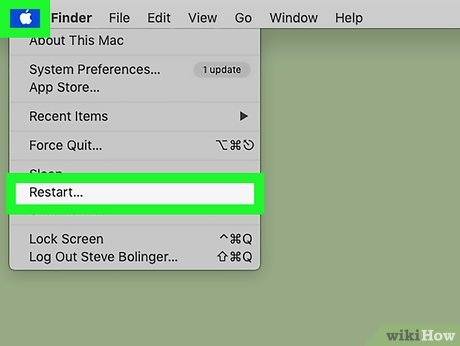
Restart your Mac. Open the Apple menu , click Restart. , and click Restart when asked. The Mac keyboard will work normally once the Mac finishes restarting.