Table of Contents
Remove Physical Write Protection on Microsd Card Adapter

This practical guide explains how to remove write protection on a transcend microsd card with clear steps and useful context. It also covers common requirements, potential problems, and the details that can help you get better results.

Unlock card adapter. Push the slide lock all the way up to disable the anti-overwrite mode.
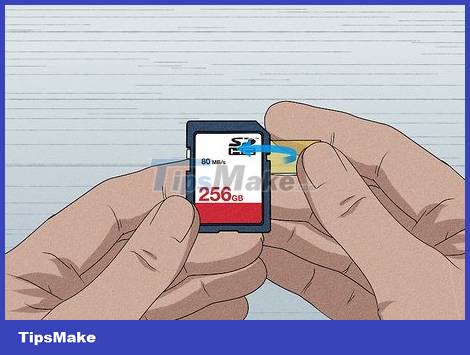
If there is a notch on the right side of the adapter, fix it with tape. Some devices cannot overwrite the microSD card if there is a notch on the adapter. Apply a small piece of tape over the notch so that the device can read the adapter normally.
Use Diskpart to Remove Overwrite Protection (Windows)

Open the Run program by pressing the key combination ⊞ Win + R. A new window with the word 'Run' at the top will appear. The Run program makes it easy for users to open applications and run files just by entering the name of the content to be launched.

Type diskpart and click Ok. A new Command Prompt window will appear with the mouse pointer behind the word 'DISKPART>'.
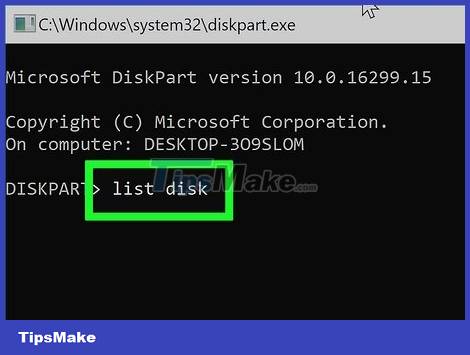
Type list disk and press ↵ Enter. The list of disks that the computer can read will appear in rows with the disk number, status, capacity and free memory of each disk.
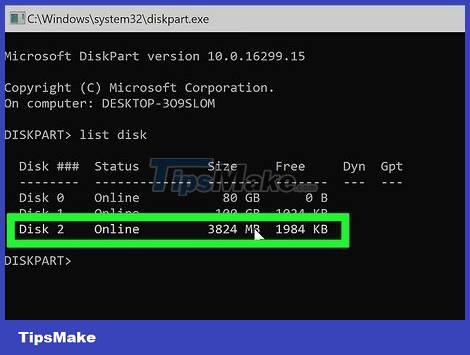
Find the disk number of the microSD card. A quick way to determine the disk number that corresponds to the microSD card is to check the disk space. Look for a disc with the capacity corresponding to the microSD card.

Type select disk (the disk number of the microSD card) and press ↵ Enter. This command will tell the computer that the next command is for that disk, so you can specifically target the microSD card. The text 'Disk (number) is now the selected disk' will appear next showing that the microSD card is currently selected.
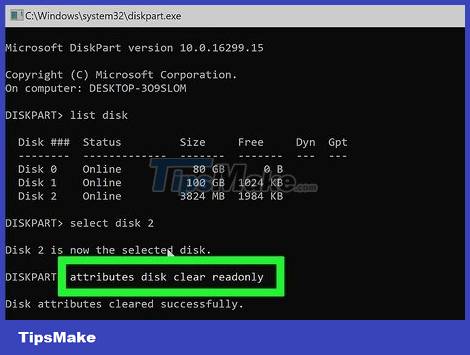
Type attributes clear disk readonly and then press ↵ Enter. This command is intended to remove all attributes as read-only, which means that the microSD card will no longer be overwrite-protected. The next line of text that will appear will be 'Disk attributes cleared successfully'.
Use Registry Editor to Remove Overwrite Protection (Windows)
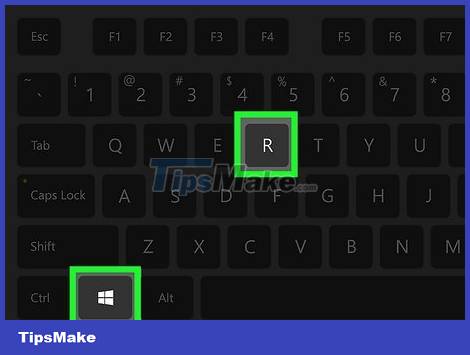
Open the Run program by pressing the key combination ⊞ Win + R. A new window with the word 'Run' at the top will appear. The Run program makes it easy for users to open applications and run files just by entering the name of the content to be launched.
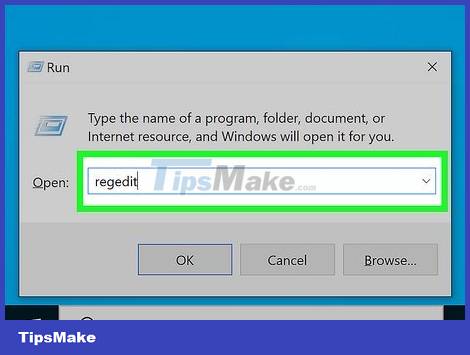
Type regedit and click Ok. A new window will appear titled 'Registry Editor'.
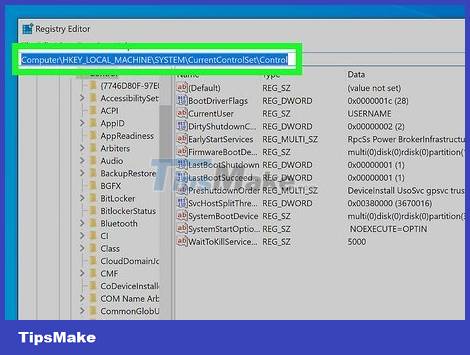
Follow the file path HKEY_LOCAL_MACHINE/SYSTEM/CurrentControlSet/Control. Under 'Computer', click the drop-down arrow to the left of the 'HKEY_LOCAL_MACHINE' folder. In this folder, you click on the drop-down arrow next to the 'SYSTEM' folder and so on.
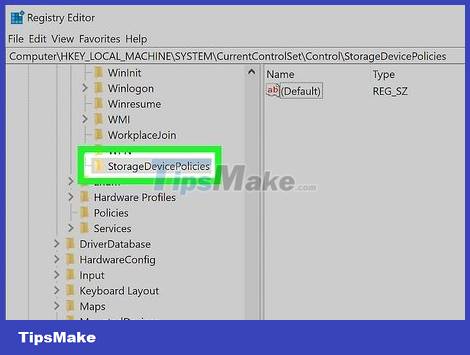
Create a new key named 'StorageDevicePolicies'. If a folder with the name 'StorageDevicePolicies' already exists in the folder 'Control', you can skip this step. Otherwise, proceed with the following steps to create a new folder:
Right click on the Control folder.
Click the New menu.
Click Key.
Type StorageDevicePolicies and press Enter.
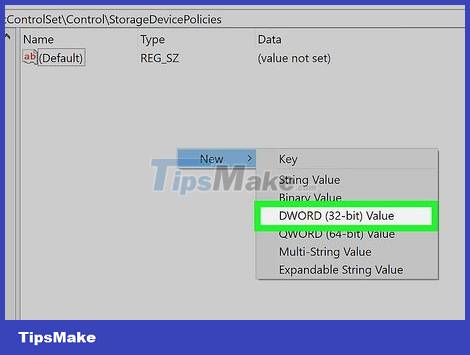
Open StorageDevicePolicies and create a new DWORD entry. You can create a new entry by right-clicking on the table containing the file named '(DEFAULT)', selecting DWORD (32-bit) Value from the New menu.
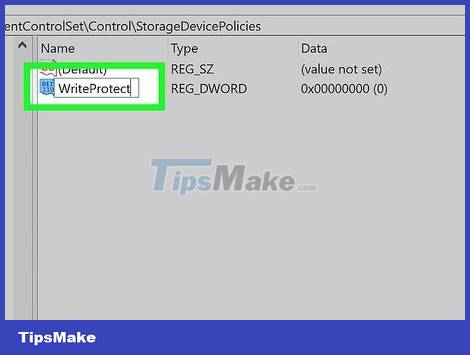
Rename the DWORD entry to WriteProtect. This file tells the computer if the device is overwritten, so you can edit the file and change the protection status.
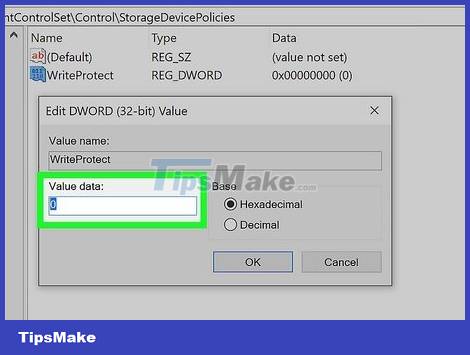
Open WriteProtect and change the value to '0'. Double-click the file to open a dialog titled 'Edit DWORD (32-bit) Value'. If the value in the 'Value data' field is not '0', change it to '0'.
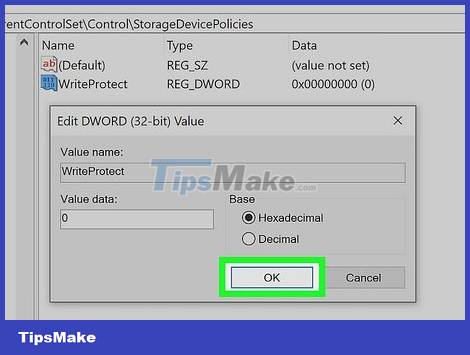
Click Ok and restart the computer. Restart your computer to apply the changes you just made. If nothing goes wrong, after the computer restarts, you should be able to save the data to the microSD card.
Find Read-Only Files on a Microsd Card (Mac)
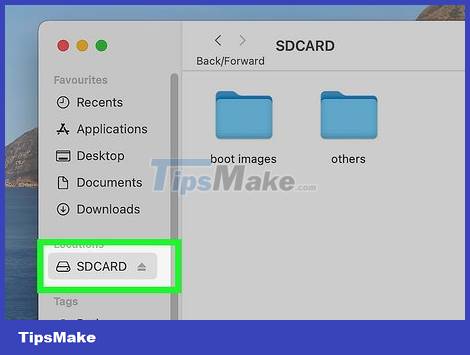
Open the microSD folder in Finder. The microSD card will show up under the 'Locations' heading in the left pane of the Finder.
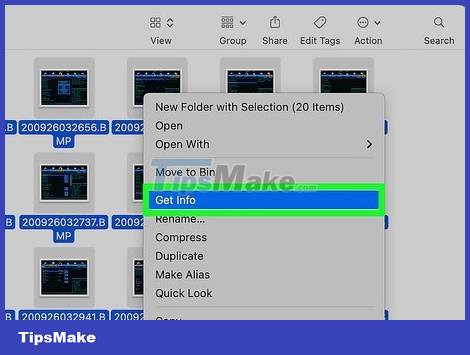
Find read-only files. You can check individual files by right-clicking on them and selecting Get Info, then looking for your account name under the 'Sharing and Permissions' heading located end of the window.
To quickly check the permissions of multiple files, click on a file and press the key combination ⌘ Command + ⌥ Option + I. The pop-up window will update as soon as you select different files, allowing scanning. quickly by moving through rows of files with the arrow keys.
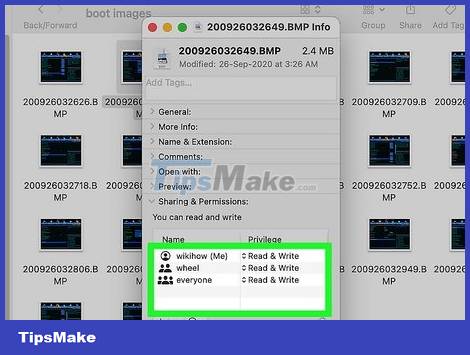
Change the permissions of all files to read-only. Below the 'Sharing and Permissions' heading, find your name then click the Read only status displayed next to it. Then, select Read & Write from the menu that appears.
Repair Microsd Cards with Disk Utility (Mac)
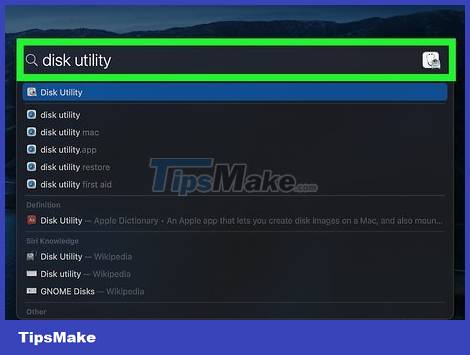
Open Disk Utility. To find the Disk Utility feature, click on the magnifying glass icon in the upper right corner of the screen, type 'Disk Utility' and then open the application.
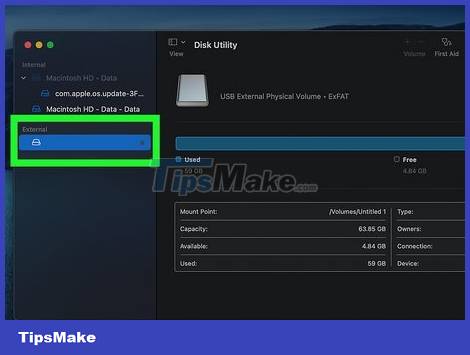
Select a microSD card. Usually, tags will be listed under the 'External' heading.
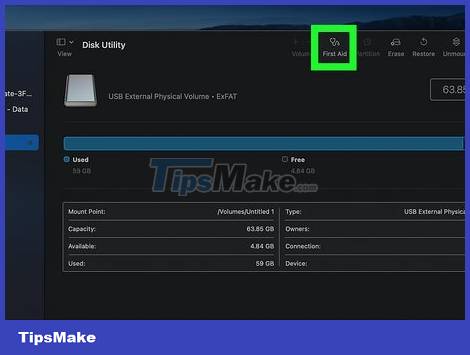
Click First Aid. The First Aid button has a stethoscope icon.
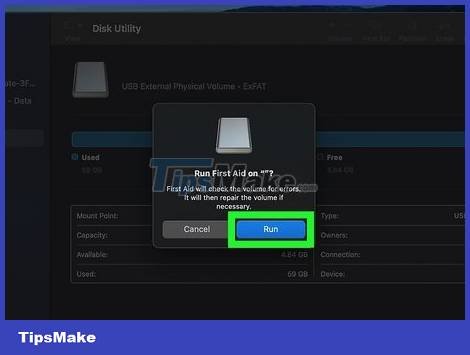
Follow the instructions on the screen. Click Run, then wait for the process to complete. Once the First Aid process is done, you will be able to write data to the microSD card.
Conclusion
Understanding Microsd Transcend makes it easier to compare options, avoid common mistakes, and apply the information in this guide more effectively. Review the relevant requirements before making changes or choosing a solution.
FAQ
How do you remove write protection on a transcend microsd card?
Follow the steps in this guide in order, confirm the required settings or tools, and verify the result before making additional changes.
Is it safe to remove write protection on a transcend microsd card?
It is generally safe when you follow the recommended instructions, use trusted tools, and avoid changing settings you do not understand.
What should you do if the process does not work?
Recheck the requirements, restart the device or application when appropriate, and review each step for missed settings or compatibility issues.
Related Articles
 7 Ways to Fix Problems with Microsd Cards11 minutes read
 Top Best MicroSD Cards for 2020 Devices9 minutes read
 Whoever Plays the Game Is Ready to Buy HyperX MicroSD Card4 minutes read
 How to Choose the Appropriate MicroSD Card for Nintendo Switch10 minutes read
 How to Choose to Purchase Microsd Card to Upgrade Android Memory7 minutes read
 The World's Fastest 1.5 TB microSD Card: Complete Overview5 minutes read
Reader Comments 0
Sign in with email or Google to join the discussion.