How to Remove the Latest Samsung Galaxy Tab Battery
Remove the Samsung Galaxy Tab battery

Prepare the necessary tools. To remove the battery from your Samsung Galaxy Tab, you need a plastic pry tool and a small screwdriver. Some models require the use of a three-sided screwdriver. You can purchase all the necessary tools along with a replacement battery, or simply purchase a battery replacement kit for a specific Samsung Galaxy tablet model.
You must purchase the correct kit specifically for the Samsung Galaxy Tab tablet model. If the wrong kit is purchased, the tool and battery may not be compatible.
If you don't have a plastic pry tool, you can use any piece of plastic (for example, a guitar pick or a thin piece of plastic cut from a soda bottle).
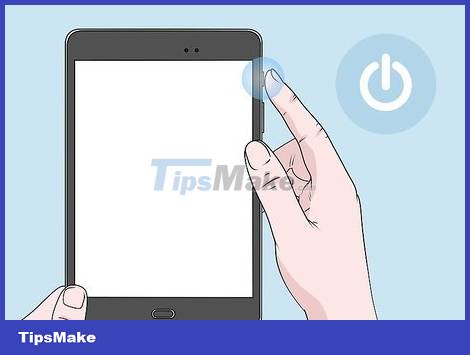
Power off the Galaxy Tab. Hold down the power button on the side (top) to power off the device.
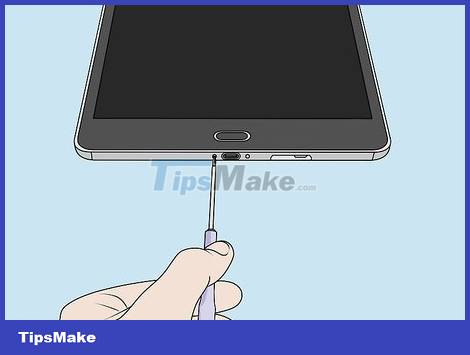
Remove the two screw covers near the charging port (if applicable). Some Galaxy Tab 10 models have screws located on both sides of the charging port. If this model of Galaxy Tab tablet has screws located on either side of the charging port, you need to use a tape pin or sharp object to pry the screw cover first, and then use a three-sided screwdriver to remove the screws.
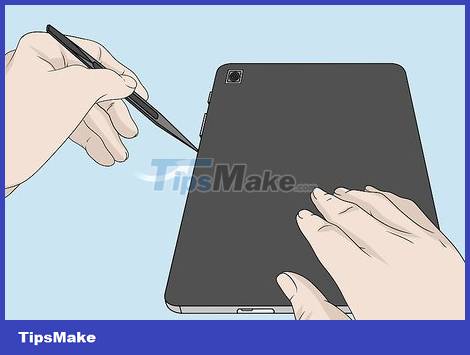
Use the plastic pry tool to pry the back cover. Insert the plastic pry tool into the space between the back cover and the front panel (usually located on the side of the device). On some models, this may be somewhere around the front panel display. While moving the tool around the machine, you use light force to separate the front from the back.
Note: the latches that secure the back cover are fragile, so you need to be slow and careful. Be careful not to tear the microphone cable when you detach the front panel at the upper left corner of the Galaxy Tab.
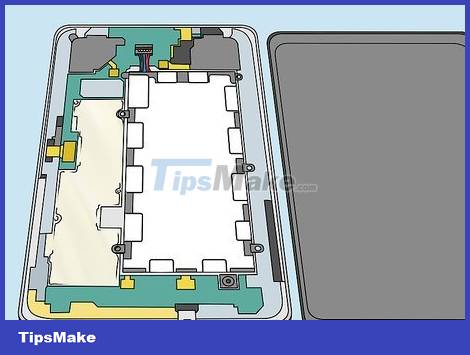
Separate the back cover from the rest of the device. Once all the latches have popped out, you can remove the back cover and set it aside.
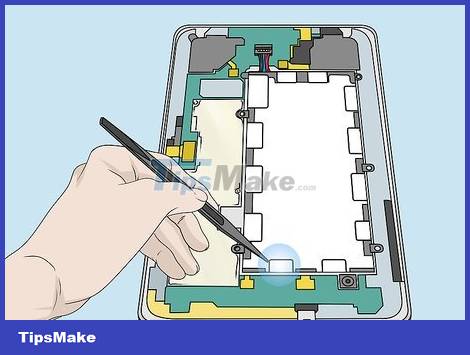
Remove the tape from the ribbon cable (flat cable) and battery. Depending on the model, there will be tape covering the flat cable and battery. Use the plastic pry tool to remove the tape and set it aside.
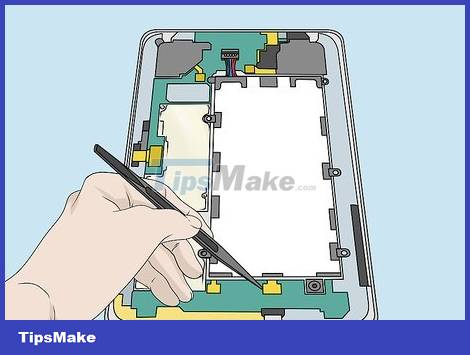
Unplug the tape cable from the battery (if applicable). Many Samsung Galaxy Tab 10 models with larger sizes have 2 or 3 ribbon cables on top of the battery. Use the tool to pry open the protective plate above the connector where the ribbon cable plugs in. Then proceed to unplug the ribbon cable from the connector. If there is no shield above the connector then simply unplug the ribbon cable.
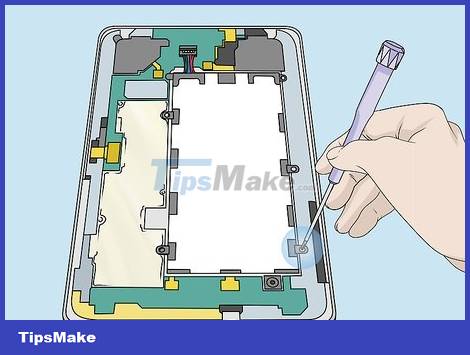
Remove screws (if any). On some Galaxy Tab models, the battery can be secured with screws. Use a Philips screwdriver to unscrew the screws on the battery sides.
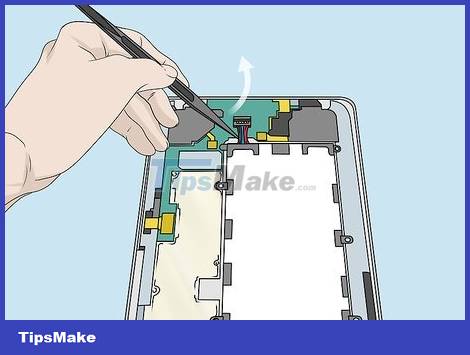
Disconnect the battery from the board. There are 4 wires connecting the battery to the black clip and the motherboard. Insert the plastic tool under the power cord and pry up to disconnect the black clamp from the board.
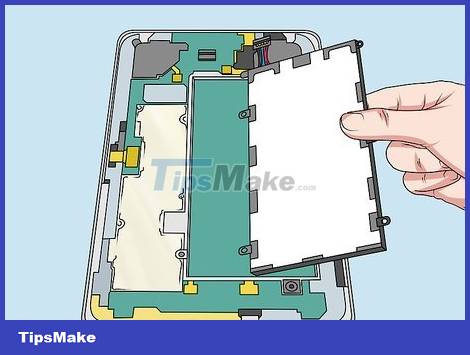
Take out the battery. After disconnecting the battery, you just need to remove the battery from the machine.
Reassemble Samsung Galaxy Tab
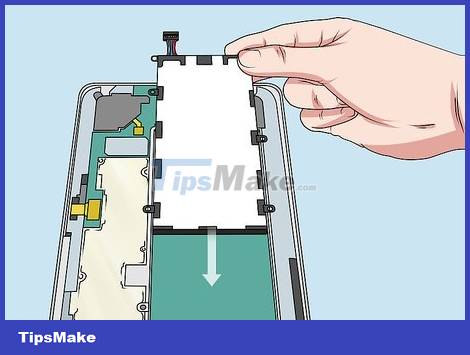
Install a new battery. After taking out the old battery, you can replace it with a new one.
If this Samsung Galaxy Tab model has a ribbon connector, you need to make sure you don't place the battery on top of the connector.
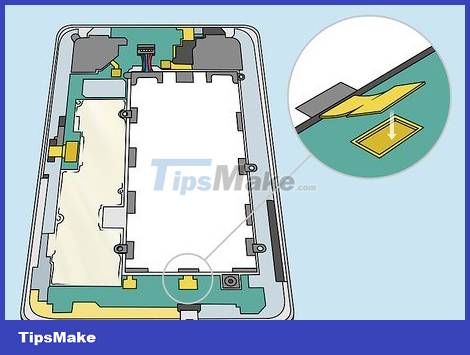
Reconnect the battery cord to the board. Find the 4 wires connected to the black clamp and gently push the black end down to attach the battery to the board.
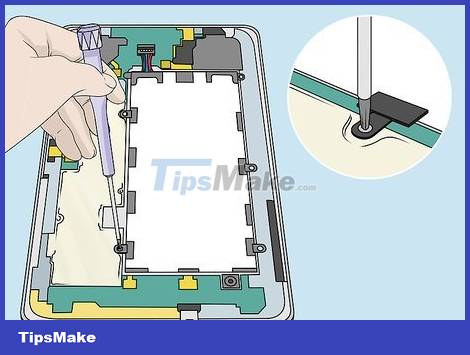
Reinsert the battery screw. If the old battery is secured with a screw, you'll need to use a Phillips screwdriver to screw the old screw back into place.
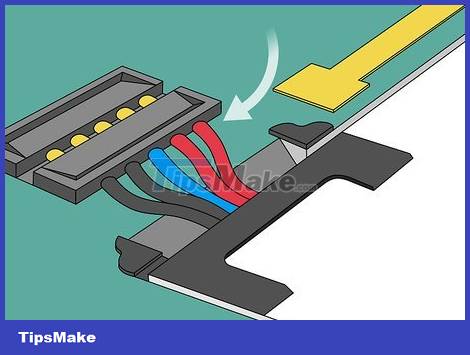
Reinsert the ribbon cable. If the Samsung Galaxy Tab has a ribbon connector, reinsert it on the top of the battery. Place the connector strip facing up and slide it back in place until it is secure. Then you press the connector strip down to snap into place.
Warning: If the tape cable is not installed, it will definitely affect the performance of the device.
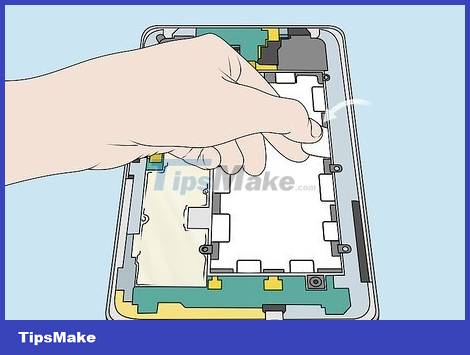
Put the protective sheet back on the ribbon and battery connector. If there is a cover for the ribbon connector and the battery, you will need to put it back in its original position.
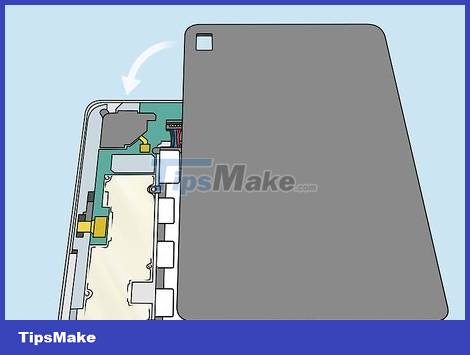
Reinstall the back cover. Once the battery and all cables are properly attached, reinstall the back cover. Use your fingers to gently press around the edge of the device so that the back cover snaps into place.
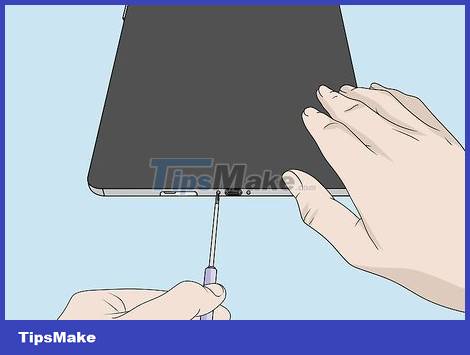
Screw the screw back on. If the Samsung Galaxy Tab model has a screw in the charging port, you need to use a three-sided screwdriver to tighten the screw. Finally, reattach the screw cap. Now Samsung Galaxy Tab is fully assembled. You can proceed to turn on the device.

It is done.
You should read it
- ★ Galaxy S20 and S20 +: Snapdragon 865 / Exynos 990, 8 / 12GB RAM, 100X zoom camera, 8K video recording
- ★ Review Samsung Galaxy S20: First 5G phone in 2020
- ★ How to fix charging Samsung Galaxy S21 not on battery
- ★ 8 useful apps on Samsung Galaxy S21
- ★ Some ways to increase battery life for Samsung Galaxy S8