How to quickly blur photos online
Photo editing software will all have tools to blur images, but not everyone knows how to use that software. Or many people who want to quickly edit images and don't want to use software can look for online photo blurring tools.
These online photo blurring tools will quickly hide parts of the image where you have blurred areas. Online photo blurring websites have simple interfaces, helping you edit photos online quickly. Below are some online photo blurring websites.
1. Blur photos with Photoshop Online
Open Photoshop Online on your computer or phone. Click Open Flie from computer/Open from Computer to upload the image that needs to be blurred to Photoshop Online.
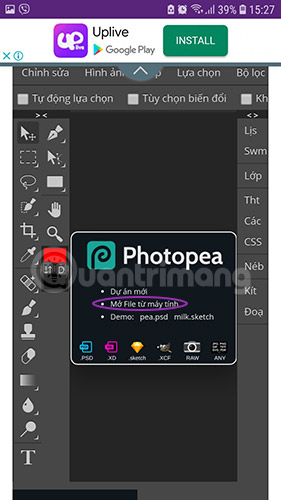
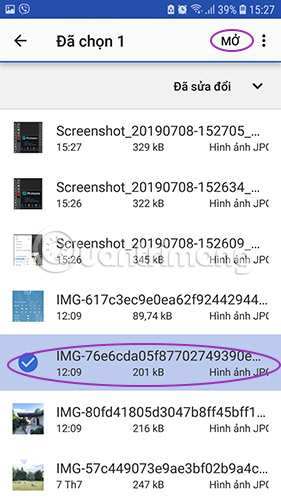
Select the photo to blur then click Open .
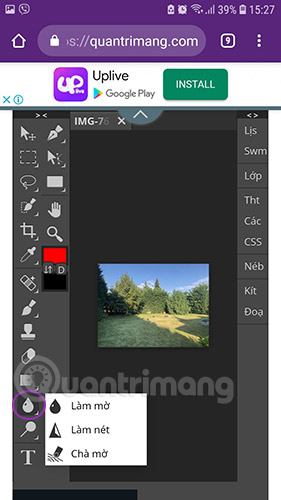
Click on the water drop blur icon on the right hand side, select the type of blur you want, if you want a light blur, choose Blur/Blur Tool , if you want a completely unrecognizable blur, choose Smudge Tool .
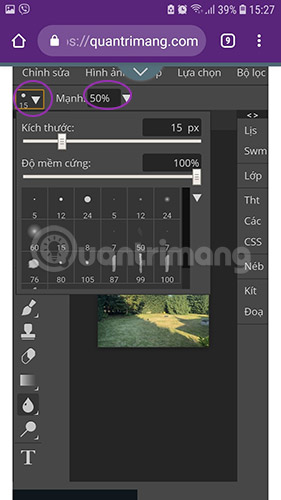
Next, look right below the toolbar, you will see there are 2 options: 1 is the width, 2 is the strength of the blur tool. Adjust to the level you want, then fill in the area on the photo that needs to be blurred.
When finished editing, click File > Export as > select the format you want to export the image, usually PNG or JPG, then save the image to your computer or phone and you're done.
2. Blur photos on Befunky
This website will help you blur photos quickly and can choose the direction and blur area.
Step 1:
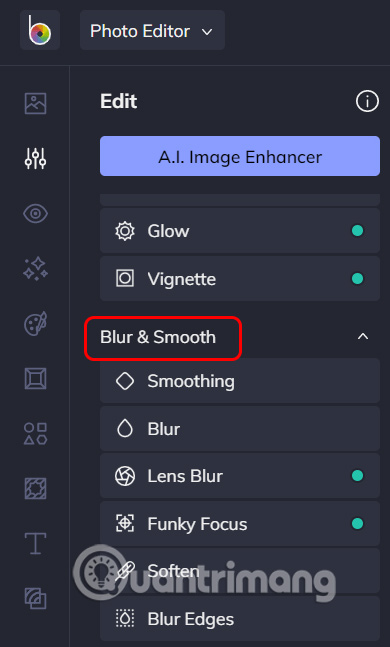
You access the link above and then download the photo from your computer. Next in Befunky's tools interface, look down at the Blur & Smooth group and you will see different blur tools.
Step 2:
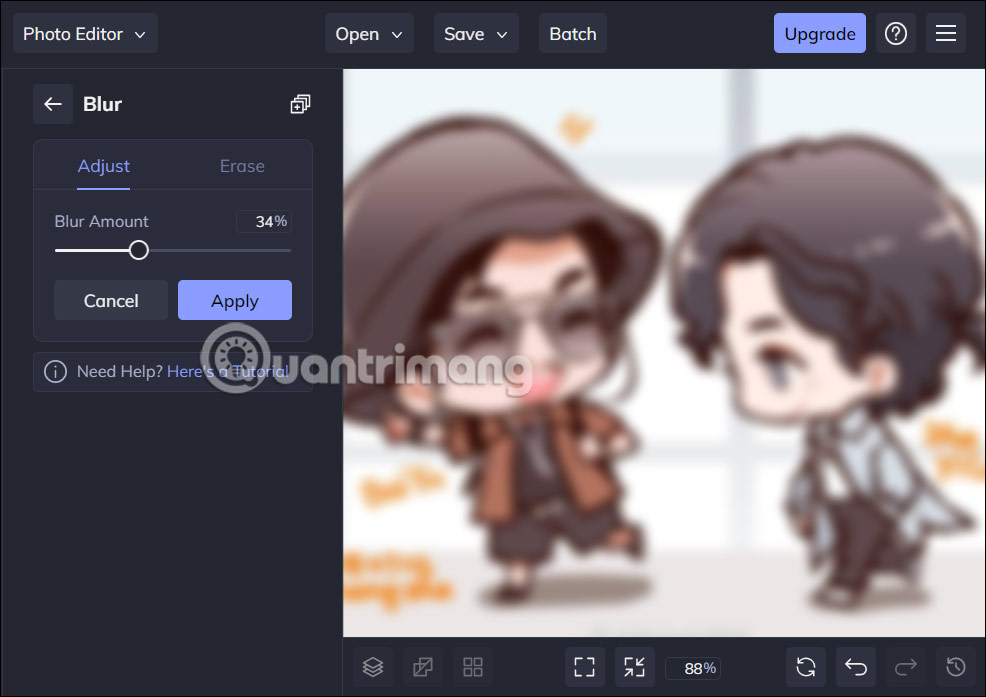
For example, with the Blur blur tool , the image is completely blurred according to the level of blurring percentage that the user adjusts.
Step 3:
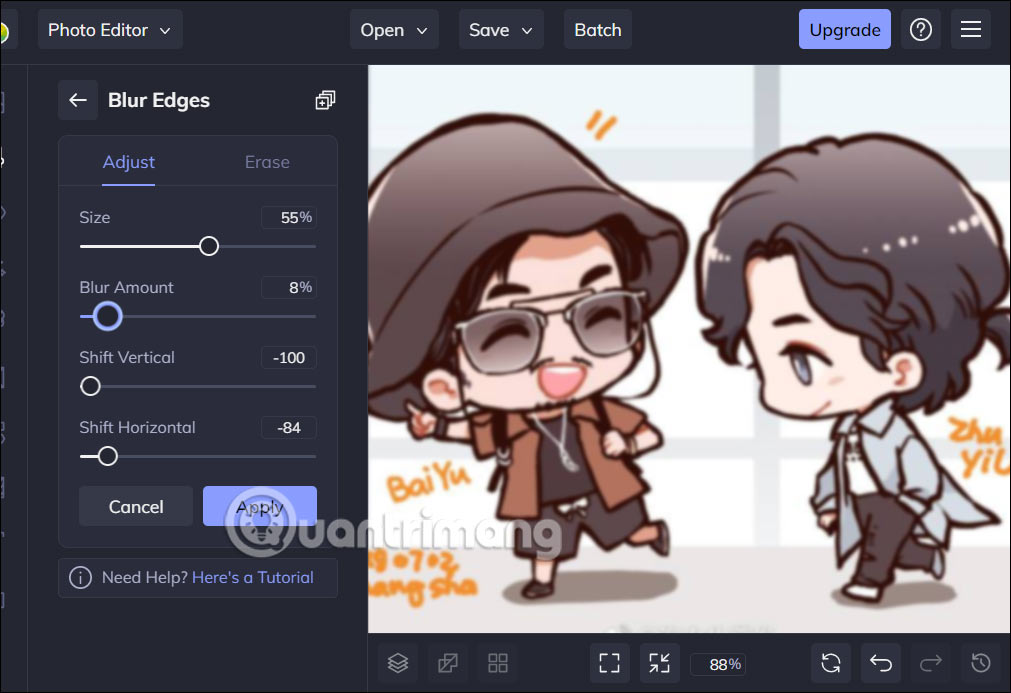
You can click Blur Edges to adjust the blur direction of the photo. You can blur images horizontally, vertically.
After adjusting the blur, click Save to save the image as usual.
*Additional information:
BeFunky's all-in-one online Creative Platform has everything you need to easily edit photos, create graphic designs, and collage photos. BeFunky has a great collection of tools and features for photo editing, collage creation, and graphic design. Here are some favorites:
- Crop and resize photos : With this photo editor, you can easily crop and resize your images with pixel-perfect precision.
- Turn photos into works of art : Give your photos a truly unique look. Artsy filters will make your photos look like vintage-style paintings, sketches, cartoons, etc.
- Batch edit photos: With batch processing, you can crop, resize, and edit multiple photos at once.
- Background removal : AI-powered background removal feature detects the main subject in your photo and removes the background - in just one click! Easily create transparent and solid-colored backgrounds for products, portraits, etc.
- Portrait retouching : Perfect portraits and selfies, every time. With its collection of Touch Up tools, Befunky will help you look your best in no time.
- One-click collage maker : With the click of a button, your photos will be used to build a series of layouts for you. All you have to do is choose a suitable layout.
- Customizable design templates : Graphic design doesn't have to be difficult. Choose one of BeFunky's pre-made design templates and with just a little customization, you'll turn your concept into a stunning design.
- Over a million free images : BeFunky has partnered with Pixabay and Pexels to bring you over a million high-quality FREE images right in the web app.
- Thousands of vector graphics and icons : You'll never have to scour the Internet for the perfect icon again. Quickly search thousands of icons and vector graphics right in BeFunky's web app.
3. Instructions for blurring photos on Pixelied
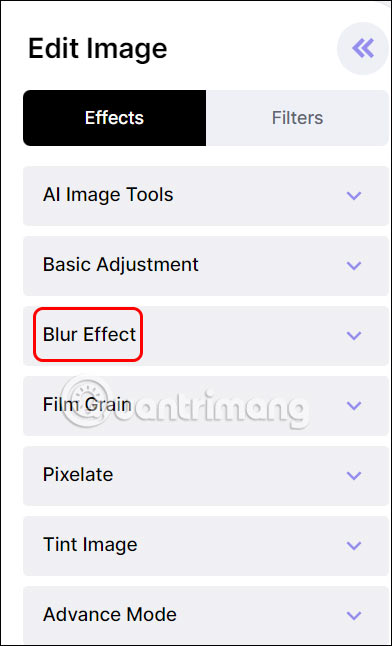
First of all, we also upload photos to this website to use the photo blurring tool. Then in the toolbar , click on the Blur Effect tool to blur the image.
We will adjust the image blur level through the toolbar. This tool will blur the entire image so you need to pay attention.
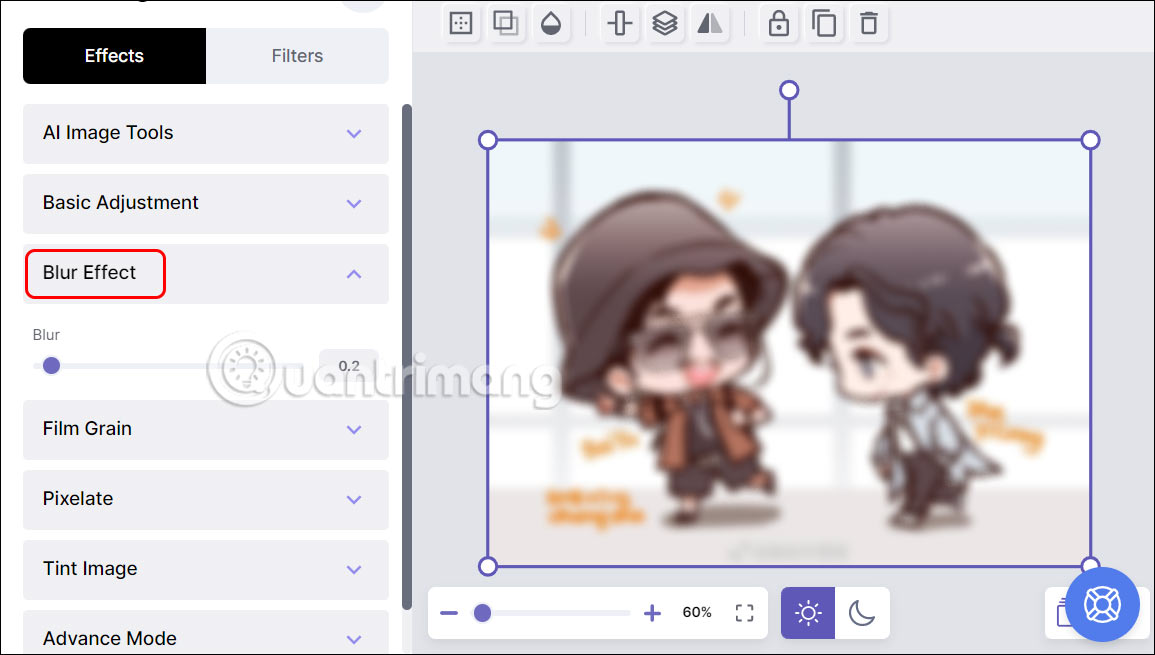
After editing, press the Download button to download the image.
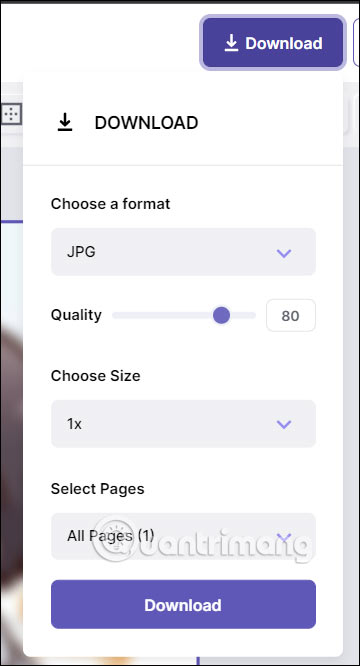
4. Fotor blurs photos online
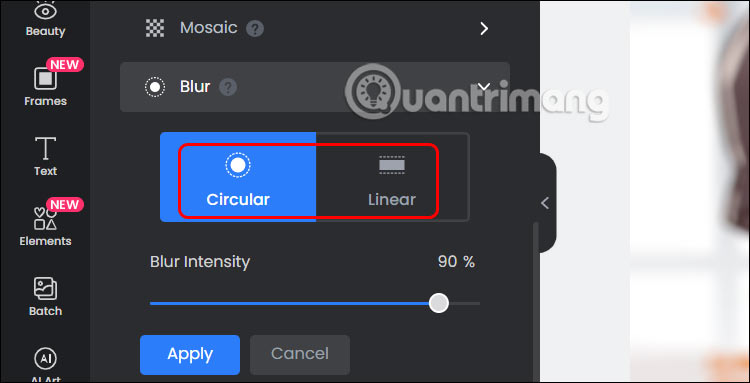
Fotor's blur tool has 2 blur options: blur in circular areas, or blur in horizontal areas. You choose to blur according to the circular area at Circular or according to the line at Linear.
Below is the bar to adjust the blur level for the image.
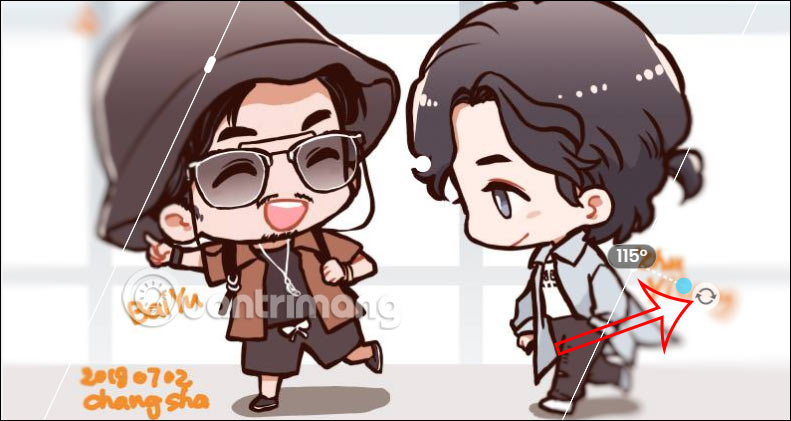
With line blurring of content, you can rotate the area in any direction you want.
After editing, click the Download button to download the image.
5. Instructions for blurring photos online on Picsart
Picsart will let you choose pre-selected image blur styles for you to choose to apply to your image.
We upload the image to Picsart's blur tool. We will then see the image blur types available to choose from.
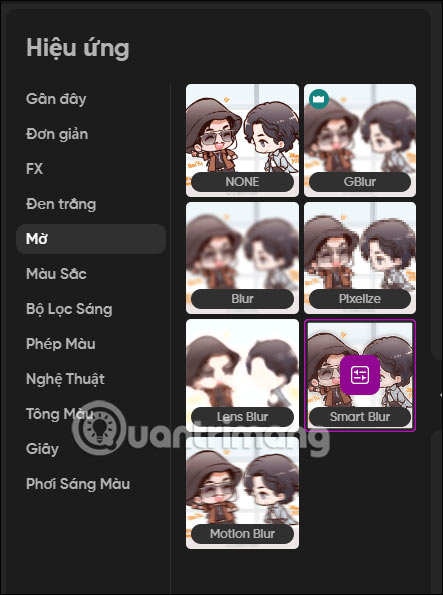
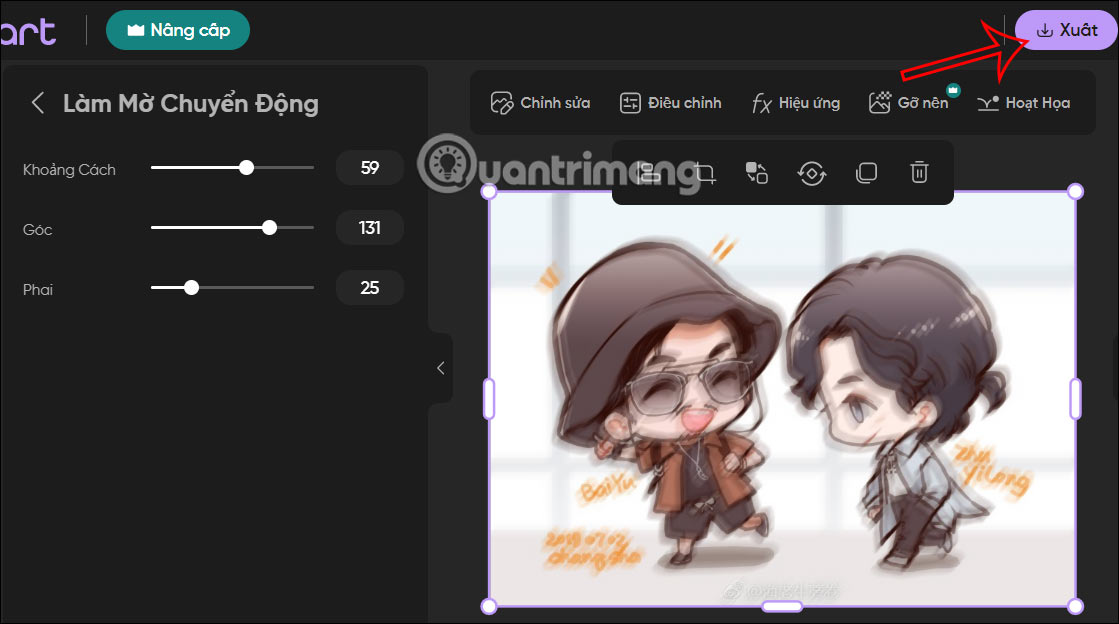
After choosing the blur type, click on the adjustment icon to adjust the blur level for the image.
Each type of blur will have different adjustment bars. You use these bars to adjust the blur level for the image accordingly.
After editing, press the Export button to download the image.
6. Instructions for blurring photos online using Canva
Like BeFunky, Canva offers many tools for designing and editing, including a photo blur tool. However, unlike BeFunky, blurring images on Canva will require you to create a free account to use this feature.
After logging into your Canva account, locate and select Upload your photo . You'll be prompted to upload your image and create a Canva design that perfectly matches the dimensions of your photo. Additionally, you can drag and drop your images on the page.
Note : At the time of writing, Canva has launched a new photo editor. However, the blur tool on the new editor is quite basic and does not yet allow you to blur specific parts of the image. If you're taken to the new editor, Canva will show the option to use the old editor when you select Edit photo . Until the new editor improves functionality, use the old editor.
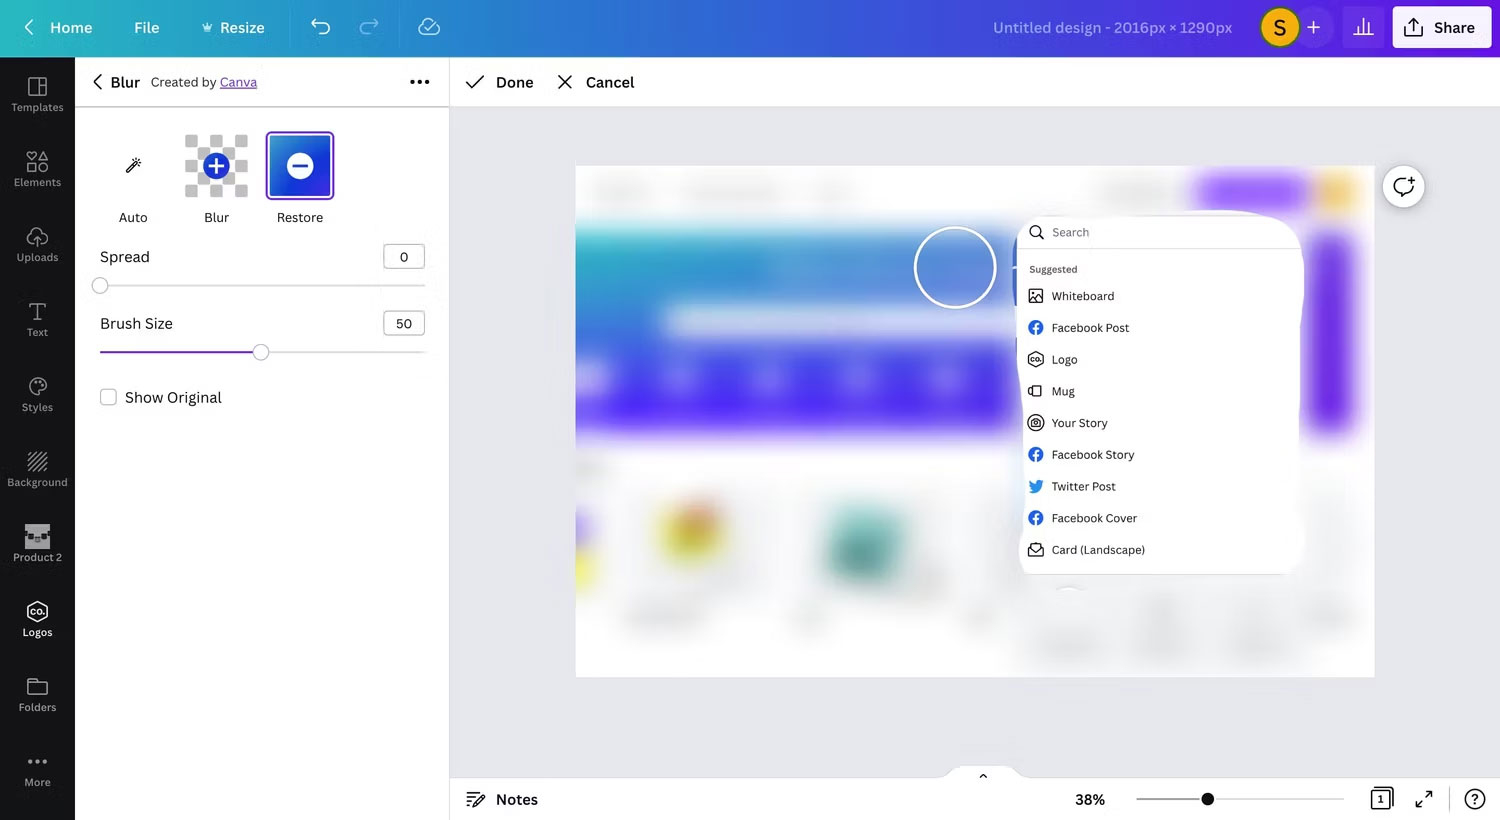
Go to Edit photo in the top toolbar and find the Blur option under Tools . In case you have never used the Blur tool before, you will find it in the suggestions section or just search for it in the search bar.
Use the Auto option to blur your entire image, or select Blur to brush over the area you want to blur. You can also undo fading using the Restore option .
When you're done editing your image, tap Share , then select Download to save your design to your computer.
You can download Canva designs in several formats, including JPG, PNG, and PDF. If you decide to use a paid Canva account, you can also download your design as an SVG.
7. Blur photos with Blur Photo Editor
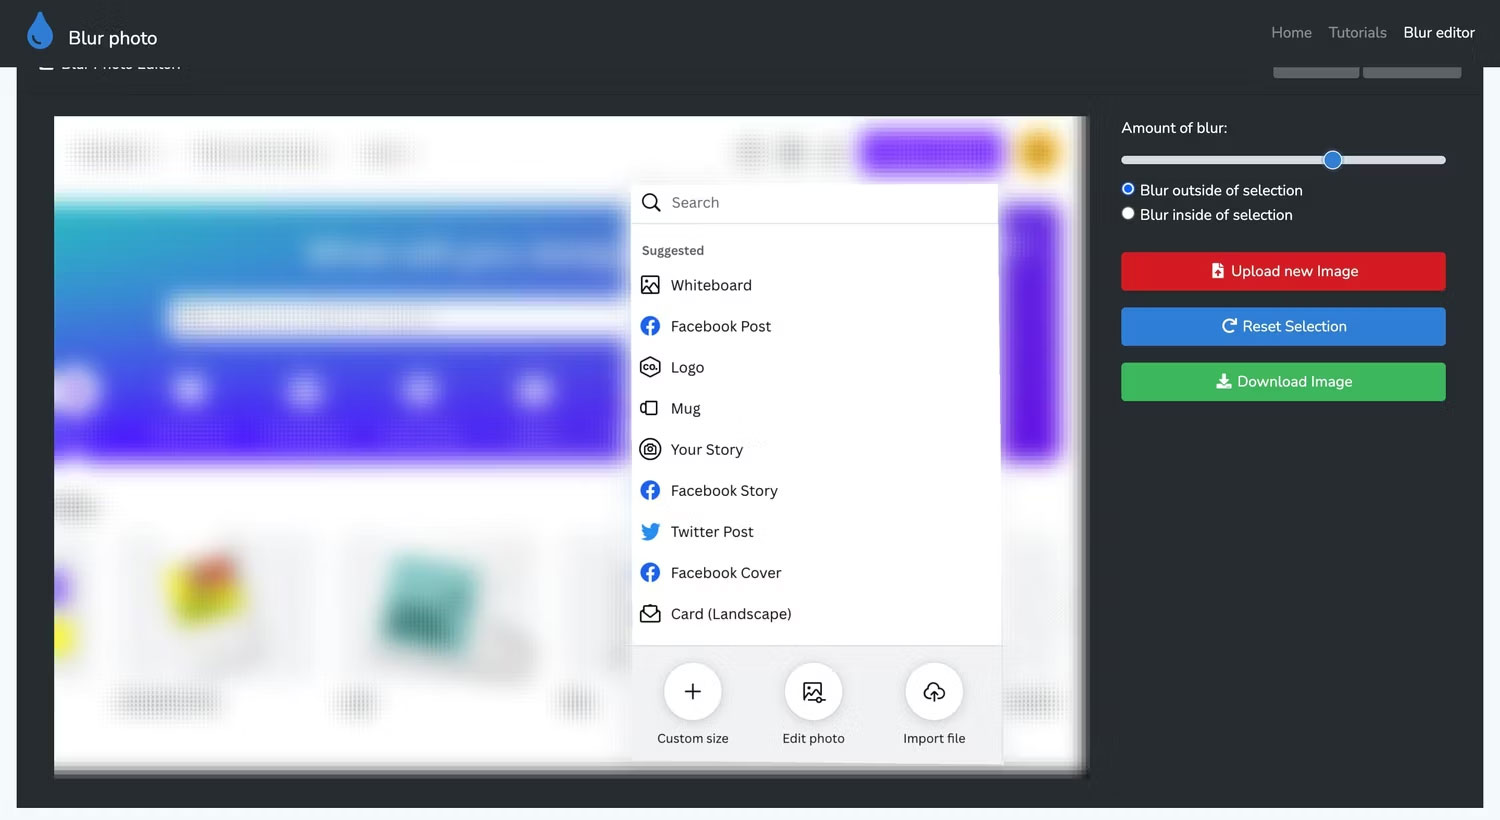
If you find your hands are a bit shaky when blurring images with brush strokes, then you'll love the clean lines created by Blur Photo Editor. Although the ads can be annoying, this is a great tool for blurring parts of an image because it allows you to create a selection instead of relying on the steadiness of your hand. This tool is also very simple because there are not too many editing functions.
On the home page, select Start Blur Photo Editor , then tap Choose Photo to Blur to add your photo to the editor.
Next, start making a selection by clicking on the corners of the area you want to blur. Once selected, choose whether you want blur inside or outside your selection and toggle the amount of blur you want to add. If you make a mistake, reset your selection, or if you're happy with your adjustment, download the finished image.
While Blur Photo Editor may not be the prettiest editing tool on the Internet, it is easy to use and produces professional blur images at zero cost.
8. Peko Step helps blur photos quickly
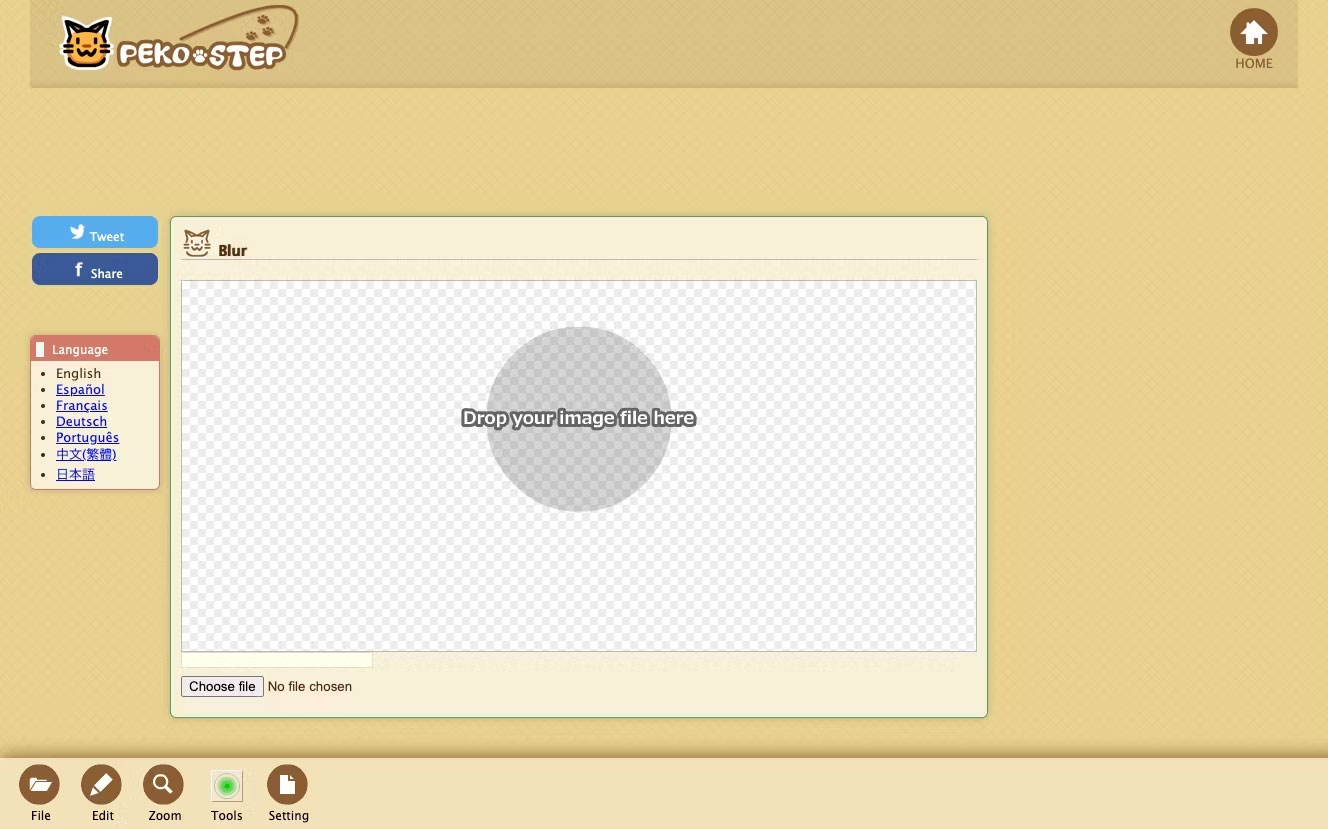
Peko Step is a free image editor that runs in your web browser. To add opacity to an image in Peko Step, start by uploading the image via the File icon at the bottom. Additionally, you can drag and drop images directly on the canvas.
Once the image is uploaded, select the area you want to blur or leave intact by dragging over the image inside the editor. Now, choose whether you want to add an ellipse or rectangular blur effect. Unlike the other tools mentioned earlier, you cannot adjust the size of the blur effect on Peko Step.
Next, choose whether you want to blur inside or outside your selection. Then select Apply to blur the area.
To download an image, right-click it on the desktop and save as usual. You can also save the image by going to File > Save Image , but this may not work in your browser.
Compared to the other tools on this list, Peko Step is not as intuitive to use, and it doesn't let you adjust the opacity level of the selection. If you want to add a little opacity to your image or want to blur the inside or outside of an ellipse, you can try this tool.
9. How to blur photos with Pixlr
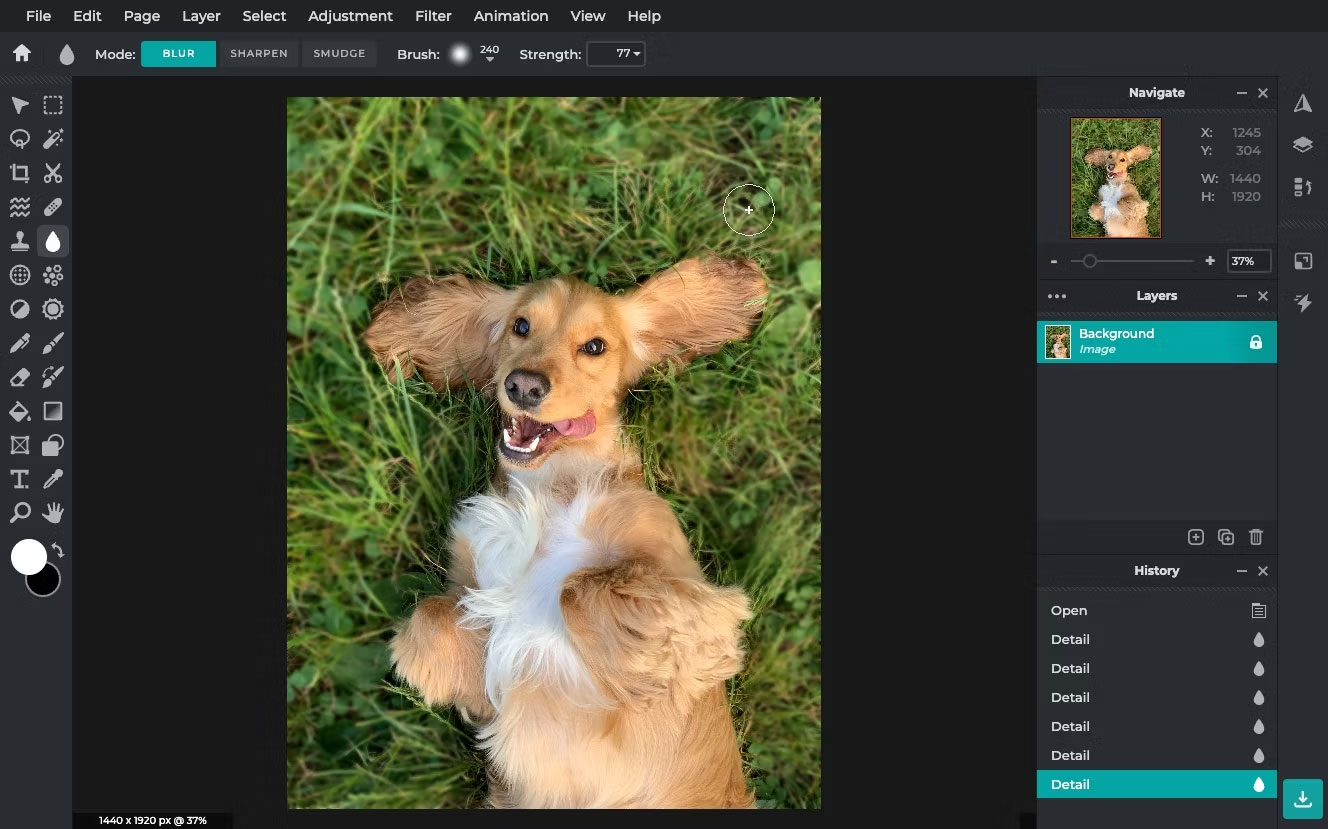
Finally, we have Pixlr. While the blur feature in Pixlr may not be strong enough to hide confidential information, it is ideal for adding a blurred background to portraits or other images. But like most of the products on this list, Pixlr has many tools. To blur an image or parts of an image, you must use Pixlr's photo editing tool, Pixlr E (the link above will take you directly to the editor).
Select Open Image and upload your image. Next, select the Blur icon in the left sidebar of the editor; this can be found under the water drop icon on the left side of the screen. Then select Blur at the top and configure the blur tool to your liking using the sliders.
Start with a large brush size to fill most of your background, then switch to a smaller brush to get as close to your subject as possible. When you're done, tap File in the top left, select your preferred download format from the pop-up window, and select Save As to download the image in your chosen format.
The free version of Pixlr offers a limited number of daily saves, so you may want to explore the other tools on this list if you plan to blur parts of multiple images.
 Using the world's blackest material as a photography background, what will happen?
 5 reasons to skip Surface Laptop and wait for Intel Lunar Lake
 3 ways to change IP address in Windows 10
 5 disadvantages of Xbox Game Pass to keep in mind
 Why does TV sound so bad? How to prepare?
 Reasons not to use password manager browser extensions, even though they are very convenient