Table of Contents
Most people should use a normal administrator account and approve individual elevation prompts through User Account Control (UAC). Windows also includes a separate, disabled built-in Administrator account for recovery and advanced administration. Enable it only when a specific troubleshooting task requires it, then disable it again.
Signing in to this account is not a safe way to eliminate prompts during everyday use. It has unusually broad privileges, and software launched from it can make system-wide changes more easily.
Before you enable the built-in Administrator
- You must already be signed in to an account that can approve administrator actions.
- On a work or school PC, use the organization's support process instead of changing local accounts.
- Set a strong password before signing in to the account.
- Do not leave the account enabled after the recovery task is complete.
Enable the account with Command Prompt
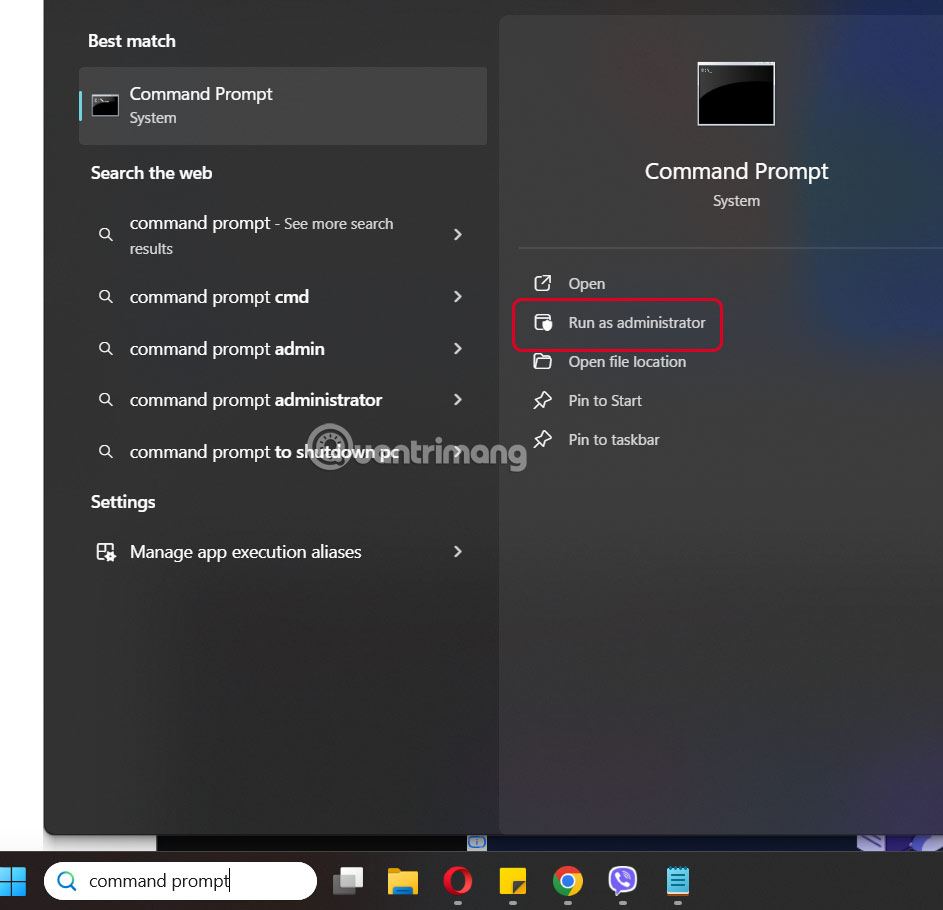
Step 1: Open Start, type Command Prompt, and select Run as administrator. Approve the UAC prompt.
Step 2: Enter the following command:
net user Administrator /active:yesWindows should respond that the command completed successfully.
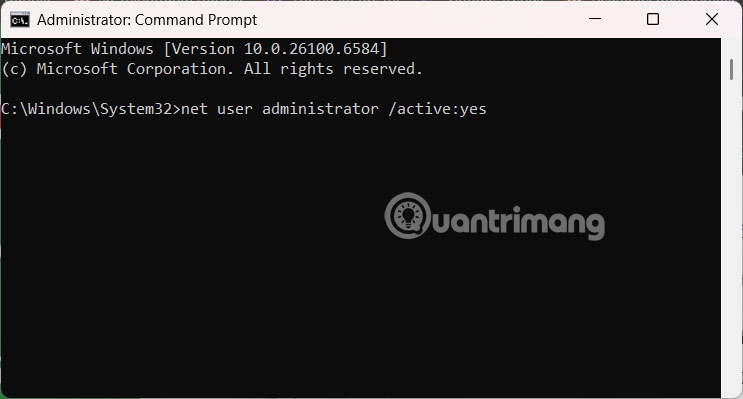
If Windows uses a localized name for the built-in account, the English name may not work. An administrator can identify the local account with the well-known SID ending in -500 rather than guessing its name.
Enable the account with PowerShell or Windows Terminal
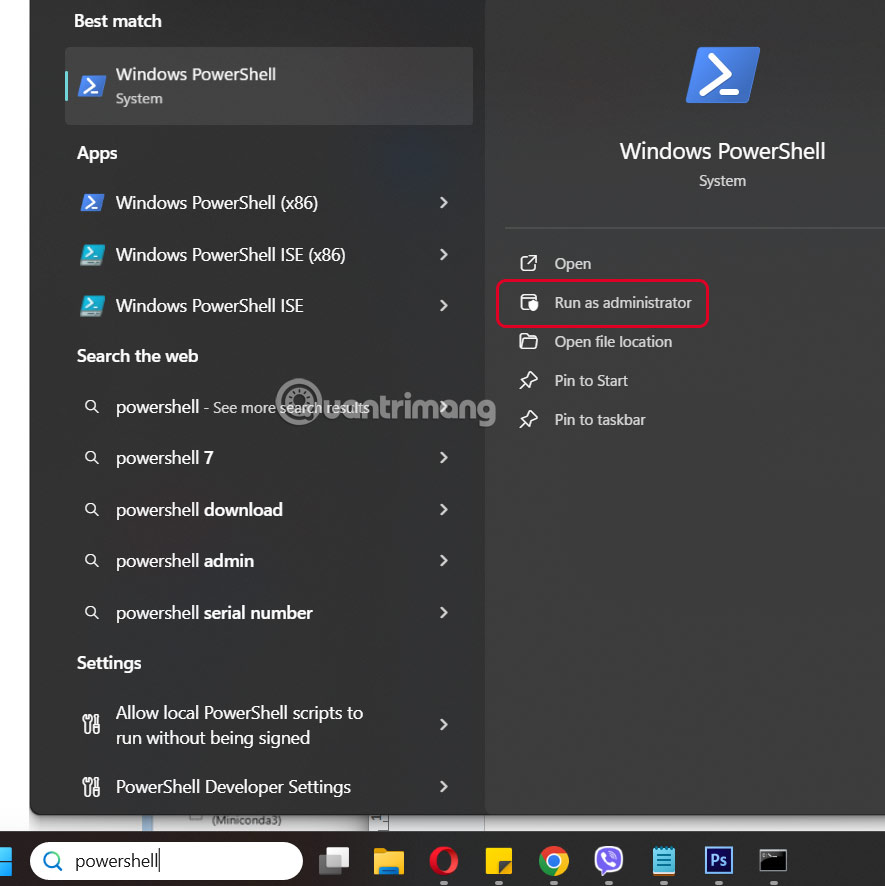
Step 1: Search for PowerShell or Terminal, then choose Run as administrator.
Step 2: You can run the same command:
net user Administrator /active:yes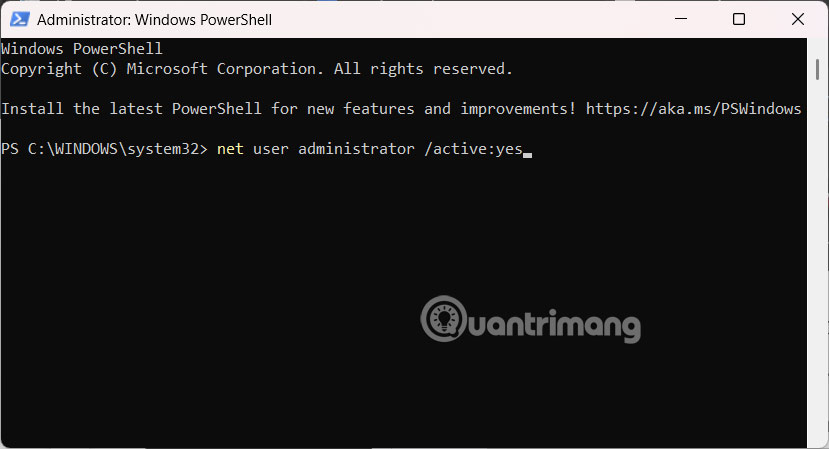
On systems with the LocalAccounts PowerShell module, this command is another option:
Enable-LocalUser -Name "Administrator"It can still require the localized account name.
Set a password without exposing it in the command
Do not place the password directly after the account name, because it can remain visible on screen or in command history. From an elevated Command Prompt or Terminal window, enter:
net user Administrator *Windows asks for the new password twice and does not display the characters while you type.
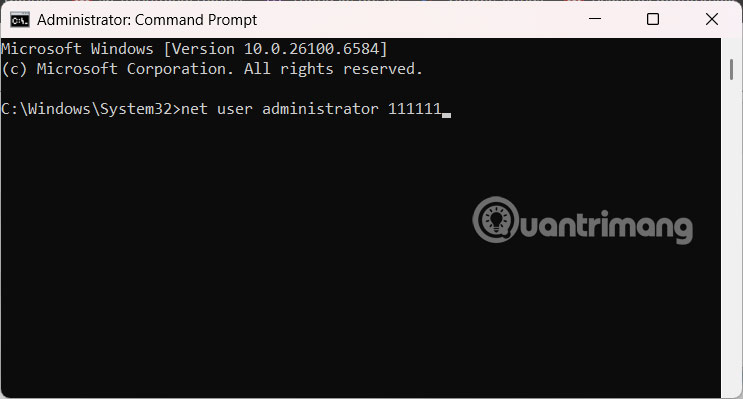
Use a unique password and store it securely. An enabled built-in Administrator account without a password creates unnecessary risk.
Sign in to the built-in Administrator account
- Save your work in the current account.
- Open Start, select your account picture, and choose Sign out or Switch user.
- Select Administrator on the sign-in screen.
- Enter the password you just set.
If the account does not appear, restart once and verify that the activation command succeeded. Do not use the account as your regular profile; settings, files, and browser data are separate from your normal user account.
Disable the account when finished
Return to your normal administrator account, open Command Prompt, PowerShell, or Terminal as an administrator, and run:
net user Administrator /active:noA successful message confirms that the built-in account can no longer be used to sign in. Disabling it does not delete your ordinary administrator account.
Built-in Administrator vs. a normal administrator account
| Account type | Recommended use | UAC behavior |
|---|---|---|
| Standard account | Everyday work with limited rights | Requires administrator credentials for elevated actions |
| Normal administrator | Everyday administration | Usually prompts before elevation |
| Built-in Administrator | Short-term recovery or advanced maintenance | Has different elevation behavior and broader default privileges |
Keep UAC enabled on normal accounts; the endpoint security overview explains why account controls remain an important protection layer. When stepping away from an elevated session, lock the computer rather than leaving it accessible.
Related Articles
 5 Ways to Run File Explorer with Administrator Privileges on Windows 114 minutes read
 Run CMD with Administrator Privileges on Windows 7, 8, 8.1, And 104 minutes read
 How to Open the Application with Administrator Privileges on Windows 102 minutes read
 Losing Admin Permissions on Windows 10 // 8.1, This Is a Fix6 minutes read
 How to Check If a Process Is Running with Admin Privileges4 minutes read
 How to Make Yourself an Administrator on Any Windows System5 minutes read
Reader Comments 0
Sign in with email or Google to join the discussion.