How to install CorelDraw on a Macbook
In this article, TipsMake will guide you on how to install CorelDRAW on your Macbook. Additionally, you can refer to other articles on TipsMake to learn more about installing and using CorelDRAW, and creating professional images on your PC.
Table of Contents
This article from TipsMake will guide you on how to install CorelDraw on your Macbook by creating a Windows partition on your Mac and installing the program on that partition.

Installing CorelDraw on a Macbook is simple.
Download the latest version of CorelDraw here:
Follow the steps below to install CorelDraw, graphic design software, on your Macbook:
Step 1 : Make sure your MacBook is updated to the latest version of macOS. To do this, go to the Apple menu => find and click on Software Update.
Note: Before starting, you should back up your important files and data to avoid data loss.
Step 2: Log in to your Admin account, then find and click on the Applications folder => Utilities => find and click on Boot Camp Assistant .
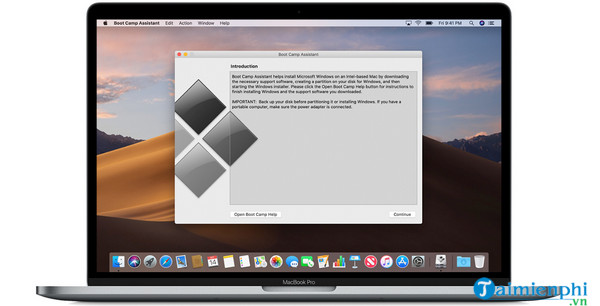
Step 3 : Create a partition for Windows using Boot Camp Assistant. Set the partition size to install the version of Windows you want to use.
Step 4 : Click on Partition and wait a few minutes for the partition creation process to complete.
Step 5 : In the Boot Camp window, find and click on Start Windows Installation. Insert the Windows installation drive into the CD drive, then click on the Start Installation option .
Step 6: Follow the on-screen instructions to install Windows. Follow the on-screen instructions to install your version of Windows until you reach the partition formatting menu.
Step 7: In the partition formatting window, select the partition you just created. On Windows Vista or Windows 7, this partition is labeled BOOT CAMP. On Windows XP, it's Partition C. Check the partition size to ensure you've selected the correct partition.
Step 8: Select Drive Options => Format => OK, then click Next. This will change the partition format to NTFS.
Step 9: Follow the on-screen instructions to complete the Windows installation process.
Step 10: Next, insert the macOS installation drive and follow the on-screen instructions to install the Boot Camp drivers.
Step 11: Restart your Macbook and proceed with the driver update.
Step 12: Finally, download and install CorelDraw on your new Windows operating system.
The article above from TipsMake has just guided you on how to install CorelDraw on a Macbook. This is the most effective way to install CorelDraw on a Macbook. Additionally, you should also learn the keyboard shortcuts in CorelDraw to use them more proficiently and save time.
Was this article helpful?
Your feedback helps us improve.
Related Articles
 Install and use Corel, design professional images with CorelDraw.5 minutes read
 CorelDRAW X6 interface overview, and CorelDRAW X6 KEYS to know9 minutes read
 Comparing Illustrator and CorelDraw4 minutes read
 Fixed an error when opening DWG files in CorelDRAW4 minutes read
 How to edit SVG files in CorelDRAW3 minutes read
Reader Comments 0
Sign in with email or Google to join the discussion.