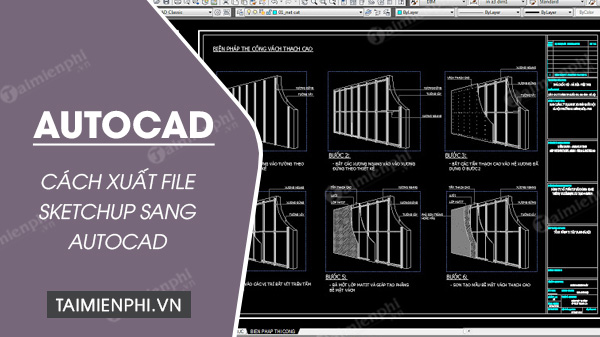
How to export SketchUp files to AutoCAD
If you don't know how to export SketchUp files to AutoCAD 2D or 3D, please continue reading this article by TipsMake to learn the steps involved.
Table of Contents
The steps to export a SketchUp file to AutoCAD are quite simple. Refer to the article below from TipsMake for detailed instructions.
Exporting SketchUp files to AutoCAD 2D and 3D files is simple and efficient.
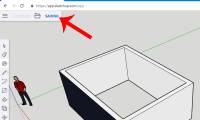
Download link for the latest AutoCAD version:
=> See also How to download and install the latest AutoCAD 2020
To export a SketchUp file to an AutoCAD 2D file, follow these steps:
Step 1 : To maintain the model's scale in the exported file, in SketchUp, select Camera => Parallel Projection. Next, set the view mode to one of the standard modes in SketchUp by selecting Camera => Standard Views and choosing any option from the menu.
Step 2: Select File => Export => 2D Graphic.
Step 3: Choose the location or folder where you want to save the exported file.
Step 4 : If desired, you can change the exported file name to avoid conflict with the current file name.
Step 5: Select the file format as .dwg or .dxf from the Save As Type menu (on Windows) or the Format menu (on Mac).
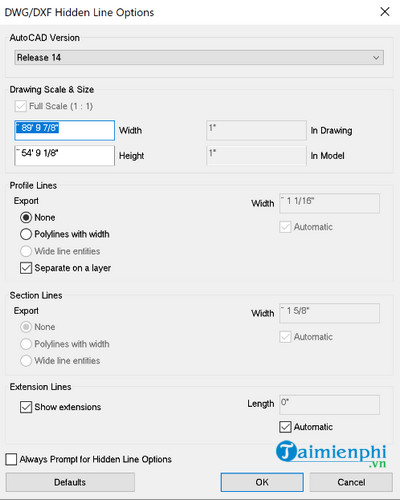
Step 6: Click the Options button and set the Scale and Line values. Once complete, click OK on the DWG/DXF Hidden Line Options dialog box (on Windows) or the Export Options dialog box (on Mac).
Step 7: Click Export to export the Sketch file to AutoCAD. This file will be saved in the folder you selected.
Below, TipsMake will explain some additional options and parameters when exporting files:
- AutoCAD Version: Select the AutoCAD version you want to use to open the exported file.
- Drawing Scale & Size : By default, the box next to the Full Scale option is checked. If desired, you can uncheck this option and set a custom scale. Enter the actual value you want to use to set the file scale in the Drawing box . In the Model box, enter the value to set the scale of the exported file.
- Profile Lines: Here you can customize the aspect ratio of the lines displayed in the exported file, including:
Option None: Export the file in standard width.
Polylines with Width option : Exports lines as polylines in AutoCAD.
Wide Line Entities option : Exports lines as wide line entities in AutoCAD.
- The "Separate on a Layer" box is also checked by default, to create layers for the edges of the file.
- Section Lines: If exporting selected lines or a section, these export options will be available.
- Edge Extensions: Some CAD applications may malfunction in recognizing endpoints and intersections if you use the SketchUp Line extension in your model. Uncheck the Show Extensions option to disable the extension in the exported file.
Additionally, to restore the settings to their original default state, you can click the Defaults button.
To export a SketchUp file to AutoCAD 3D, follow these steps:
Step 1 : In SketchUp, select File => Export => 3D Model . The Export Model dialog box will then appear on the screen.
Step 3: Choose the location or folder where you want to save the exported file.
Step 4 : If desired, you can change the exported file name to avoid conflict with the current file name.
Step 5: Select the file format as .dwg or .dxf from the Save As Type menu (on Windows) or the Format menu (on Mac).
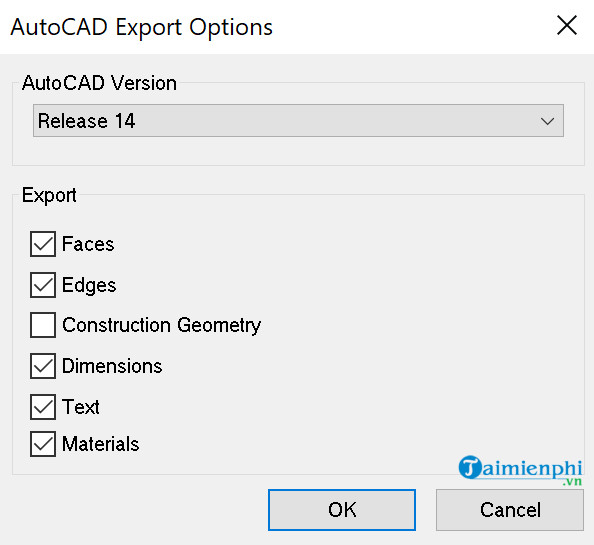
Step 6: Click the Options button to open the Export Options dialog box. Next, select the AutoCAD version you want to use to open the exported file from the AutoCAD Version menu. Then, in the Export section, check the boxes next to the entity types you want to include in the exported file, and then click OK.
Step 7: Return to the Export Model dialog box, click Export to export the Sketch file to AutoCAD 3D. The exported file will be saved in the folder you selected.
The article above guides you on how to export SketchUp files to AutoCAD. We wish you success.
However, if you are a professional AutoCAD user, you should also learn about some basic AutoCAD commands for drawing to be able to work faster and more easily.
Was this article helpful?
Your feedback helps us improve.
Related Articles
 How to save AutoCAD drawing files, export AutoCAD drawings to PDF, JPG, PNG files quickly and accurately2 minutes read
 How to use SketchUp to design 3D4 minutes read
 How to Use SketchUp9 minutes read
 How to Import KML Files into SketchUp3 minutes read
 5 best AutoCAD alternatives9 minutes read
 Steps to retrieve unsaved AutoCAD files3 minutes read
Reader Comments 0
Sign in with email or Google to join the discussion.